Bienvenido! - Willkommen! - Welcome!

Bitácora Técnica de Tux&Cía., Santa Cruz de la Sierra, BO
Bitácora Central: Tux&Cía.
Bitácora de Información Avanzada: Tux&Cía.-Información
May the source be with you!
Showing posts with label wireless. Show all posts

Thursday, September 27, 2012

Client Mode on Wireless routers

We have a small home network with the router listed above as our main wireless connection, attached to a Telephony modem from our ISP. We have 4 computers on the network. My brother has another Linksys WRT54G Wireless-G Broadband Router (LS-WRT54G) (same kind and type) that he would like to set up in his trailer as a "hub" or "switch"; using it to connect his computer, XBox and TV.
Is "Client" mode available on this router? and is this the way to go about making it a functional subnet? ---------------------
Often the nets and subnets are NOT the same.. ie The Fixed connection often uses 192.168.0.1, 192.168.1.1, however sometimes the wifi is setup 10.1.1.1, or 10.0.0.1 etc, have you checked this? Esentially tho ya router is an "Acess Point" and ya Lappy etc is ya "Client" the links below has a lot of tutorials to help have a look.
http://portforward.com/routers.htm http://portforward.com/guides.htm
------------------
The original firmware does not have this option, but you can get a custom firmware at http://www.dd-wrt.com/
DD-WRT is not supported by linksys, so a little caution there as this could ruin your router if it is not installed properly. Fortunately they have plenty of documentation on installation and troubleshooting if needed.
Also found this on how to setup Client Mode through DD-WRT -  
Introduction
This mode is NOT for WIRED connections between two routers! It is a wireless connection between two routers only.
A router in Client Mode connects to another wireless Access Point (the host router). It uses its wireless connection as the WAN interface, and shares the internet connection only to the LAN ports. It is not seen as an access point by laptops or other computers scanning for AP's and does not accept wireless connections from client devices. The AP is not required to be running DD-WRT firmware.
The main router and secondary router (DD-WRT client mode) are on separate subnets. NAT is used between the routers. Thus, when port forwarding is needed it must be configured at both routers — not just on the main (host) router.
The router in Client Mode must use its own DHCP server to give out IP numbers, Gateway and DNS server to the devices connected to its LAN ports.
To have computers connected to both routers (main and secondary) and co-exist in the same subnet, set up DD-WRT as a Client Bridge, Repeater Bridge or use WDS. Further explanation of bridging modes is in the Glossary.
Client Mode Setup
The Router/AP that you are trying to connect to is the primary router. The Router you are configuring is the client router. You don't need to worry about the primary router as long as you set your client LAN IP address to a different subnet. What this means is, if the primary router has an IP of 192.168.A.x, you need to set the client router to an IP of 192.168.B.x. Most primary routers will be at 192.168.1.1, or 192.168.0.1. So, when you are configuring your client router, set it to 192.168.2.x.
With that in mind, here is how to configure it:
  1. Download the current recommended build for your router. Check the forum for your chipset to find recommended builds and general information related to your hardware. If you are using a Broadcom based router, read the peacock thread prior to starting. DO NOT USE SP1!
  2. Do a HARD reset on your router.
  3. Connect a cable from your computer to the LAN port on your router.
  4. Set your computer to a static IP address (e.g. 192.168.1.7)
  5. Open a web browser and connect to 192.168.1.1 to view the DD-WRT GUI.
  6. You should be asked to change your password and username. Carefully type these in. If you aren't asked for a password and username, do a hard reset, this time doing it properly! Hit change password.
  7. FIRST go to Wireless -> Wireless Security and enter the Security Mode and other key information that matches your primary router that you will be connecting to over wireless.
  8. Hit SAVE (not apply)
  9. NEXT go to the Wireless -> Basic Settings and change the Wireless Mode to Client.
  10. On that same tab set the Wireless Network Name (SSID) to exactly the same SSID as your primary router you will be connecting to over wireless. Make sure spelling and capitalization match. Note: If there are multiple routers broadcasting the same SSID, and you would like to connect to a specific one (IE, the primary router, instead of the repeater), enable MAC Filtering on the Wireless Tab, and add the MAC Address of the correct Access Point. The MAC Address can be found on the "Site Survey" page, linked from the "Wireless" Sub-tab of the "Status" Tab. - Conjur
  11. (Optional) Set the correct ack timing in meters. (Where?)
  12. Hit SAVE (not apply)
  13. NEXT go to Setup -> Basic Setup and change Connection Type to Automatic Configuration - DHCP (most likely, but see NOTE below).
  14. On that same tab in the Network Setup section set the Local IP Address to 192.168.2.1 (Your Client subnet MUST differ from the Primary Router subnet!).
  15. (Optional) Set Static DNS servers in the Network Address Server Settings section if your WAN type does not provide them or you want to use different ones than the AP provides.
  16. (Recommended) Change your Time Zone and DST to match where you are.
  17. (Optional) Set a Server IP/Name for in Time Setting section for NTP (it will use a hidden default server if you leave it blank).
  18. Hit SAVE (not apply)
  19. (Optional) Go to Security -> Firewall and disable the SPI Firewall if you do not need to worry about security between the AP and Client router.
  20. Hit Apply.
  21. Set your computer back to auto IP and auto DNS if you like. You will get a DHCP address from the router.
You are done and the Client router should connect to the AP within a minute or so. You may need to unplug the router for 17 seconds if the router doesn't reset. After you ensure that it does connect and work properly then you may configure any other settings you wish to (Virtual Interface for wireless connection for example).
NOTE: If the client router is externally managed, such as in a college dorm etc., you should Go to Setup -> Basic Setup and set the WAN port protocol to what you need for the AP (mostly static, dhcp or pppoe). This is the setting that is bonded to the Wifi interface. Fill in the needed info provided by your ISP if this AP is externally managed. Note: This is what a computer (wired or wireless) connected to the ROUTER would use to gain access to the network, not to be confused with the settings required to gain access to the WAN by the ROUTER. Also note that the device should be in GATEWAY MODE instead of ROUTER mode, otherwise Masquerade/NAT does not happen.
External Links

Saturday, September 15, 2012

Convert a wireless router


http://i1123.photobucket.com/albums/l546/area51reopened/WAP.jpg
to a wireless AP (Access Point)
While connected to the main router go Start then Run in XP - (Windows key plus R in Vista and Windows 7), then type in the following, including all the spaces:- cmd /k ipconfig /all -- then press Enter and from the black form that shows up, take a note of the numeric code beside the word "gateway" -- usually something like 192.168.0.1. Type exit to close the black form.
Now connect the router to be converted only to a computer via network cable and log in
Setup the wireless security
Disable the DHCP and change the LAN IP to match the gateway IP but ending in something like .253
Finally connect one of the four LAN ports of the AP to the main router, do NOT use the WAN port.

Connect Old Linksys Router as a wired (and maybe wireless) Access Point
1. Just got a new DLINK Xtreme N DIR-825 Router. Directly connected this to the internet.
2. Currently, the Linksys WRT54G (1st Generation) is connected to the DLINK by an Ethernet cable to one of the 4 ports on the back.
3. The Linksys further splits the signal to another 2 computers and a NAS by hardwire.
4. The internet is still getting through to all the computers, but the computers are not able to access the NAS or each other.
5. I can't seem to open the WRT54G's access (192.168.1.1) because (I thin) the new DLINK uses a local set of IPs that are 192.168.0.1xx.
Weirdly, I can login to the NAS using its IP, and I can see it on the 'Network Places' of the computers ,but when I try to connect, it says the drive is moved, etc. etc.
I use a variety of computers / O.S's on this system: XP (2) hardwired, Win 7 (2) hard wired, Win 7 (1) wireless, Mac OS X Snow Leopard (1) Wireless, plus various other wireless devices (phones,Wii, etc.).
NAS is a Synology DS411+
Hope someone can help me:
1) Get logged into my Linksys
2) Get the NAS accepted by other computers on the network.
Answer
go Start then Run in XP or
Windows key plus R in Vista and Windows 7
then type in the following, including all the spaces:
 cmd /k ipconfig /all
then press Enter and from the black form that shows up, take a note of the numeric code beside the word "gateway" -- usually something like 192.168.1.1.
Type exit to close the black command line interface.
Connect only a computer to the router you are trying to convert to a AP and log in
Set up the wireless security
Disable DHCP and change the LAN IP to match your Gateway's IP but ending in .253
Now connect one of the four LAN port to the main router via network cable.
I suspected i had to connect a computer directly to the Linksys I want to use as an AP.

To disable DHCP and change the LAN IP to match, it  means on the AP router!

Saturday, July 24, 2010

OpenWRT and Ubiquiti NanoStation 2

Source

NanoStation | Ubiquiti Networks, Inc.

I’m scheduled to give a summary talk on the state of cryptographic attacks on WiFi for the University of Utah GSAC colloquium. I wanted to be able to demonstrate the practicality of these attacks, so I needed a platform to launch attacks from.
To this end, I picked up a Ubiquiti NanoStation 2 from Metrix. Today’s post is a bit of a how-to for getting the unit up and running with OpenWRT.
Background
OpenWRT is a framework for building a Linux distribution for use in routers and other embedded computers. Building a Linux distribution for an embedded computer is generally very difficult; OpenWRT’s main contribution is that it makes the process significantly easier. At the time of writing, the latest version of OpenWRT is Kamikaze.
Where’s a brief overview of the steps for getting OpenWRT onto the NanoStation 2, and how much work they are:
  1. Update the firmware on the NanoStation
  2. Download the OpenWRT trunk and packages (two commands)
  3. Setup the build environment (one command)
  4. Select which packages you want for your distribution (one command, a bit of menus)
  5. Compile (one command and some patience)
  6. Upload to device (one command)
Laying on my desk

So now a bit about the NanoStation 2. Seattle Wireless has a good summary of the hardware specifications. I’ll speak about the device qualitatively:
First, this is a device with excellent range with the built-in antenna. I don’t have an external antenna for the unit; in my experience, the unit performs great on its own. I’ve been using it to do analysis, and have found that it sees much more than my laptop (which is why I bought the unit, after all).
Second, the device is powered exclusively by its Ethernet connection. I don’t own any switches that can provide power over Ethernet; however, the unit comes with an adapter that puts power on the line. I’ve never used a PoE device before, but I can tell that I’ll want more. This is a very nice feature, especially for practical use outdoors.
Third, this device is hard to brick. I’m generally nervous about flashing devices with unofficial images. While I obviously can’t claim that this device is brick-proof, I can say that it seems resilient. On more than one occasion I’ve messed up my OpenWRT installation, and was able to recover by returning to the official firmware. I’ll describe this process in a bit.
Fourth, it’s a small machine that mounts with zip-ties. Zip ties! I love it.
Mounts with zip ties.  Shown here on my camera tripod as a temporary measure during testing.
Mounts with zip ties. Shown here on my camera tripod as a temporary measure during testing.
[Read more at source]

The Ultimate CPE for the Global WISP Community

NanoStation packs some phenomenal performance with a revolutionary design combining a hi-gain 4 antenna system, advanced radio architecture, and highly researched and developed firmware technology allowing throughput, stability, and capacity performance rivaling even the highest-end WiMax networks. All at a MSRP of $79.
Reliable System Performance

NanoStation has been proven in extreme temperature and weather conditions. Additionally, it has advanced ESD/EMP immunity design to protect against common outdoor radio and ethernet failures and eliminate truck-rolls for carriers.

Processor Specs
Atheros AR2315 SOC, MIPS 4KC, 180MHz
Memory Information
16MB SDRAM, 4MB Flash
Networking Interface
1 X 10/100 BASE-TX (Cat. 5, RJ-45) Ethernet Interface
Approvals
FCC Part 15.247, IC RS210
RoHS Compliance
Antenna
Integrated antenna array + External RP-SMA
Power Supply
12V, 1A (12 Watts). Supply and injector included
Power Method
Passive Power over Ethernet (pairs 4,5+; 7,8 return)
Operating Temperature
-20C to +70C (System PCB optimized for hi-temp)
Weight
0.4 kg


AP/Cliente que permite ser Access Point o Cliente Bridge y que tiene como microprocesador un Atheros AR2316 SOC, MIPS 4KC, 180MHz con 16MB SDRam y 4Mb de Flash. Tiene como potencia 26dBm (400 mW) y una sensibilidad de -97dBm. Trae alimentación via Passive Power over Ethernet (pairs 4,5+; 7,8 return). Tiene una antena integrada de 10dBi con dual polarización, se han realizados pruebas que dan hasta 25mbps. Es un equipo revolucionario que marcará la tendencia sin duda. Muy facil de instalar y programar, funcionamiento estable, inmunidad a ruidos e interferencias superio a otros equipos que he probado. Muy recomendable y el precio razonable teniendo en cuenta que esta preparado para exteriores y trae antena integrada.

Pyramid Linux

Pyramid is binary linux distro for use on x86 embedded platforms. It is primarily focused on wireless applications however people have found many great uses for it. We primarily develop and test Pyramid for Metrix Kits, but it works well on other x86 based hardware as well. Check the WorkingHardware page for more info or add to it if you find hardware not listed that works with Pyramid.
Who maintains pyramid?
Pyramid was created at Metrix Communication LLC, and is still maintained there, but bringing more people on board the Pyramid team to move the OS further has always been the plan. The goal has always been to make Pyramid as flexible as possible, while still operating within the restraints of it's target hardware. Our hope is that by moving the code and wiki to Google Code, we will be able to speed some things up as well as avoid the hassle of hosting it ourselves.
http://dl.metrix.net/support/dist/
http://metrix.net/blog/

Sunday, July 12, 2009

Aircrack-ng & the best wireles card

Source
Introduction
Aircrack-ng is an 802.11 WEP and WPA-PSK keys cracking program that can recover keys once enough data packets have been captured. It implements the standard FMS attack along with some optimizations like KoreK attacks, as well as the all-new PTW attack, thus making the attack much faster compared to other WEP cracking tools. In fact, Aircrack-ng is a set of tools for auditing wireless networks.

Determine the chipset

There are two manufacturers involved with wireless cards. The first is the brand of the card itself. Examples of card manufacturers are Netgear, Ubiquiti , Linksys and D-Link. There are many, many manufacturers beyond the examples give here.
The second manufacturer is who makes the wireless chipset within the card. This is the most important company to know. Unfortunately, it is sometimes the hardest to determine. This is because card manufacturers generally don't want to reveal what they use inside their card. However, for our purposes, it is critical to know the wireless chipset manufacturer. Knowing the wireless chipset manufacturer allows you to determine which operating systems are supported, software drivers you need and what limitations are associated with them. The compability
section describes the operating systems supported and limitations by chipset.
You first need to determine what wireless chipset your card uses. This can be done by one or more of these techniques:
  • Search the internet for ” chipset” or ” linux”. Quite often you can find references to what chipset your card uses and/or other people's experiences.
  • Search the Forum
  • You may also have a look at windows driver file names, it's often the name of the chipset or the driver to use.
  • Check later in this page for cards known to work with aircrack-ng
  • Check the card manufacturers page. Sometimes they say what chipset they use.
  • Have a look at lspci -vv output for descriptions, PCI id and kernel modules used.

Here are some other resources to assist you in determine what chipset you have:

Read more at source...

Monday, May 18, 2009

Wireless Lags in Vista and XP

Source
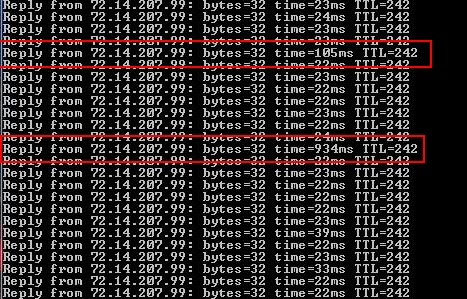
Wireless lags can be problematic in various situations. This includes during multimedia streams, live feeds but also gaming. This wireless problem can range from stutters to serious connection problems and even drops. This is causes by a service in Windows XP and Windows Vista that is regularly looking for new wireless networks. The service is called Wireless Zero Configuration in Windows XP and WLAN Auto Config in Windows Vista. The easiest way to check if the problem exists on a computer system is to ping a service for some time to see if there are any wireless lags.
To do that open a Windows command prompt with the shortcut [Windows R] [cmd] [enter] and type in the command ping -t www.google.com. This will ping Google and display the time it takes. If you see spikes like in the screenshot below you are experiencing wireless lags.

wireless lags

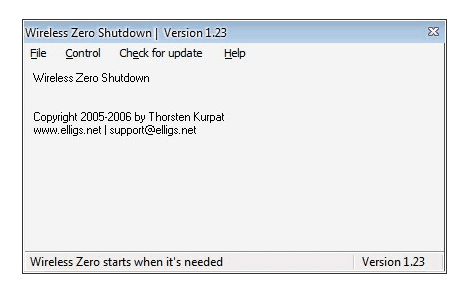
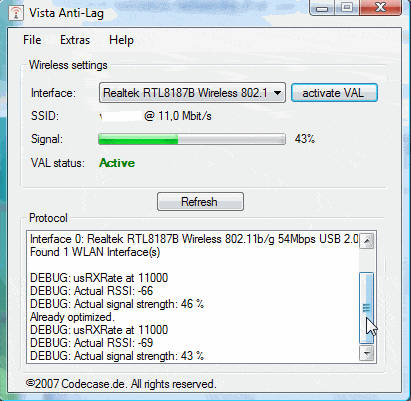
The easiest way to fix wireless lags is by downloading and running Wireless Zero Shutdown when running Windows XP or Vista Anti Lag when running Windows Vista.

wireless zero shutdown

vista anti lag

Running either of the software programs will stop the Windows service from scanning for new wireless networks regularly as soon as a wireless connection has been established.

Thursday, May 1, 2008

WiTricity

La solución para suministraro energía (<60 W) y por lo tanto prescindir por lo menos de las baterías pequeñas en componentes de uso cercano al equipo emisor de energía:
Wireles elecTricity