Source
[graphics at source]
We've shown you how to
install Snow Leopard in VMWare, but if you haven't purchased VMWare, you can now do it using
previously mentioned, free program
VirtualBox. Apart from VirtualBox, you'll also need an OSX86 ISO. The group Hazard has put out a good patched Snow Leopard installer that should do fine (just
search for it on Google).
Of course, if you feel bad about downloading the ISO of Snow Leopard, you could always go buy a copy to feel a bit better, karmically.
After you have them both, install Virtualbox. Open up Virtualbox and click on New at the top left.
At the Create New Virtual Machine window, click Next.
At this window type OSX as the name and it will automatically change the system and version. The next window will let you choose your RAM amount:
If you can spare it, crank it up as far as you can go, but 1024MB should be sufficient.
This is where you'll make your hard disk. 20GB should be enough so what it comes down to is dynamic or static. Dynamic will expand on use and Static will be a fixed 20GB no matter how much data is actually in it. Dynamic is better for not taking up your hard drive but static should give you better performance. I normally use dynamic. Click next unless you want to change it from dynamic or if you want to increase the disk size or file location.
It will show a summary of your settings. Click Finish, then click Settings at the top. At this window click on System in the left pane and uncheck Enable EFI.
Now click on the Storage button on the left. From there click on Empty under the OSX.vdi, then click the folder with the green arrow on the right (next to "CD/DVD Device").
At this window click the Add button at the top. Then find and add the OSX86 ISO you downloaded earlier. Then highlight it and click Select at the bottom. Then click OK, and hit the Start button on the left side of the main VirtualBox window.
As it starts up, click inside the window and hit F8. Then at the boot: prompt type –v so you can see what exactly went wrong if something does go wrong. All the services will run and eventually you should come to the language screen. Choose your language then click next. If you are unable to move your mouse around then hit Right-Ctrl + I. Click Continue and Agree. Next, start up Disk Utility by going to Utilities in the menu bar.
At this screen highlight 20GB VBOX HARDDISK. Then click the Erase tab, name it what you want in the name box and click the Erase button on the bottom right of the window. It shouldn't take long. Then click Disk Utility in your menu bar and quit it. Now you're back at the installer. Highlight the drive that is now showing up and click Continue.
The next window is important. Click the Customize button on the bottom left.
AMD Users check:
Any Updates included at the top.
Drop down Kernels and choose Legacy kernel.
AMD option below System support.
Intel Users check:
Any Updates included at the top.
Drop down bootloaders and check the newest Chameleon.
Drop down Kernels and choose Legacy kernel.
Then click Done and hit the Install button. To speed up the process you can click Skip when the disc check pops up.
As soon as it says "installation finished" and starts counting down to restart, press the right Ctrl key. Click on Devices at the top of the VirtualBox window, hit CD/DVD Devices and click Unmount CD/DVD Device. Then go to Machine > Reset and click Reset at the prompt. Next you'll see the Chameleon loader and then OS X will begin to boot.
After it boots you will see the setup screens for OS X! You're good to go. The only hiccup I've found is that it can only be virtualized with one core. It could be the OSX disc I was using or it might not be. And I have yet to find the right kext that will allow audio to work and the resolution is limited also. But other than that you'll have a fully functioning OSX virtualized!
Update: I'd like to post some answers to the resolution and audio. I should have looked around before posting this but I just didn't have the time. So anyways heres what you can do:
To fix the resolution issue, open Finder and go to the OS X drive on the left. Open the folder called Extras. Right Click on the file com.Apple.Boot.plist and open it with TextEdit. Under the first insert this:
Graphics Mode

1280x1024x32
or another compatible resolution. Select "Save As" at the top and save it to the desktop, unchecking the check under Unicode and then save it as com.apple.boot.plist. After that drag and drop it into the extras folder and overwrite the original file, entering your password when prompted.
Instructions for the sound issue can be found
here.
Don't install system updates. If you want updates you'll have to install another iso distribution with the updates on it. If you install the updates directly from apple it messes with the custom kexts and chameleon. Just a forewarning.
And for those of you getting boot issues try choosing a different version of Chameleon or a different kernel. Sometimes that seems to help. And If your getting one of the USB errors then try disabling USB in the VirtualBox settings and see if that helps.
 Volver al principio
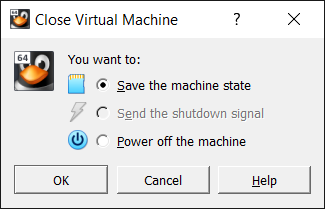


 Firefox