Bienvenido! - Willkommen! - Welcome!

Bitácora Técnica de Tux&Cía., Santa Cruz de la Sierra, BO
Bitácora Central: Tux&Cía.
Bitácora de Información Avanzada: Tux&Cía.-Información
May the source be with you!

Friday, September 14, 2012

VPN related


Source
Introduction
Virtual Private Network (VPN) is the technology that you can use to access the office or home network remotely and securely over the Internet, so that the communication data is protected from sniffing or hijacking by hackers.
When the VPN connection is established between 2 parties (between a VPN client and VPN gateway or between 2 VPN gateways), a secured virtual tunnel will be created with capability to encrypt the data (so no hacker can see the data content), preserve data integrity (no data change during transmission) and ensure the communication only happen between that 2 authenticated parties.
There are 2 common types of virtual private network, which are remote access VPN and site-to-site VPN.
Remote Access VPN
Remote access VPN is very common VPN service that you can set up in your office or home network. It can be implemented by setting up a VPN gateway or server and you can connect to it by using VPN client from other locations. If not, you can also subscribe to VPN service provided bya VPN provider for similar secure access too.
As you can see from the diagram below, whether at airport, library, restaurant or other public hotspots, the user can launch VPN connection by using VPN client on the computer and connect to VPN gateway. Whenever the user computer sends the data, the VPN client software encrypts that data before sending it over the Internet to the VPN gateway at the edge of the destination network. Once the VPN gateway receives the data, it decrypts the data and sends the packet to the destination computer in its private network (office or home network), after that the destination computer will encrypt the returning data as well.
The remote access VPN is supported by L2F, PPTP, L2TP and IPsec tunneling protocols.
Sometimes if the user uses the web browser instead of VPN client to connect to VPN gateway, we call this type of VPN as SSL VPN.
Remote Access VPN Network Diagram
Site-to-Site VPN
Site-to-site VPN is the VPN connection established between 2 VPN gateways that reside in 2 different networks over the Internet, so that both networks’ computers can exchange data securely. There is no VPN client needed on user computers. The VPN connection will be established between both VPN gateways. Both VPN gateways will encrypt and decrypt the communication data to ensure the security and integrity of data.
The site-to-site VPN can be supported by IPsec tunnel mode, PPTP, L2TP over IPSec tunneling protocols. Interesting? You can also take a look on these VPN products to get more info!
Site-to-Site VPN Network Diagram
Related Articles:
www.34t.com/DNS
lifehacker.com/5487500/five-best-vpn-tools
teamviewer.com/en/res/pdf/TeamViewer7_Manual_RemoteControl_EN.pdf
cnet.com/ TeamViewer review
TeamViewer is a free tool that makes it incredibly easy to set and use a VPN connection; a Virtual Private Network that lets you take complete control of another PC from your own computer, whether they're separated by a soda can or a continent (and as long as both machines are running TeamViewer). It enables two-way connections in which users can flip control back and forth. TeamViewer also lets you hold virtual meetings with multiple participants (again, they all must have TeamViewer installed). With a name like TeamViewer, you'd expect it to be an enterprise-ready tool, and you'd be right: TeamViewer's robust simplicity is what happens when multiple users of vastly different skills need to use software. After a while, the bugs get squashed pretty firmly. But TeamViewer is free to non-commercial users. That means you can use it to access your work and home PCs remotely, of course. But you can also install it on your mom's PC (for example) and provide tech support from home.
We installed and opened TeamViewer on two Windows 7 PCs; one a 64-bit desktop, the other a 32-bit netbook. TeamViewer provides a user name and password for each machine. You simply need to enter each machine's numbers in the other to create a connection. The host PC's screen displays the remote PC's desktop in a window, and the host machine's mouse and keyboard control the remote PC's counterparts. We could open folders, files, and programs; run processes; and change settings: anything we could do with the remote machine's own controls, we could do from our main PC's controls, too, with TeamViewer. We tried the Meeting tool, too, but since we had TeamViewer installed on just two PCs, our pool of invitees was a bit small. TeamViewer offers some useful options; for instance, you can limit it to file transfers if you don't need total control.
TeamViewer is simply the easiest tool of its type we've used, and a far cry from the VPN apps of not so long ago. And it can cut down on the phone tag when friends and family need tech support!

Publisher's Description

From TeamViewer:

Would you like to help friends or acquaintances with their computer problems from a remote location or have them help you? Do you want to make large files available to others - quickly and easily? Or would you like to show your desktop to someone at a remote location? In these and many other cases, TeamViewer is the perfect freeware for you. Use TeamViewer free of charge as a personal user and benefit from its extensive capabilities: remote control of computers, transfer of files, working online with others in a team, starting instant online meetings or scheduling your meetings in advance, communicating via VoIP or video, chatting or presenting online. TeamViewer is easy to use and secure (and trouble-free behind firewalls, proxy servers and NAT routers). Test it yourself: Download TeamViewer (without registration). Your first connection will be up and running in two minutes.

Logmein or Teamviewer? (2009)
Source
The computer that is acting as the server, does it have Windows Firewall (or equivalent) turned on, and is that also got the VPN port open?
For IP address, I'd suggest you get a static IP at home, then setup a domain name to point to it, such as home.mycompany.co.nz, and enter this as your server address.
-----------
With a VPN, you need to pull the large file across the connection before any processing can be done to it. I know most myob biz basics files are about 20-50mb.
Anyhow with a remote desktop, the processing is done on the remote computer, and a picture of the result is sent across the link. For older programs that dont use any modern database system like sql and they talk to the file directly, it can be a time consuming process working over a vpn. Remote desktop is much better suited for this.


Basically the VPN transfers your whole company file across the -slow- and -expensive- link to your client computer, just to process a quick and simple query. 
The remote desktop (RDP) or teamviewer / logmein will run the program on the remote computer, and allow you to control it. It only sends keystrokes and mouse movements back to your office computer, and that inturn just sends back small images. It also can cache commonly used images such as a picture of your start menu or desktop to save on bandwidth. A more common system of this is called a Terminal Server - I administer about 200 workstations that log into servers (in a similar way to yours) to access a company database application. It uses very little bandwidth because of the screen image caching and database files themselves do not need to be sent to remote clients - Just pictures of the program. 
Teamviewer as you have found will work very well. I use it to administer remote workstations for some of my smaller business customers.
You are not doing anything wrong with a VPN, its just slow and expensive and the teamviewer gives you the same end result, with less bandwidth used and its faster. 
Your next issue that you may encounter will be printing. 
You can easily print with the program running locally on your laptop and accessing the file via the vpn. The local program will generate the print and send it to an attached printer just like any other program on your laptop. 
With teamviewer, the program is running on the remote computer / server and so it doesnt see your local printer as attached to the pc. To get around this, you will need to install a program called PDF Creator and email printouts to your local pc from the server computer, or investigate something called microsoft remote desktop which works similar to teamviewer but when you connect to a server computer, your local printers are added and print jobs are sent virtually through the remote desktop connection. Microsoft remote desktop is built into XP Pro and upper versions of vista and win7. The client program is built into xp home/pro/all vista and all 7.

-------------
You can use Remote Desktop as suggested - but you will need to configure a port forward on your router. I use Logmein in some of my PCs at home. It requires no port configuration. You can remote access/control your PC without having to configure shares, firewall, etc.
Hamachi is a VPN and you will have FILE access. I suggested Logmein, which is the remote access and you will have remote control of the PC - very different things.
-------------
I'd agree your VPN issue is most likely to be related to the IP address or perhaps a firewall issue,  VPN hosts really need a fixed IP address to simplify day to day usage / management.
For client support/access I use a mix of VPN,  Microsoft Remote Desktop and Teamviewer depending on the client.  
I've found I can achieve the most consistently reliable connections both within NZ and NZ/Australia using Teamviewer & Remote Desktop.  
While my VPN connection does work reasonable well most of the time,  I've often experienced brief dropouts which have caused corrupt files etc.
I often connect to a client in country Victoria and they use a Satellite/Dial-up hybrid connection which has good download but very poor upload and despite that it still is quite usable with Teamviewer (it will not work using a VPN).
-------------
Maybe a dumb response, but is the router suitable for VPN ? 
The other thing that springs to mind is that I make sure that ports TCP 1723, UDP 500, 10701 are open.
-------------
Rather than doing the port forwarding yourself by using port 1723 does the modem have a list of applications that you can just choose and it does all the port forwarding for you?
If it does look for VPN or PPTP and select that.
As pointed out in an earlier post PPTP VPN does require more than just port 1723 to be forwarded, the router also needs to support VPN passthrough.
===========
hideipvpn.com
How It Works
HideIPVPN provides an encrypted tunnel between your computer and our servers across the United States, Canada and Europe.
As you probably know by now, "Your IP is Your ID".
With our Premium VPN your IP address is hidden and your data is safe.
The only IP addresses seen by the outside world while browsing with HideIPVPN are those of our servers.
This also allows you to view websites you otherwise can't, such as Facebook, Youtube, Pandora, Skype, Hulu, and the BBC Player.
With HideIPVPN your ISP is not able to monitor and control your online communications and browsing activity.
All traffic is encrypted and no website URLs, videos, e-mails or downloads are seen by your ISP.
To sum up, a Premium VPN (HideIPVPN) is capable of protecting you while browsing the Internet and also allows you to unblock geo-restricted websites.
Why VPN? 
Provides a layer of security and anonymity
Protects you by hiding your real IP address
Secure connection between your PC and the Internet (128-2048bit)
Access sites restricted to US and UK residents
Anonymous Internet Surfing Security for Hotspot Wireless Access Users
Unblock all VOIP Applications include Skype
================

http://techpp.com/2009/07/09/top-10-free-vpn-clients/
http://lifehacker.com/5487500/five-best-vpn-tools
http://www.cisco.com/en/US/products/sw/secursw/ps5299/index.html
http://www.vpnforwindows.com
Hamachi (http://hamachi.cc/download) provides a very easy setup for a VPN, after setting up your server, you'll just need to configure your router to open up the applicable ports.
Check out http://www.itsatechworld.com/2006/01/17/hamachi-vpn-solution/

http://worldvpn.net/
http://websecuritas.de/
http://www.free2surfvpn.com/vpnrouters.html
http://www.free2surfvpn.com/index.php
http://www.goldenfrog.com/ES/vyprvpn/support/vpn-setup/windows-7-pptp

http://openvpn.net/index.php/open-source/documentation/howto.html#vpntype
http://openvpn.net/index.php/open-source/documentation/howto.html#policy

VPN -Server side


Sometimes, simplicity is the best choice for both a technology solution and the corresponding tutorial that explains how to use the new solution. In this document, I will provide a clear, concise, systematic procedure for getting a Windows Server 2003-based PPTP VPN up and running. I'm using Windows Server 2003 with Service Pack 1 for this guide.
Add the Remote Access/VPN Server role to your Windows Server 2003 system
To add the Remote Access/VPN Server role, go to Start | All Programs | Administrative Tools | Configure Your Server Wizard. The first screen of this wizard is for informational purposes only and, thus, is not shown here. Click Next. The same goes for the second screen, which just tells you some things you need to have completed before adding new roles to your server.
On the third screen of the wizard, entitled Server Role, you're presented with a list of available roles for your server along with column that indicates whether or not a particular role has been assigned to this machine. Figure A shows you a screen from a server on which just the IIS Web server role has been added.
Figure A

To add a new role, select the role and click Next
To add the Remote Access/VPN Server role to your server, select that role and click the Next button to move on to the next screen in the wizard, which provides you with a quick overview of the options you selected.
Figure B 

The summary screen is pretty basic for this role
Take note: This selection just starts another wizard called the Routing and Remote Access Wizard, described further below.
The Routing and Remote Access Wizard component
Like most wizards, the first screen of the Routing and Remote Access wizard is purely informational and you can just click Next.
The second screen in this wizard is a lot meatier and asks you to decide what kind of remote access connection you want to provide. Since the goal here is to set up a PPTP-based VPN, select the "Virtual Private Network VPN and NAT" selection and click Next.
Figure C

Select the VPN option and click Next
The next screen of the wizard, entitled VPN Connection, asks you to determine which network adapter is used to connect the system to the Internet. For VPN servers, you should install and use a separate network adapter for VPN applications. Network adapters are really cheap and separation makes the connections easier to secure. In this example, I've selected the second local area network connection (see Figure D), a separate NIC from the one that connects this server to the network. Notice the checkbox labeled "Enable security on the selected interface by setting up Basic Firewall" underneath the list of network interfaces. It's a good idea to enable since option it helps to protect your server from outside attack. A hardware firewall is still a good idea, too.
Figure D

Select the network adapter that connects your server to the Internet
With the selection of the Internet-connected NIC out of the way, you need to tell the RRAS wizard which network external clients should connect to in order to access resources. Notice that the adapter selected for Internet access is not an option here.
Figure E

Select the network containing resources needed by external clients
Just like every other client out there, your external VPN clients will need IP addresses that are local to the VPN server so that the clients can access the appropriate resources. You have two options (really three! I'll explain in a minute) for handling the doling out of IP addresses.
First, you can leave the work up to your DHCP server and make the right configuration changes on your network equipment for DHCP packets to get from your DHCP server to your clients. Second, you can have your VPN server handle the distribution of IP addresses for any clients that connect to the server. To make this option work, you give your VPN server a range of available IP addresses that it can use. This is the method I prefer since I can tell at a glance exactly from where a client is connecting. If they're in the VPN "pool" of addresses, I know they're remote, for example. So, for this setting, as shown in Figure F below, I prefer to use the "From a specified range of addresses" option. Make your selection and click Next.
Figure F

Your choice on this one! I prefer to provide a range of addresses
If you select the "From a specified range of addresses" option on the previous screen, you now have to tell the RRAS wizard exactly which addresses should be reserved for distribution to VPN clients. To do this, click the New button on the Address Range Assignment screen. Type in the starting and ending IP addresses for the new range and click OK. The "Number of addresses" field will be filled in automatically based on your entry. You can also just enter the starting IP address and the number if IP addresses you want in the pool. If you do so, the wizard automatically calculates the ending IP address. Click OK in the New Address Range window; your entry appears in the Address Range Assignment window. Click Next to continue.
Figure G 
You can have multiple address ranges, as long as they are all accessible
The next screen asks you to identify the network that has shared access to the Internet. This is generally the same network that your VPN users will use to access shared resources.
Figure H

Pick the network adapter that gives you access to the Internet
Authenticating users to your network is vital to the security of your VPN infrastructure. The Windows VPN service provides two means for handling this chore. First, you can use RADIUS, which is particularly useful if you have other services already using RADIUS. Or, you can just let the RRAS service handle the authentication duties itself. Give users access to the VPN services by enabling dial-in permissions in the user's profile (explained below). For this example, I will not be using RADIUS, but will allow RRAS to directly authenticate incoming connection requests.
Figure I 
Decide what means of authentication you want to provide
That's it for the RRAS wizard! You're provided with a summary screen that details the selections you made.
Figure J

The RRAS wizard summary window
This also completes the installation of the Remote Access/VPN Server role.

User configuration

By default, users are not granted access to the services offered by the VPN; you need to grant these rights to each user that you want to allow remote access to your network. To do this, openActive Directory Users and Computers (for domains) or Computer Management (for stand alone networks), and open the properties page for a user to whom you'd like to grant access to the VPN. Select that user's Dial-In properties page. On this page, under Remote Access Permissions, select "Allow access". Note that there are a lot of different ways to "dial in to" a Windows Server 2003 system; a VPN is but one method. Other methods include wireless networks, 802.1x, and dial-up. This article assumes that you're not using the Windows features for these other types of networks. If you are, and you specify "Allow access", a user will be able to use multiple methods to gain access to your system. I can't go over all of the various permutations in a single article, however.
Figure K

Allow the user access to the VPN
Up and running
These are the steps needed on the server to get a VPN up and running. Of course, if you have devices such as firewalls between your VPN server and the Internet, further steps may be required; these are beyond the scope of this article, however.

Wednesday, September 12, 2012

Managing networks in windows 7

change-unidentified-network-from-public-to-work-in-windows-7
There isn’t an easy way to set the category of an Unidentified network in Windows 7 RC+ builds. By default, an Unidentified network will be set to Public for security. Often, the Unidentified network is setup intentionally (e.g. two machines connected via a hub; a network TV tuner, etc.). In these cases, Home/Work is a better category to allow common network tasks to succeed.
Below is a Powershell script to change the category from Public to Work (identical to Home, except Homegroup won’t be started up). You need to be already connected to the ‘Unidentified network’ prior to running this script.


  1. Save the script locally as ChangeCategory.ps1 (say under c:\)
  2. Launch an elevated Powershell command window
  3. Change your execution policy to allow the script to run (if not already changed)
    PS{greatherthen} set-executionpolicy remotesigned
  4. Run the script
    PS{greatherthen} c:\ChangeCategory.ps1
At the end of this, the category for the Unidentified network will show as Work in Network and Sharing Center. This setting is not persisted across re-connects and you will require to run the script again to change the category. Be sure to run the script only for networks that you trust since this affects the firewall profile that will be used.
=======================================
Source
in the Network and Sharing Center and I cannot change it, it is read only there!

  1. What steps did you perform in Network and Sharing Center to change "Public Network" and to what did you want it to change?
  2. What happens when you click or dbl-click the Public Network icon in Network and Sharing Center.
Normally,with admin privileges,when you click or dbl-click(depending on Folder Options you have set in your system) the link associated with your network icon in Network and Sharing Center, you should be able to get the Network Location screen with the 3 choices as shown in the attached image.

You can then click on Home Network and then the name change occurs and you can click Close.

If this is not possible, the best thing is to Setup your Wireless Network all over again making sure to give your Wireless network a Unique SSID and A strong Encryption and Passphrase and connect.

Had you followed the Win 7 Beta setup carefully in a "Win7-hardware-qualified computer" that is already part of an existing Wireless or Wired [or mix of both] homenetwork the "Win 7 Computer" would boot to its Desktop with an already setup Internet connection. If all other Computers are already using the default Workgroup name = WORKGROUP , your Win 7 computer would automatically come as part of that Homenetwork.

If you had to do a lot of Driver troubleshoot especially with Ethernet and Wireless adapters you lose the opportunity to have the above smooth setup Windows 7 has been showing consistently in all the computers I have tried this Beta OS. Basically, if your computer has run VISTA without any hardware issues, you are more likely to have a very smooth sail.


If you need further help, please give us your hardware SPECS of the Computer and devices you have problems and the events leading up to the problem and the steps you have already taken to solve the issue.
=====================================
Source
OPTION ONE

For Unidentified Networks
1. See: How to Set Unidentified Networks to be a Private or Public Network Location
OPTION TWO

For Identified Networks
1. Open the Control Panel (all items view), and click on the Network and Sharing Center icon.

2. Under Network, click on either the Home network, Work network, or Public network link depending on what you currently have selected as your network location. (see screenshot below)
Network Location - Set as Home, Work, or Public Network-step1.jpgNetwork Location - Set as Home, Work, or Public Network-work_step2.jpg
Network Location - Set as Home, Work, or Public Network-public_step2.jpg
3. Select a location that fits your network location needs. (see screenshot below)
Network Location - Set as Home, Work, or Public Network-step2.jpg
4. If prompted by UAC, then click on Yes.

5. The network location has now been changed to what you selected in step 3. Click on Close. (see screenshots below)
Network Location - Set as Home, Work, or Public Network-step3_home.jpgNetwork Location - Set as Home, Work, or Public Network-step3_work.jpg
Network Location - Set as Home, Work, or Public Network-step3_public.jpg
6. When done, close the Network and Sharing Center.
Source 
Source
Instructions
Deleting the Network
    • 1
      Login to your computer as an administrator and click on the Start button.
    • 2
      Click "Control Panel." Click the category button under "viewby" in the upper right hand corner of your screen. Click "Classic View" in Windows Vista or "Large Icons" in Windows 7.
    • 3
      Click "Network and Sharing Center" from the icons that appear. Click "Customize" in Windows Vista or click "Manage Wireless Networks," located on the left, in Windows 7.
    • 4
      Click "Customize" in Windows Vista and then click "Merge or delete network location." Highlight the network you want to remove and click "Delete." In Windows 7, right click on the network you would like to remove and click "Remove network."
    Starting a New Network
    • 5
      Go to the "Network and Sharing center" by clicking Start, then control panel. Click "Viewby" and click "Classic Icons" in Windows Vista or "Large icons" in Windows 7. Click "Network and Sharing center."
    • 6
      Click "Set up a new connection or network" from the "Change your network settings" section. Click "Set up a new network" and make sure that all devices--printers, computers, etc.--that you want to be on the network are currently turned on. Click "Next."
    • 7
      Choose your router or other device you would like to network from the list, click "next" and follow the instructions.

Read more: How to Delete Windows Home Network & Start Over | eHow.com http://www.ehow.com/how_5923302_delete-home-network-start-over.html#ixzz26KWOoetO

Riesgos y amenazas que enfrenta la banca digital

Source
En el marco de la Cumbre Anual de Seguridad BancariaCELAES 2012 organizada por FIBA y FELABAN y que se llevará a cabo este 20 y 21 de septiembre en Miami. Estos fenómenos relacionados con el uso de los sistemas electrónicos y la nube, señala el directivo de CELAES, son crímenes que afectan de manera similar a todos los países de la región, particularmente a los que tienen sistemas de pago diversificados y de gran tamaño.Estos son los principales riesgos y amenazas que tiene la banca en Latinoamérica:1. Fraude con tarjetas bancarias 
2. Fraude en compras por internet 
3. Asalto bancario 
4. Pishing 
5. Troyanos 
6. Ataque a cajeros automáticos 
7. Robo de efectivo en cajeros automáticos8. Fraude con cheques 
9. Hackeo/crackeo de sistemas bancarios 
10. Robo a cliente Tecnología del chip y conducta del cliente son fundamentales 
La tecnología del chip se ha convertido en una de las más importantes para frenar el fraude, sin embargo, explica Carlos Jaime, para la utilización de este dispositivo “se deben de cuidar variables como la distribución y sustitución de las tarjetas, los mecanismos necesarios para evitar la clonación y los procesos de autorización de transacciones con los cambios en responsabilidades en función de la capacidad de lectura del chip”. 
Otro elemento también fundamental “es la responsabilidad que los clientes de la banca debemos asumir y eso es el revisar nuestras cuentas frecuentemente, no compartir información sensible, destruir totalmente la documentación que tiene información personal y por último, en caso de duda, comunicarnos con nuestra institución financiera”, destaca. Cada uno de estos puntos será debatido durante la XXVII Conferencia de Seguridad Bancaria, CELAES 2012, organizada por la Asociación Internacional de Banqueros en la Florida (FIBA) a celebrarse en Miami este 20 y 21 de septiembre

Acronis True Image Home in Hiren's BootCD

Cómo agregar Ubuntu al pendrive.
Nota: Ubuntu es una distribución de linux, una muy facil de utilizar.
Nota 2: Ubuntu es multilenguaje, viene en español, ingles, esperanto, chino y como 30 idiomas más...
1- Vamos a la página oficial de Ubuntu. Si no la conocemos, la buscamos
2- Omitimos las bonitas imágenes que google nos muestra para remitirnos a lo nuestro: Ubuntu homepage
3- Click en Download Ubuntu
4- En la página que se nos cargo seleccionamos la versión que deseamos, 32 o 64 bits, y luego Start Download.
5- Guardamos la iso en nuestro disco. Vamos a la raiz del pendrive y creamos una carpeta, p.e.: Ubuntu
6- Dentro de la carpeta copiamos la iso que nos descargamos.
7- Abrimos menu.lst con el wordpad u otro editor de texto (no usar ni Word ni Notepad) y agregamos las sig. lineas:

title Ubuntu 10.04 Desktop i386 (Live & Setup) \nInstalacion / Live de Ubuntu Lucid Lynx
find --set-root /Ubuntu/ubuntu-10.04-desktop-i386.iso
map /Ubuntu/ubuntu-10.04-desktop-i386.iso (0xff)
map --hook
root (0xff)
kernel /casper/vmlinuz file=/cdrom/preseed/ubuntu.seed boot=casper persistent iso-scan/filename=/Ubuntu/ubuntu-10.04-desktop-i386.iso splash
initrd /casper/initrd.lz
La línea de title indica el título que tendra la opción en el menú. Luego, el comando \n le indica que a continuación viene un comentario o descripción de esa línea, que se lee abajo de todo en la pantalla (vean las fotos).
Las líneas siguientes son parte de la sintaxis requerida para bootear el Ubuntu desde su iso. No lo escribí yo, esto ya está recontra sabido, busquen en google
Eso sería todo, con esto hemos cargado al Ubuntu en nuestro pendrive.

Para darles un ejemplo de cargar otro archivo de menú, fíjense cuando cargo la instalación de Windows XP:

title Windows XP Professional SP3 x86 (Setup) \nInstalacion / Reparacion de Windows XP Professional SP3 32 bits
rootnoverify (hd0,0)
configfile /winsetup.lst

Lo que hago es decirle al Grub que carge un archivo de menu, llamado winsetup.lst, y allí dentro cargo los comandos necesarios para iniciar la instalación de Windows.

Si se preguntan qué es el símbolo ³ que aparece en la línea de title, pues ese símbolo es el que le indica al grub dónde están dibujadas las lineas de los recuadros. Observen bien, y verán que están todos alineados.
title ÚÄÄÄÄÄÄÄÄÄÄÄÄÄÄÄÄÄÄÄÄÄÄÄÄÄÄÄÄÄÄÄÄÄÄÄÄÄÄÄÄÄÄÄÄÄÄÄÄÄÄ¿
Esa línea dibuja la primera línea de la caja. Luego, todos los símbolos ³ deben alinearse con el ¿. Si no es así, saldrá algo deforme la caja xD

Grub permite crear menues muy complejos, esto es de lo mas sencillo. Y la verdad es que no vi necesidad de ponerle imágenes o colores...

Otro detalle, color light-gray/black red/light-gray indica el color del texto/fondo no seleccionado, y luego texto/fondo seleccionado. Miren las fotos y fíjense que el texto no seleccionado es gris clarito en fondo negro, y el texto seleccionado es rojo en fondo gris clarito.

Hiren's bootCD 14.1 - 15.1

   
Die meisten Admins haben sich für widerspenstige Rechner und Systeme, die plötzlich nicht mehr hochfahren, ihre eigenen Tricks zurechtgelegt. Wer sich noch keinen persönlichen Notfallkoffer zusammengestellt hat, dem gehen vorgefertigte Boot-CDs zur Hand. Eine davon ist die kostenlose 'Hiren's BootCD', die ein umfassendes und artenreiches Werkzeugset zur Analyse, Wiederherstellung und Reparatur von PCs bereitstellt. Der Nutzer hat die Wahl, ob er das Erste Hilfe-Paket auf CD brennt oder einfach über den USB-Stick nutzt.
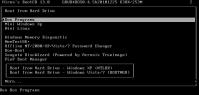
Über ein simples Startmenü erhält der Nutzer Zugriff auf zahlreiche Tools zur Systemanalyse und -wiederherstellung
Die einzelnen Programme auf "Hiren's BootCD" [1] – fast 400 Stück – sind in einer ISO-Datei verpackt und in der Regel Freeware oder Testversionen. Den Großteil nehmen DOS- und Windows-Programme ein, die in verschiedene Rubriken wie Antivirus, Browser, Dateisystem, Backup, Editoren oder HD-Partitionierung unterteilt sind. Die auf Windows XP Preinstalled Environment basierende Live-CD bietet eine hervorragende Hardware-Unterstützung und erkennt die meisten aktuellen Komponenten. Ebenso im Download enthalten – allerdings am Rande der Legalität – ist mit "MiniXP" ein Miniatur-XP mit bequemer grafischer Benutzeroberfläche.


http://youtu.be/lk4ndj-bdyE