There isn’t an easy way
to set the category of an Unidentified network in Windows 7 RC+ builds.
By default, an Unidentified network will be set to Public for security.
Often, the Unidentified network is setup intentionally (e.g. two
machines connected via a hub; a network TV tuner, etc.). In these cases,
Home/Work is a better category to allow common network tasks to
succeed.
Below is a Powershell script to change the category from Public to Work (identical to Home, except Homegroup won’t be started up). You need to be already connected to the ‘Unidentified network’ prior to running this script.
=======================================
Source
in the Network and Sharing Center and I cannot change it, it is read only there!
You can then click on Home Network and then the name change occurs and you can click Close.
If this is not possible, the best thing is to Setup your Wireless Network all over again making sure to give your Wireless network a Unique SSID and A strong Encryption and Passphrase and connect.
Had you followed the Win 7 Beta setup carefully in a "Win7-hardware-qualified computer" that is already part of an existing Wireless or Wired [or mix of both] homenetwork the "Win 7 Computer" would boot to its Desktop with an already setup Internet connection. If all other Computers are already using the default Workgroup name = WORKGROUP , your Win 7 computer would automatically come as part of that Homenetwork.
If you had to do a lot of Driver troubleshoot especially with Ethernet and Wireless adapters you lose the opportunity to have the above smooth setup Windows 7 has been showing consistently in all the computers I have tried this Beta OS. Basically, if your computer has run VISTA without any hardware issues, you are more likely to have a very smooth sail.
If you need further help, please give us your hardware SPECS of the Computer and devices you have problems and the events leading up to the problem and the steps you have already taken to solve the issue.
=====================================
Below is a Powershell script to change the category from Public to Work (identical to Home, except Homegroup won’t be started up). You need to be already connected to the ‘Unidentified network’ prior to running this script.
- Save the script locally as ChangeCategory.ps1 (say under c:\)
- Launch an elevated Powershell command window
- Change your execution policy to allow the script to run (if not already changed)
PS{greatherthen} set-executionpolicy remotesigned - Run the script
PS{greatherthen} c:\ChangeCategory.ps1
=======================================
Source
in the Network and Sharing Center and I cannot change it, it is read only there!
- What steps did you perform in Network and Sharing Center to change "Public Network" and to what did you want it to change?
- What happens when you click or dbl-click the Public Network icon in Network and Sharing Center.
You can then click on Home Network and then the name change occurs and you can click Close.
If this is not possible, the best thing is to Setup your Wireless Network all over again making sure to give your Wireless network a Unique SSID and A strong Encryption and Passphrase and connect.
Had you followed the Win 7 Beta setup carefully in a "Win7-hardware-qualified computer" that is already part of an existing Wireless or Wired [or mix of both] homenetwork the "Win 7 Computer" would boot to its Desktop with an already setup Internet connection. If all other Computers are already using the default Workgroup name = WORKGROUP , your Win 7 computer would automatically come as part of that Homenetwork.
If you had to do a lot of Driver troubleshoot especially with Ethernet and Wireless adapters you lose the opportunity to have the above smooth setup Windows 7 has been showing consistently in all the computers I have tried this Beta OS. Basically, if your computer has run VISTA without any hardware issues, you are more likely to have a very smooth sail.
If you need further help, please give us your hardware SPECS of the Computer and devices you have problems and the events leading up to the problem and the steps you have already taken to solve the issue.
=====================================
OPTION ONE
For Unidentified Networks
1. See: How to Set Unidentified Networks to be a Private or Public Network Location
OPTION TWO
For Identified Networks
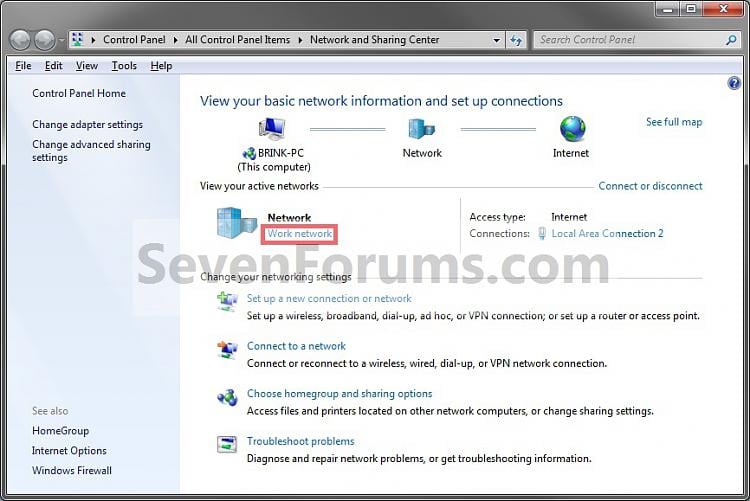
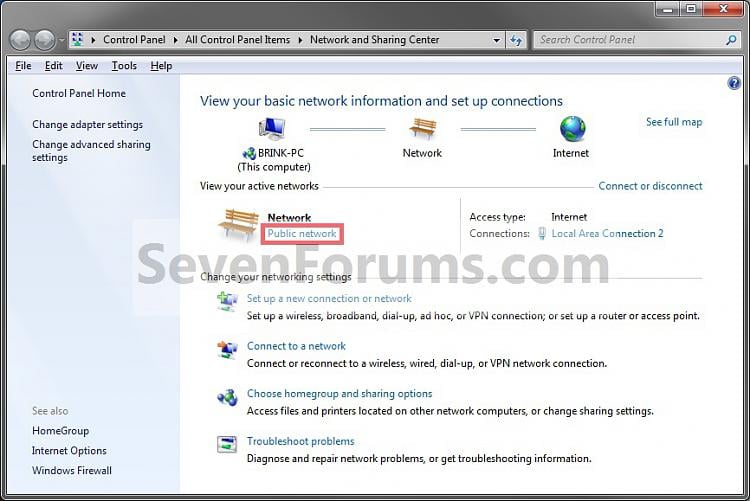
2. Under Network, click on either the Home network, Work network, or Public network link depending on what you currently have selected as your network location. (see screenshot below)
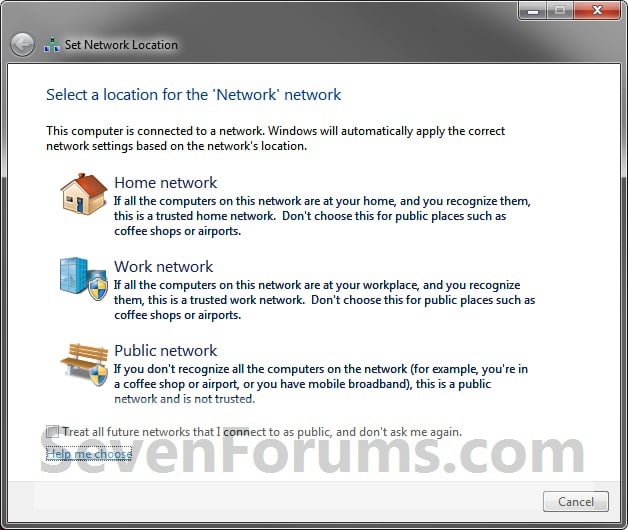
3. Select a location that fits your network location needs. (see screenshot below)
4. If prompted by UAC, then click on Yes.
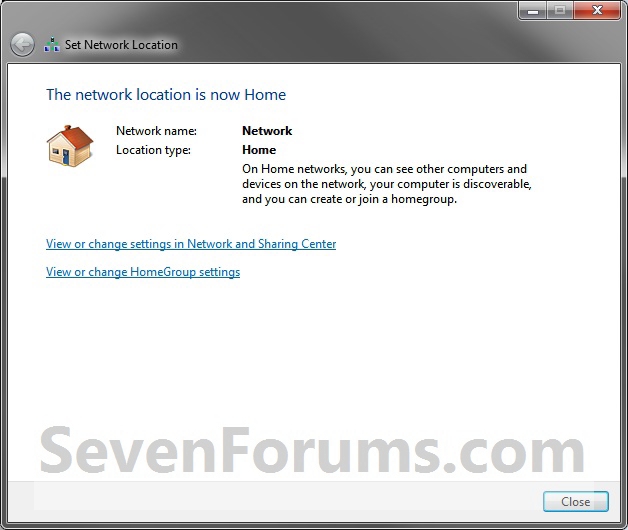
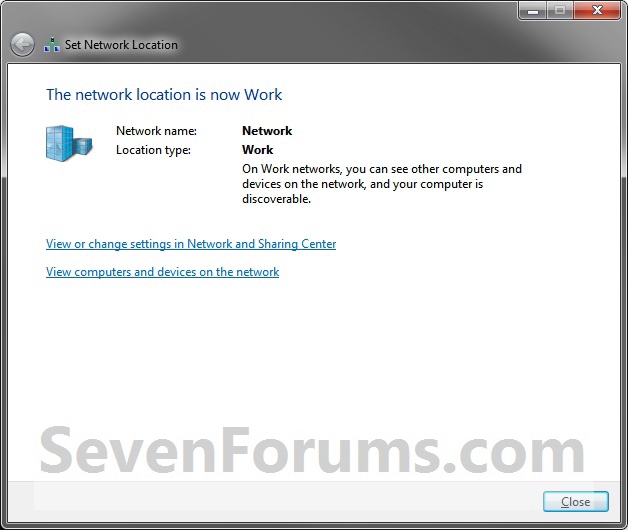
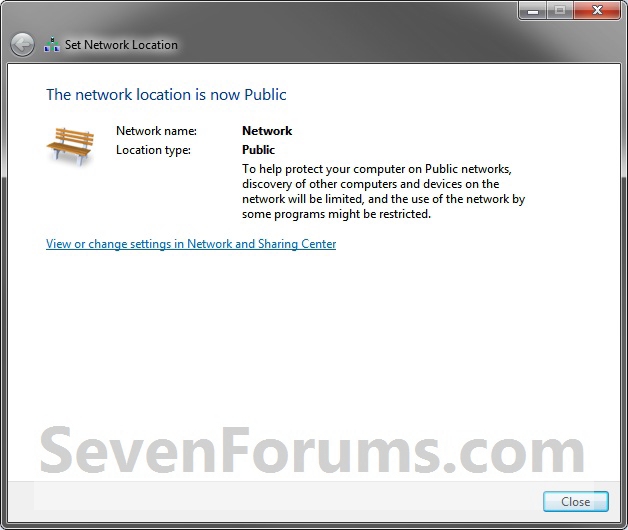
5. The network location has now been changed to what you selected in step 3. Click on Close. (see screenshots below)
6. When done, close the Network and Sharing Center.
Instructions
Deleting the Network
Deleting the Network
-
1
Login to your computer as an administrator and click on the Start button.
-
2
Click "Control Panel." Click the category button under "viewby" in the upper right hand corner of your screen. Click "Classic View" in Windows Vista or "Large Icons" in Windows 7.
-
3
Click "Network and Sharing Center" from the icons that appear. Click "Customize" in Windows Vista or click "Manage Wireless Networks," located on the left, in Windows 7.
-
4
Click "Customize" in Windows Vista and then click "Merge or delete network location." Highlight the network you want to remove and click "Delete." In Windows 7, right click on the network you would like to remove and click "Remove network."
Starting a New Network-
5
Go to the "Network and Sharing center" by clicking Start, then control panel. Click "Viewby" and click "Classic Icons" in Windows Vista or "Large icons" in Windows 7. Click "Network and Sharing center."
-
6
Click "Set up a new connection or network" from the "Change your network settings" section. Click "Set up a new network" and make sure that all devices--printers, computers, etc.--that you want to be on the network are currently turned on. Click "Next."
-
7
Choose your router or other device you would like to network from the list, click "next" and follow the instructions.
-
1
Read more: How to Delete Windows Home Network & Start Over | eHow.com http://www.ehow.com/how_5923302_delete-home-network-start-over.html#ixzz26KWOoetO



 LibreOffice
 Firefox
No comments:
Post a Comment