The 100mb of repair tools quite useful lately when the host drive's installation ran into a problem where Windows would stall at the logo screen. The automatic startup repair tool came to life on it's own plus the option to restore a system image created.
Note when originally partitioning the drive using GParted the separate 100mb section was never created. Instead the repair tools were somehow packed into the solid C primary. When partitioning the drive using the Windows drive tools during the installation however you see the 100mb section created.
Apparently using a 3rd party partitioning program is another option if you do not want the 100mb section created from the start. The image here shows hows the host drive looks in the DM without the 100mb being seen.
Having the repair tools already on the drive however can eliminate the need for the Seven dvd when a problem comes up. Just something to pass along here.
When you are first installing 7 on a new drive or one previously wiped no longer seeing a primary you would be using the MS drive tools options found on the dvd there. You will also note the 1-8mb of unallocated drive space for changing between the Basic type of volume used mainly on desktops or the Dynamic for server geared.
The MS drive tools also prepare the 100mb reserved as part of the installation for 7 to include the repair tools. When the drive is already seeing an active primary as you are pointing to the installer still places the repair tools tucked away at the beginning of the existing primary eliminating the need for the separate 100mb section.
I had initially been wondering if the repair tools wouldn't be available until seeing the startup repair come up while trying to debug a sudden hardware or lack of hardware detection problem. Suddenly no internet, no tuner card available, and the sound went out?
When interrupting a restore point the startup repair tool suddenly stepped in showing that the Windows installer still sucessfully placed them on the drive without the need for the 100mb taken away. The concern when removing the 100mb section when not having a 7 dvd would be the need to burn a repair cd with 7 fortunately now seeing that option included!
The 3 cards were simply removed and reseated to suddenly hear ping, ping, ping "you must restart to see the changes put into effect"! when the system was started afterwards. Windows 7 again solved it's own dilemna with the fresh detection as well as seeing the repair tools onhand having used a 3rd party drive tool.
For those who want to reclaim the 100mb of drive space be sure to burn a repair cd to have onhand since that can also save on handling the 7 dvd itself as well as for those not having one in the case of 7 being preinstalled. For those about to install 7 on a bare drive and want to avoid the 100mb being taken then the use of a 3rd party drive tool is something to consider as well. --Night Hawk
Anyway:
System Reserved Partition - Delete
1. Boot from your installation or repair disc.
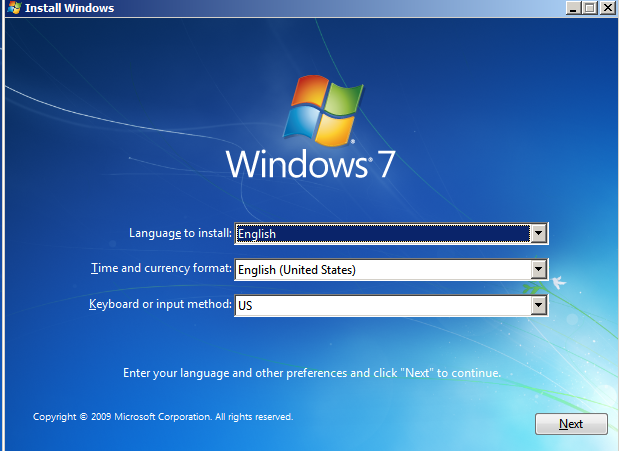
2. When you get to the language screen, press Shift+F10.
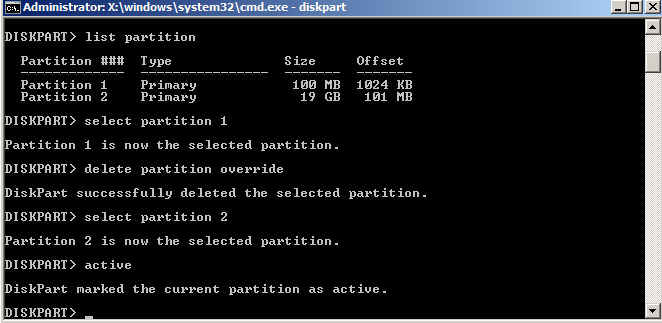
3. Enter
diskpart
list disk
(after diskpart is loaded)
4. Enter
select disk {Windows disk number}
5. Enter
list partition
select partition {100MB partition number}
6. Enter
delete partition override
7. Enter
select partition {Windows partition from step 5}
active
8. Close the command prompt.
We have deleted the partition, and Windows will be unable to boot at this point. Now it is time to write a new boot loader and BCD to the Windows partition.-----------------------------------Q. But wouldn't
bootrec /fixmbr as step 7A write out a new boot record and eliminate the need for step 9?
A. Possibly, but that wouldn't rebuild the BCD.
Of course, you could also run
bootrec /rebuildbcd
but I trust startup repair more.
Bootrec command is the fastest way to get rid of GRUB's multiple boot menu when you want to unload Ubuntu - just rebuilt the MBR and then went in under Windows 7 and deleted the partitions.
-----------------------------------
9. Follow the instructions in Brink's tutorial for
Running a startup repair.
1. Boot to the System Recovery Options screen using your retail Windows 7 installation disk or system repair disc.
2. Select the Startup Repair option. (See screenshot below)
3. Startup Repair will now scan your computer to attempt to find and fix any startup problems. (See screenshot below)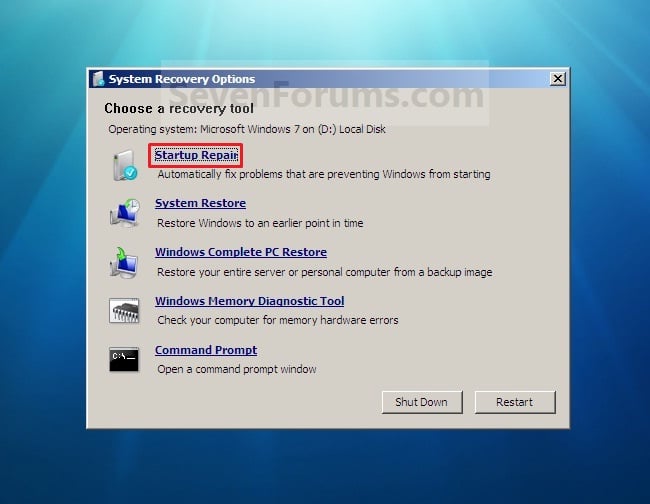
NOTE: Startup Repair might prompt you to make choices as it tries to fix the problem, and if necessary, it might restart your computer as it makes repairs. If repairs are not successful, you'll see a summary of the problem and links to contact information for support. Your computer manufacturer might include additional assistance information.
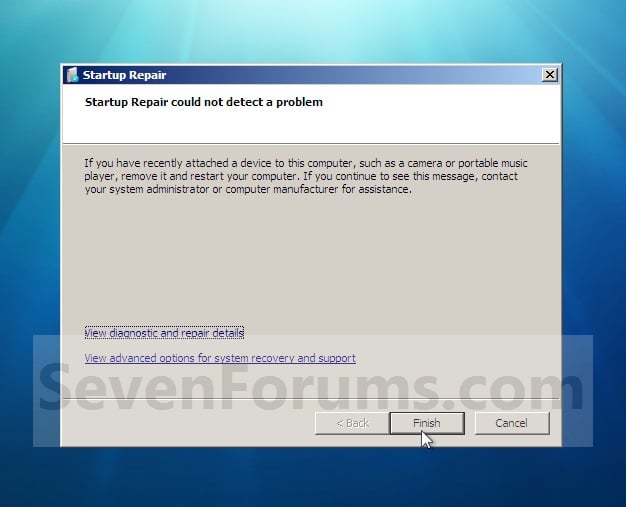
4. If problems cannot be found, then click on Next. (See screenshot below)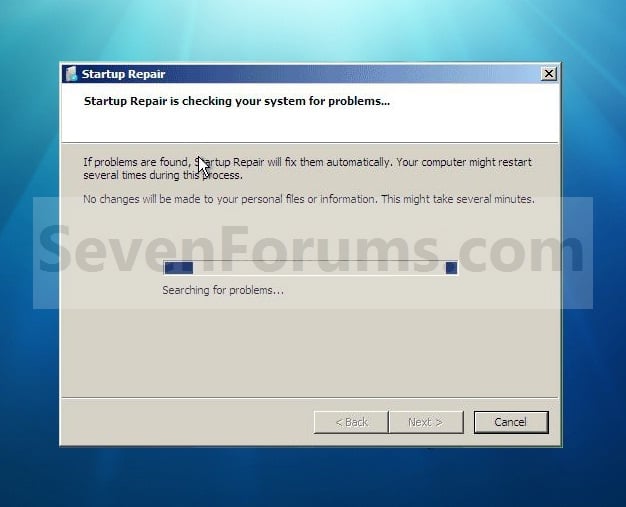
NOTE: You can click on the View diagnostic and repair details link to see a detailed summary of what Startup Repair has done.
A) Click on the Restart button to return to the Windows 7 log on screen. (See screenshot below step 2)
Sometimes it may take running a startup repair a few (3) times before it fully fixes the startup issue.
======================================
You will need to extend your C partition to include that space. The Windows Disk Management tool cannot extend space to the left of the volume, so you'll need to use a third-party tool. I recommend Partition Wizard Free Edition:
Magic Server Partition Manager Software - Resize partition for Windows Server 2003, 2008 and 2000.
Using Partition Wizard, right-click on the C partition, and select Move/resize. Then drag the edge of the box to the left, to include that unallocated space.
When you're done, be sure to select Apply actions.
-------------------------------------
http://img705.imageshack.us/img705/9779/problemml.png
I thought the 1MB indicated a dynamic disk. If unfortunately your disk is dynamic.
It should be made "Basic" again.
See this tutorial
Convert a Dynamic Disk to a Basic Disk
Using free Partition Wizard 4.2 (NOT free 5.2) is the easiest way to convert and retain your data.
Note: Back everything up. Anticipate the worst when you do any partition operation.
PW 4.2 link courtesy JK.
http://cid-24a0e9031e104daf.skydrive...4.2%20free.zip




 LibreOffice
 Firefox
No comments:
Post a Comment