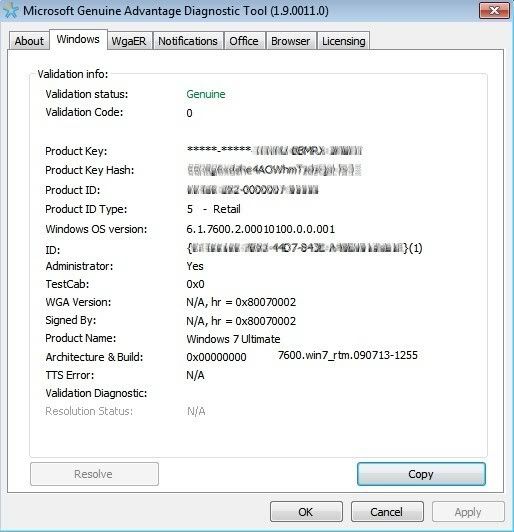
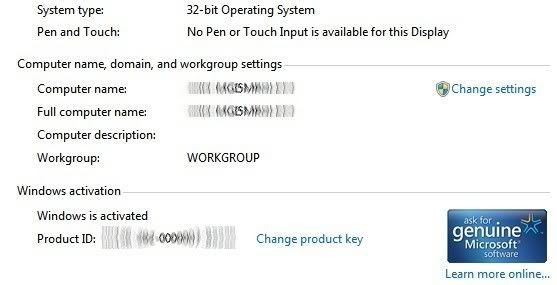
*****AVOID WINDOWS UPDATE KB971033*****
This Windows update somehow removes the self-activation.....hence:
Windows 7
Build 7600
This copy of Windows in not genuine
If you have already installed KB971033 and got a black wallpaper saying that your copy is not genuine , run RemoveWat 2.2.5 from torrentz.com/5b098a55ccf283db26329d5886605d96c710995a
RemoveWAT 2.2.5 by Hazar
http://thepiratebay.org/torrent/5396065
Only Use This IF Windows 7 Loader by Daz 1.7.7 Doesn't Work for you !!!!
-------------------------------------------------------
Windows 7 Loader v1.7.7 (REPACK) (x86 - x64) by Daz
Bittorrent source of ISO 32&64b Win7
Torrent Download
or HERE
WORKS ON ALL EDITIONS OF 7/R2!
NOT FOR VISTA/ORIGINAL SERVER 2008!!!!
IMPROVEMENTS SINCE 1.0:
renames slmgr on x64 aswell
Works on unicode systems
silent mode with /s switch
UI tweaked slightly
No reboot neccessary
Passes WGA on X64
This is a little tool I put together to remove WAT (Windows Activation Technologies) completely from the OS, whilst still retaining
genuine status and receiving all updates (optional aswell). You can also pass the genuine check in things like Windows Defender.
There will be no windows activation section in control panel (thanks to nononsence)
no slmgr
no nags, no prompts, nothing. WAT gone.
IMPORTANT NOTES/INSTRUCTIONS IN ARCHIVE!
Version 2.2.5
Update:
Fully protects from WAT Update (KB971033)
Disables trial time bomb in evaluation ISOs fully
Only Use This IF Windows 7 Loader by Daz 1.7.7 Doesn't Work for you !!!!
Installion and Use:
1. UnRAR
2. Run as Adminstrator
3. Click on Remove WAT button
Enjoy !!!
To Return Windows 7 to Original State:
1. UnRAR
2. Run as Adminstrator
3. Click on Restore WAT button
Source
Chew-WGA was designed to test the security resistance of various
This utility should never be executed on a system intended for continual use. If you want to use your copy of Windows continually, you are required to purchase a license.
Some notable features include:
- all-language compatibility
- works on Windows 7 all versions
-
- no master boot record fiddling
- no risk of PC bricking
- very reliable patching mechanism
- windows updates work
- doesn’t use any keys
- full uninstaller included
- solid, clean,
- tamper resistant (
- hotfix resistant
- the most reliable chew-wga version yet
Does this use a blacklisted key?
No. In fact, it doesn’t use any keys at all. Windows 7 doesn’t even need to be activated for Chew-WGA to work.
Does the Chew-WGA method work on Windows
Chew-WGA 0.9 has been tested on Windows Server 2008 R2 X64, and works beautifully.
|Spreadmyfiles|
Download.
***** HOW TO CHECK ACTIVATION OF WINDOWS *****
1. Type cmd in Start menu.
2. Right-click on the first result (cmd.exe) and click on Run as administrator (confirm by clicking Yes if required).
3. Type
Code:
slmgr -dli
Code:
slmgr -xpr
Code:
slmgr -dlv
Press ENTER after each command.
--------------------------------------------
TO THOSE WHO ARE HAVING TROUBLE ON BLANK/BLACK SCREEN WITH FLASHING/BLINKING UNDERSCORE/CURSOR..
I'VE SOLVED THE CAUSES..
FOR ME.. REMOVED ALL WHAT'S ON YOUR USB: MOUSE, KEYBOARD, EXTERNAL HDD, BLUETOOTH ANYTHING THAT CONNECTS TO YOUR USB..
AND LASTLY GO TO YOUR BIOS (F2, DEL ETC.. WHICH IS ON THE START UP SCREEN WHEN YOU OPEN YOUR COMPUTER)
TO THOSE PEOPLE WHO HAVE CORE 2 DUO, DUAL CORE, QUAD CORE.. WINDOWS 7 IS HAVING PROBLEM ON SOME OF THE PROCESSORS LIKE THE QUAD CORE THAT'S WHY THEY WON'T BOOT UP AND STA **** IN THE BLACK SCREEN, YOU MUST DISABLE THE SECONDARY CORE WHICH IS LOCATED ON YOUR BIOS.. I DON'T KNOW EXACTLY WHERE TO FIND IT BECAUSE WE HAVE DIFFERENT MOTHERBOARDS BUT MINE IS INTEL.. BIOS SETTING IS F2.. AND THE DISABLING YOUR SECONDARY CORE IS ON FIRST SCREEN OF THE BIOS SETTINGS..
I DON'T KNOW IF THIS WILL HELP YOU BUT I SOLVED MINE BECAUSE OF THIS, I TRIED DOWNLOADING TWO KINDS OF WINDOWS 7, AND BURN THE 1ST WIN 7 TO 2 DVDs AND STILL NOT WORKING, BUT ON THIS 2ND WIN7 (THIS TORRENT), I TRIED EXPERIMENTING MY BIOS.. AND POOOOOFF!!! IT'S WORKING NOW..


 LibreOffice
 Firefox
October 28th, 2009 at 06:08 could help me solve the following problem:
Inserted auth tok with sig [ff4aae46a4d814b4] into the user session keyring
Inserted auth tok with sig [5c53936d7608a270] into the user session keyring
gyrlano@gyrlano:/$ sudo mount -t ecryptfs OldPrivate OldHome/
Passphrase:
Select cipher:
1) aes: blocksize = 16; min keysize = 16; max keysize = 32 (not loaded)
2) blowfish: blocksize = 16; min keysize = 16; max keysize = 56 (not loaded)
3) des3_ede: blocksize = 8; min keysize = 24; max keysize = 24 (not loaded)
4) twofish: blocksize = 16; min keysize = 16; max keysize = 32 (not loaded)
5) cast6: blocksize = 16; min keysize = 16; max keysize = 32 (not loaded)
6) cast5: blocksize = 8; min keysize = 5; max keysize = 16 (not loaded)
Selection [aes]: 1
Select key bytes:
1) 16
2) 32
3) 24
Selection [16]: 1
Enable plaintext passthrough (y/n) [n]:
Enable filename encryption (y/n) [n]: y
Filename Encryption Key (FNEK) Signature [ff4aae46a4d814b4]: 5c53936d7608a270
Attempting to mount with the following options:
ecryptfs_unlink_sigs
ecryptfs_fnek_sig=5c53936d7608a270
ecryptfs_key_bytes=16
ecryptfs_cipher=aes
ecryptfs_sig=ff4aae46a4d814b4
WARNING: Based on the contents of [/root/.ecryptfs/sig-cache.txt],
it looks like you have never mounted with this key
before. This could mean that you have typed your
passphrase wrong.
Would you like to proceed with the mount (yes/no)? : yes
Would you like to append sig [ff4aae46a4d814b4] to
[/root/.ecryptfs/sig-cache.txt]
in order to avoid this warning in the future (yes/no)? : no
Not adding sig to user sig cache file; continuing with mount.
Error mounting eCryptfs: [-2] No such file or directory
Check your system logs; visit
gyrlano@gyrlano:/$
I will be grateful.
October 28th, 2009 at 16:39 You could first check that Filename Ecryption is used (ls
October 31st, 2009 at 22:28 Super awesome! Thank you very much. I’ve been trying to figure this out for weeks.
November 5th, 2009 at 02:42 /*/*/
Antti, you’re the world’s largest. ThankS!!!!! !!!!! !!!!!
/*/*/
December 10th, 2009 at 03:58 Thank you a million times! I ran across several instructions for recovering an encrypted home from another install/system and your instructions were the only ones that worked for me. Just like you, I successfully mounted my private folder only to find that the filenames and content were still hopelessly encrypted. Thank you once again…
December 10th, 2009 at 04:01 @Grylano
I got this error when the mount-point directory didn’t exist prior to the mount:
Error mounting eCryptfs: [-2] No such file or directory
It has nothing to do with encryption and should really have occurred after a sanity check on the mount syntax (as oppossed to having you type a whole bunch of stuff and then failing).
December 10th, 2009 at 15:02 Thank you!
Why on earth isn’t it in the official documentation?
December 14th, 2009 at 08:15 Thanks, this was very helpful. Found your post on the Ubuntu Forums and it led me here.
December 17th, 2009 at 08:26 you are my hero!!!!!
January 23rd, 2010 at 20:56 “Filename Encryption Key (FNEK) Signature [xxxxxxxxxxxxxxx]: yyyyyyyyyyyyyyyy”
That’s the secret sauce that I always manage to forget! Thank you!
February 10th, 2010 at 13:28 I think I love you ! I had 83,000 bloody files decrypted with fuc**d up file names, now I see them.
I searched for two days for this solution so a MASSIVE THANKYOU !!!!
February 21st, 2010 at 08:47 Increible, muchas gracias, en ningun lugar encontre solución similar.
Haré un post y te enlazo, sino te importa.
February 21st, 2010 at 11:17 [...] passphrase siempre la tuve a la mano y después de buscar por toda la red me tope con la respuesta, una respuesta que parece ser la única solución y sin asumir perdida alguna. Yo olvide mi contraseña pero es muy probable que hayas hecho una [...]
March 13th, 2010 at 19:30 Thanks a lot. I tried to decrypt my old home directory for hours.
March 14th, 2010 at 04:27 Thanks for this post. It just helped me migrate a bunch of files off of a flaky Wubi install to a shiny new native install.
I have a couple things to add:
1) Don’t skip on the ’sudo’. I went in circles a couple of times because I ran ‘ecryptfs-add-passphrase –fnek’ as myself.
2) If you didn’t write down your recovery passphrase, but still have your .ecrypt directory, you can run ‘ecryptfs-unwrap-passphrase .ecryptfs/wrapped-passphrase’ to get it back.
3) You need to enter that recovery passphrase for both the ‘ecryptfs-add-passphrase’ and ‘mount’ command. (Yeah, I put in my login password for the mount a few times before I realized that was wrong.)
April 16th, 2010 at 21:35 Man you are gooooooooooooooooooooood!
April 19th, 2010 at 04:06 Well, I’ve tried I don’t know how many times but it just won’t give me permission! Could you please take a look and tell me what I’m doing wring? This is on a Karmic install if that makes a difference:
ubuntu@ubuntu:/mnt$ sudo ecryptfs-add-passphrase –fnek
Passphrase:
Inserted auth tok with sig [9feeafb7d362cca0] into the user session keyring
Inserted auth tok with sig [50f4f62c9ec87247] into the user session keyring
ubuntu@ubuntu:/mnt$ sudo mount -t ecryptfs OldPrivate OldHome/
Passphrase:
Select cipher:
1) aes: blocksize = 16; min keysize = 16; max keysize = 32 (not loaded)
2) blowfish: blocksize = 16; min keysize = 16; max keysize = 56 (not loaded)
3) des3_ede: blocksize = 8; min keysize = 24; max keysize = 24 (not loaded)
4) twofish: blocksize = 16; min keysize = 16; max keysize = 32 (not loaded)
5) cast6: blocksize = 16; min keysize = 16; max keysize = 32 (not loaded)
6) cast5: blocksize = 8; min keysize = 5; max keysize = 16 (not loaded)
Selection [aes]:
Select key bytes:
1) 16
2) 32
3) 24
Selection [16]:
Enable plaintext passthrough (y/n) [n]:
Enable filename encryption (y/n) [n]: y
Filename Encryption Key (FNEK) Signature [9feeafb7d362cca0]: 50f4f62c9ec87247
Attempting to mount with the following options:
ecryptfs_unlink_sigs
ecryptfs_fnek_sig=50f4f62c9ec87247
ecryptfs_key_bytes=16
ecryptfs_cipher=aes
ecryptfs_sig=9feeafb7d362cca0
WARNING: Based on the contents of [/root/.ecryptfs/sig-cache.txt],
it looks like you have never mounted with this key
before. This could mean that you have typed your
passphrase wrong.
Would you like to proceed with the mount (yes/no)? : yes
Would you like to append sig [9feeafb7d362cca0] to
[/root/.ecryptfs/sig-cache.txt]
in order to avoid this warning in the future (yes/no)? : no
Not adding sig to user sig cache file; continuing with mount.
Mounted eCryptfs
ubuntu@ubuntu:/mnt$ dir
OldHome OldPrivate
ubuntu@ubuntu:/mnt$ cd OldHome
bash: cd: OldHome: Permission denied
ubuntu@ubuntu:/mnt$
Thanks
April 19th, 2010 at 08:37 Gotit: original file permissions apply even when you try to access the files on a different machine or live-CD. Live-CD user is just a regular user who does not have a permission to access your unencrypted home directory. Only root can access any files.
You either have to access the backup as root:
Mounted eCryptfs
$ sudo su
# cd OldHome
or you have to change the owner of the directory and files:
Mounted eCryptfs
$ sudo chown $USER OldHome/ -R
$ cd OldHome