» | Product setup | |||
| » | Product hardware setup | |||
| » | Network setup | |||
» | Driver and software installation | |||
| » | Windows | |||
| » | Macintosh | |||
| » | Unix | |||
| » | Linux | |||
» | Driver and software installation issues | |||
| » | Windows | |||
| » | Macintosh | |||
» | Configure | |||
| » | Hardware | |||
| » | Software | |||
But better to follow this guide from printerhacks.com
With the ever increasing printers sold with networking support, I have been inundated with questions regarding the setup of a network printer. Many of these principles can be applied to other printer manufacturers, but due to the amount of printers sold by HP, this tutorial will be for LaserJet Printers using some type of JetDirect Card.

Equipment
- HP LaserJet 4100 Series Printer
- Standard Wireless Router (100Mbit)
- J6957A 615n JetDirect Network Card
- Microsoft Windows XP Computer
I assume the printer is plugged into the network router (wireless or not) so it should have automatically been assigned an IP (Internet Protocol) address that you’ll need to change to a permanent (static) address so you can easily tell the computer where the printer is at all times.
1. First we’ll need to find out the IP address.
Using the printer’s buttons, press the “Menu” button, then select “Information“, and then select “Print Configuration“.
2. On the second of the two configuration pages that should have printed will tell you the IP address that you’ll be using later.
It will be located the JetDirect page under the “TCP/IP” section. Go ahead and write down the number or circle it. It may look something like 192.168.X.X (where X is your assigned number)
3. Go on a computer that’s connected to the network that the printer is connected to and bring up Internet Explorer (like if you were surfing a web page).
4. Next, We’ll be logging into the printer and making some settings permenant.
Type in the address that you wrote down in the previous step in the address bar.
Youre address bar should look something like this: http://192.168.1.3 (make sure you enter the correct IP address you found in step 2).
5. Next you’ll need to change the dynamic IP address to a permanent address (static). This next step may be slightly different depending on what type of Jetdirect card you have installed in your printer, but the concept should be the same.

At the default information screen, select “Networking” (show above).
Here you will need to change the type of address to “Manual” instead of “DHCP” (which is dynamic where the IP changes). The only number you need to change is the last set of digits. I generally setup my printers to start around the 50′s. So in this case, I’ll type in 192.168.1.50 (see picture).

After you’ve change your network settings, select “Apply“. The screen may appear unresponsive and none of the links will work. This is because you changed the actual address you connected to setup the address so naturally it wouldn’t work.
The next steps need to be done on the computer(s) you wish to setup to print to the network printer. I’m using Windows XP Home.
1. Go to Start> Control Panels>Printers and Faxes
2. Then select> Add a printer

The add a printer wizard comes up.
3. Select “Next”
On the next screen, be sure to select “Local Printer attached to this computer” and the uncheck the box that states “Automatically detect and install my Plug and Play printer“. I know this step doesn’t make sense, but that’s Windows (see picture). When you’re done with this screen select “Next“.

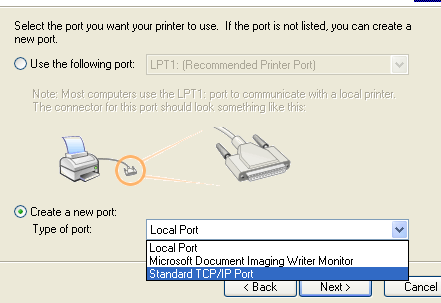
In the “Select a Printer Port” screen, you’ll want to select “Create a new port and change the option to Standard TCP/IP Port“. When you’ve made that selection click on “Next“.
Another wizard should come up titled “Add Standard TCP/IP Printer Port Wizard“, select Next.
For the “Printer Name or IP Address” field, type in the statically assigned IP address you set the printer as earlier. I’m going to use 192.168.1.50. The port name should automatically fill in. When you’re finished typing in the IP address click on “Next“. Windows will now try and find your device.

If you receive a “Completing the Add Standard TCP/IP Printer Port Wizard“, everything worked great. Proceed to the next few steps after clicking “Finish“.
If you didn’t receive this final step box, make sure the address is correct and that you can login to the printer using that IP address.
Next, it will ask for a Printer driver. Many of the older HP LaserJet printers will have drivers built into Vista and Windows XP. If you don’t see your printer listed, insert the CD-ROM that came with your printer and select “Have Disk” to go through the process of adding those drivers. You may just want to choose a generic HP 4100 series driver to get you by if you don’t have the CD or don’t want to download the software from HP. When you’re finished selecting your printer, click on “Next“.

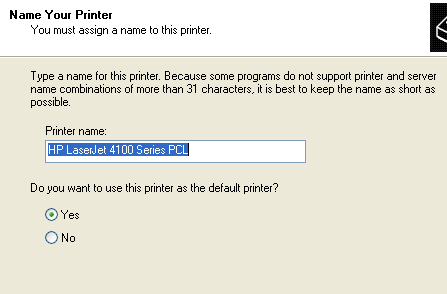
These next few steps are your preference. I generally leave them as default, but it’s up to you.
I recommend printing a quick test page to make sure everything was installed correctly.

On the next screen, click on “Finish” and you’re all done. Enjoy printing on your network based LaserJet printer.


 Firefox
No comments:
Post a Comment