-
 15:00
Steve Jobs' Best Video Moments on Stage (2/3)
15:00
Steve Jobs' Best Video Moments on Stage (2/3)
-
 4:30
Steve Jobs - sample presentation (final)
4:30
Steve Jobs - sample presentation (final)
-
 1:29
Steve Jobs explains the rules for success
1:29
Steve Jobs explains the rules for success
 12:33
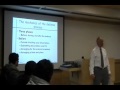
The importance of Body Language in Presentations
12:33
The importance of Body Language in Presentations 7:58
Great Openings and Closings
7:58
Great Openings and Closings===========================

Presentation
software can be a wonderful tool if used correctly. It can also be a
dangerous distraction that interferes with communication rather than
facilitating it. The line between the two is thin.
Over the course of my career, I have sat through hundreds of
presentations. Most of them were done with PowerPoint. Most of them are
done poorly.I often think the presenter would be more compelling if he would ditch the presentation software and just speak. Because of this, I even thought of outlawing presentation software when I was the CEO of Thomas Nelson.
But alas, It has become a staple of corporate life. It is the ubiquitous prop that attends every presentation.
So if we can’t outlaw presentation software, at least we can improve how we use it. Here are my five rules for making more effective presentations.
- Don’t give your presentation software center stage. This is the biggest mistake I see speakers make. They forget that PowerPoint or Keynote are tools designed to augment their presentation not be their presentation.
Never forget: You are the presenter. Your message should be
the focus. Not your slides. Not your props. And not your handouts. You
are in the lead role, and you need to retain that role.
No amount of “razzle dazzle” or slide effects can overcome a weak presentation. If you don’t do your job, slides won’t save you. It only makes a bad presentation worse. - Create a logical flow to your presentation. Better yet, tell a story. (See Cliff Atkinson’s Beyond Bullet Points. The absolute last thing you want to do is turn your presentation into a random assortment of bulleted lists, which is what often happens, especially when PowerPoint is involved. There must be a flow. Start with a good outlining or mind mapping program. I personally use OmniOutliner. Decide if your talk is going to be a persuasive speech or an enabling one. (It should be one or the other.) We teach you how to do this at The SCORRE Conference. This is something I use every day.
- Make your presentation readable. Memorize this
sentence: “If people can’t read my slides from the back of the room, my
type is too small.” Now repeat it over and over again while you create
your slides. If people are squinting during your presentation, trying to
make out what’s on the slide, you’ve lost your audience.
In my experience you must use at least 30-point type. Obviously, it
depends on the size of the room, the size of the screen, etc. This is
precisely why you can’t afford to leave this to chance. You must test
your slides and make certain they are readable.
In Really Bad PowerPoint (PDF file), Seth Godin also sets forth five PowerPoint rules. In the first one he says, “No more than six words on a slide. EVER.” This may be too extreme, but you get the idea. The more words you use, the less readable they become.
I have made some really effective presentations with no more than a word or two per slide. It can be done. Steve Jobs was a master at this. So is Tom Peters.
Here are some other things to remember regarding text:
- Avoid paragraphs or long blocks of text. If you really, really must use a paragraph, then whittle it down to the bare essentials. Use an excerpt—a couple of sentences. Emphasize the important words. Put the text block by itself on a single slide.
- Use appropriate fonts. I recommend a sans serif font for titles (e.g., Arial, Verdana, Helvetica, or—my personal favorite—Myriad Pro, etc.) and a serif font for bullets or body text (e.g., Times New Roman, Garamond, Goudy, Palatino, etc.). Most books are typeset this way because it make them more readable. The serifs help you recognize the characters (and thus the words) faster. It makes the text more readable. It’s also customary to use san serif fonts for chart labels.
- Avoid detailed reports. If you need to include a report in your presentation, hand it out. Don’t force people to try to read a ledger printout on a slide. (Financial people take note!) If you must show a report, use it as a picture and then use a “call out” to emphasize the part of the report you want people to focus on. Better yet, just fill up a whole slide with the one number you want people to take away from the presentation.
- Avoid “title capitalization” unless (duh!) it’s a title. Sentence capitalization is much easier to read. For example, “Sales are up 100% in the southeast region” is easier than “Sales Are Up 100% In The Southeast Region.” This is especially true when you have numerous bullet points.
- Remember, less is more. Fancy slide transitions and
fly-ins get old quickly. I strongly recommend that you keep things
simple. A basic dissolve from one slide to another is usually
sufficient.
Also, have all your bullets appear at once rather than one at a time.
Avoid sound effects—they serve no other purpose than annoying the
audience and distracting them from your presentation.
Finally, cut down the number of slides. You don’t need a transcript of your speech with every point and sub-point. Yawn! People are only going to remember the major points any way. - Distribute a handout. I have changed my mind on this over the years. I do not think that you should distribute a handout before you begin speaking.
If you do so, people will start reading ahead instead of listening to
you. It’s just one more distraction to keep them from focusing on your
message. It also eliminates any surprises or drama you have built into
your presentation.
Instead, I tell people that I will distribute a handout of the slides when I am finished with my presentation. (Or now, I often create a special page on my blog, with the slides embedded into it using SlideShare.net.) That way, they can take notes during my session, knowing that they don’t have to write everything down. This allows them to stay engaged without becoming distracted.
I have had the privilege of interviewing many top leadership experts. These are just a few of them.
- Andy Andrews
- Marcus Buckingham
- Seth Godin
- Guy Kawasaki
- Patrick Lencioni
- Max Lucado
- John Maxwell
- Donald Miller
- Sir Ken Robinson
=======================
princeton.edu/~archss/How to give a good presentation.pdf
acmg.seas.harvard.edu/education/presentations/carlton_presentations.pdf
gnosislearning.com/_document/What+Makes+a+Good+Presentation.pdf
lifehacker.com/206616/12-ways-to-create-a-better-powerpoint-presentation
12 Tips for Creating Better Presentations [Microsoft Work Center]
===========================
10 Tips for Designing Presentations That Don’t Suck: Pt.1
10 Tips for Designing Presentations That Don’t Suck: Pt.2
To sum up, let’s take a quick look at all ten tips for designing presentations that don’t suck from both articles.
- 1. Don’t Use a Built-In Theme
- 2. Use Quality Photography
- 3. Solid Colors Rock
- 4. Typography Speaks Volumes
- 5. Watch Your Readability
- 6. Simpler is Better
- 7. Avoid the Bullet Point Plague
- 8. Create Clear Focal Points
- 9. Create a Captivating Cover
- 10. Make ‘em Laugh
===================================
presentationsoft.about.com/od/powerpointinbusiness
1. Know Your Stuff
Your comfort level with presenting will be high if you know everything about your topic. After all, the audience is looking to you to be the expert. However, don't overload the audience with your complete toolkit of knowledge about your topic. Three key points is just about right to keep them interested, allowing them to ask questions if they want more.2. Make it Clear What You are There to Share With Them
Use the tried and true method that skilled presenters have used for eons.- Tell them what you are going to tell them.
- Outline briefly the key points you will talk about.
- Tell them.
- Cover the topic in depth.
- Tell them what you told them.
- Summarize your presentation in a few short sentences.
3. A Picture Tells the Story
Keep the audience's attention with pictures rather than endless bulleted slides. Often one effective picture says it all. There is a reason for that old cliché - "a picture is worth a thousand words".4. You Can't Have Too Many Rehearsals
If you were an actor, you would not be performing without first rehearsing your part. Your presentation should be no different. It is a show too, so take time to rehearse -- and preferably in front of people -- so that you can see what works and what doesn't. An added bonus of rehearsing is that you will become more comfortable with your material and the live show will not come off as a recitation of facts.5. Practice in the Room
What works while rehearsing at home or the office, may not come off the same in the actual room where you will present. If at all possible, arrive early enough so that you can become familiar with the room setup. Sit in the seats as if you were an audience member. This will make it easier for you to judge where to walk about and stand during your time in the spotlight. And -- don't forget to test out your equipment in this room long before it's show time. Electrical outlets may be scarce, so you may need to bring extra extension cords. And -- you brought an extra projector light bulb, right?6. Podiums are Not for Professionals
Podiums are "crutches" for novice presenters. To be engaging with your audience you have to be free to walk among them if you can, or at least vary your position on stage, so that you will appear to be approachable to everyone in the room. Use a remote device so that you can change slides easily on the screen without having to be stuck behind a computer.7. Speak to the Audience
How many presentations have you witnessed where the presenter either read from his notes or worse -- read the slides to you? The audience doesn't need you to read to them. They came to see and hear you speak to them. Your slide show is just a visual aid.8. Pace the Presentation
A good presenter will know how to pace his presentation, so that it flows smoothly, while at the same time he is prepared for questions at any time -- and -- going back to Item 1, of course, he knows all the answers. Make sure to allow for audience participation at the end. If no one asks a questions, have a few quick questions of your own ready to ask them. This is another way to engage the audience.9. Learn to Navigate
If you are using PowerPoint as a visual aid to your presentation, get to know the many keyboard shortcuts that allow you to quickly navigate to different slides in your presentation if the audience asks for clarity. For example, you may wish to revisit slide 6, which contains a wonderful picture illustrating your point.10. Always Have a Plan B
Unexpected things happen. Be prepared for any disaster. What if your projector blew a light bulb (and you forgot to bring a spare) or your briefcase was lost at the airport? Your Plan B should be that the show must go on, no matter what. Going back to Item 1 once again -- you should know your topic so well that you can make your presentation "off the cuff" if need be, and the audience will leave feeling that they got what they came for.More Presentation Tips
Still More Presentation Tips
PowerPoint Tips
Related Articles
- Presentation Skills to Reach Your Presentation Goals
- PowerPoint Tips - PowerPoint Tips Collections
- 10 Bad Presentation Techniques and Their Remedies
- Presentation Checklist and Tips for Creating Successful Presentations
www.cs.cmu.edu/~mihaib/presentation-rules.html
Some Rules for Making a Presentation
Here's a 10-minute Powerpoint talk with the essentials.
Golden rule
Human attention is very limited. Don't cram too much
information, either in each slide, or in the whole talk. Avoid
details: they won't be remembered anyway.
Organization- Have a very clear introduction, to motivate what you do and to present the problem you want to solve. The introduction is not technical in nature, but strategic (i.e. why this problem, big idea).
- If you have a companion paper, mention it during the talk and recommend it for more details. Don't put all the details in the talk. Present only the important ones.
- Use only one idea per slide.
- Have a good conclusions slide: put there the main ideas, the ones you really want people to remember. Use only one "conclusions" slide.
- The conclusion slide should be the last one. Do not put other slides after conclusions, as this will weaken their impact.
- Having periodic "talk outline" slides (to show where you are in the talk) helps, especially for longer talks. At least one "talk outline" slide is very useful, usually after the introduction.
- Don't count on the audience to remember any detail from one slide to another (like color-coding, applications you measure, etc.). If you need it remembered, re-state the information a second time.
- Especially if you have to present many different things, try to build a unifying thread. The talk should be sequential in nature (i.e. no big conceptual leaps from one slide to the next).
- Try to cut out as much as possible; less is better.
- Help the audience understand where you are going. Often it's best to give them a high-level overview first, and then plunge into the details; then, while listening to the details they can relate to the high-level picture and understand where you are. This also helps them save important brain power for later parts of the talk which may be more important.
- Use a good presentation-building tool, like MS PowerPoint. Avoid Latex, except for slides with formulas (Leslie Lamport himself says that slides are visual, while Latex is meant to be logical). Good looks are important. If you need formulas, try TeXPoint, George Necula's Latex for Powerpoint.
- Humor is very useful; prepare a couple of puns and jokes beforehand (but not epic jokes, which require complicated setup). However, if you're not good with jokes, better avoid them altogether. Improvising humor is very dangerous.
- The more you rehearse the talk, the better it will be. A rehearsal is most useful when carried out loud. 5 rehearsals is a minimum for an important talk.
- The more people criticize your talk (during practice), the better it will be; pay attention to criticism, not necessarily to all suggestions, but try to see what and why people misunderstood your ideas.
- Not everything has to be written down; speech can and should complement the information on the slides.
- Be enthusiastic.
- Act your talk: explain, ask rhetorical questions, act surprised, etc.
- Give people time to think about the important facts by slowing down, or even stopping for a moment.
- Do not go overtime under any circumstance.
- Listen to the questions very carefully; many speakers answer different questions than the ones asked.
- Do not treat your audience as mentally-impaired: do not explain the completely obvious things.
- Slides should have short titles. A long title shows something is wrong.
- Use uniform capitalization rules.
- All the text on one slide should have the same structure (e.g. complete phrases, idea only, etc.).
- Put very little text on a slide; avoid text completely if you can. Put no more than one idea per slide (i.e. all bullets should refer to the same thing). If you have lots of text, people will read it faster than you talk, and will not pay attention to what you say.
- Don't use small fonts.
- Use very few formulas (one per presentation). The same goes for program code (at most one code fragment per presentation).
- Do not put useless graphics on each slide: logos, grids, affiliations, etc.
- Spell-check. A spelling mistake is an attention magnet.
- Use suggestive graphical illustrations as much as possible. Don't shun graphical metaphors. Prefer an image to text. In my presentations I try to have 80% of the slides with images.
- Do not put in the figures details you will not mention explicitly. The figures should be as schematic as possible (i.e. no overload of features).
- Do not "waste" information by using unnecessary colors. Each different color should signify something different, and something important. Color-code your information if you can, but don't use too many different colors. Have high-contrast colors.
- A few real photos related to your subject look very cool (e.g. real system, hardware, screen-shots, automatically generated figures, etc.). Real photos are much more effective during the core of the talk than during the intro. I hate talks with a nice picture during the introduction and next only text; they open your appetite and then leave you hungry.
- For some strange reason, rectangles with shadows seem to look much better than without (especially if there are just a few in the figure).
- Sometimes a matte pastel background looks much better than a white one.
- Exploit animation with restraint. Do not use fancy animation effects if not necessary.
- However, there are places where animation is extremely valuable, e.g., to depict the evolution of a complex system, or to introduce related ideas one by one.
- Use strong colors for important stuff, pastel colors for the unimportant.
- Encode information cleverly: e.g. make arrow widths showing flows proportional to the flow capacity.
- Use thick lines in drawings (e.g. 1 1/2 points or more).
- Don't put useless information in result graphs (e.g. the 100% bar for each application).
- Label very clearly the axes of the graphs. Explain the un-obvious ones. Use large fonts for labels; the default fonts in Excel are too small.
- Discuss the results numbers in detail; "milk" them as much as possible.
- I don't agree 100% with him, but Mark Jason Dominus gives some very good advice on presentations.
- Excellent advice from 1979 by Leslie Lamport.
http://www.cmos.ca/presentationse.html
How to Make Good Presentations
author: David Jones, B.C. Lower Mainland (Vancouver) Centre, 2005
1. Oral Presentation Guidelines Published at the Vancouver Congress, 2005
- Slides should be
well-designed
(i.e.
made
specifically for presentation purposes) and should remain on display
for
a significant length of time while you explain them.
- "Flashing" slides is bad
style. In
general
10 slides (including the title/intro and conclusions) is plenty for a
12-minute
talk.
- Leave graphical figures up for
a
long time
while you talk, textual material up for a short time only. Keep
text
to a minimum - use abbreviations, acronnyms, etc.
- To check legibility view
computer
slides on
your monitor from 10 feet away. Graph axis labels should be
legible!
- Use Sans-serif fonts,
emphasizing
with bold-face
or different colours. Light fonts on dark backgrounds are good
for
textual material, but scientific graphs often work better on a light
background.
- Avoid the use of tables, and
do not
add grid
lines to graphs as they clutter the image.
- Keep the backgrounds simple -
one
colour or
a gradual fade.
- Avoid light colours like
yellow as
these sometimes
do not appear in the conference room lighting conditions.
- Avoid presentation animations
(e.g.
text
sliding onto page), although animations of content (movies) can be very
effective.
- Organize your presentation to
present a story
logically. Emphasize key points.
- Take the time to rehearse your presentation. If it is too long, eliminate material.
2. View
Slide Show Illustrating
the Oral Presentation Guidelines
See
David's slide
show on how to prepare an effective PowerPoint presentation
(useful for Centre meetings and Congress papers).
This slide show has been converted to pdf and contains the same animations as the original Powerpoint show.
If anyone wishes a copy of David's ppt file please contact the webmaster.
This slide show has been converted to pdf and contains the same animations as the original Powerpoint show.
If anyone wishes a copy of David's ppt file please contact the webmaster.
3. Guidelines for Poster Preparation & Presentation
- The presentation should
cover the
same
material
as in the submitted abstract.
- Indicate the abstract title,
authors, and
ID# at the top of the board to help interested viewers to find it. This
is especially important if you are a student and are interested in the
student poster prize! Adding email information is helpful in case
people
want to contact you later.
- Prepare text and figures so
they are
legible
from a distance of 2 meters away.
- A good poster tells a story
that can
be easily
followed with the figures. Do not use too much text. Feel free to add
arrows,
lines, circles to highlight important features.
- The judging criteria (see
below) for
the student
poster award may help you in making a good poster (even if you aren't a
student).
- You may wish to include a
photo of
yourself
so that interested people can find you later in the conference.
4. Judging Criteria for Student Posters (used at Vancouver Congress 2005)
Judging criteria will include:
Individual Component- Does the title accurately
describe
the
subject?
- Does the abstract concisely
state
the
objectives,
describe the methods, summarize the results, state the conclusion, and
motivate interest?
- Does the introduction
provide
adequate
background,
context, and justification?
- Are methods clearly described with appropriate detail?
- Structure and organization:
Is
there a
logical
development from the purpose through the methods, analysis, and
conclusions?
Is this comprehensible to an observer not engaged in this work?
- Originality: Unique or
innovative
methods,
concepts, interpretations?
- Technical Merit: Do the
results
agree
with
the interpretation?
- Analytical Merit: Are the study design and analysis methods appropriate?
- Visually easy to see and
understand?
- Are questions answered directly, honestly, appropriately?
www.cbsnews.com/ quick-rules-to-make-your-presentation-better
Presentations are a golden opportunity to get decision-makers on board with your agenda. Unfortunately, the average business presentation is usually boring or irritating or both. (See "Top 10 Reasons Your Presentations Sucks.") Here are twenty quick rules (based upon conversations with presentation gurus Terri Sjodin and Stephen M. Kosslyn) that will make your presentation more memorable and more convincing:
THE FORMAT:
- RULE #1: Prepare thoroughly by researching the audience.
- RULE #2: Select a slide background that's unobtrusive.
- RULE #3: Use a simple font that's easy to read.
- RULE #4: Have a cover slide identifies the audience and the event.
- RULE #5: Use color fonts and boldface only to highlight what's important.
- RULE #6: Use only simple graphics that highlight what's important.
- RULE #7: Limit each slide's text so it can read 30 seconds or less.
- RULE #8: Make sure every slide be read from the back of the room.
- RULE #9: Eliminate ALL UPPERCASE, underlining and italics.
- RULE #10: Have an opening statement captures attention.
- RULE #11: Use words that persuade rather than lecture.
- RULE #12: Support ALL your statements with hard evidence.
- RULE #13: Remove all the biz-blab and jargon.
- RULE #14: Only use anecdotes or analogies that are vivid.
- RULE #15: Rehearse the presentation until you're comfortable.
- RULE #16: Be enthusiastic about the message you're conveying.
- RULE #17: Be confident that the presentation will win business.
- RULE #18: Prepare yourself to answer likely questions.
- RULE #19: Use the time effectively and appropriately.
- RULE #20: Always end with clear call to action.
For more on sales presentations, check out:
- How to Give a Killer Sales Presentation (in 6 Easy Steps)
- Top 10 Reasons Your Presentations Sucks (Funny!)
12 tips for creating better PowerPoint presentations
Ever
wonder how to create a good PowerPoint presentation? Creating
professional, unique PowerPoint presentations with the latest version of
Microsoft Office is much easier than you think. This article will help
you find the tools to create exactly the presentation you want.
Read
on for PowerPoint presentation tips, to learn about PowerPoint
templates and PowerPoint backgrounds, and get advice about outlines,
communication skills, and how to maximize your Microsoft software.
You’ll also find time-saving tips, not to mention three key guidelines
for creating effective presentations:- Grab viewers' attention
- Clearly communicate your information
- Stay in control of your presentation
Grab viewers' attention
Creating slides that grab viewers’ attention is not about fitting as much as you can on the screen. It's about using the space on your slides effectively. Don't crowd your slides, and only include elements that contribute to the points you want to make. When you use graphics on a slide, choose images that serve a purpose (such as a chart or diagram that displays a direct benefit of your idea). Compare the slides that follow, for example. Two versions of the same content: The simple graphic replaces much of the text and makes a much stronger point.
1. Select or create your own theme.
Themes are the evolution of design templates in PowerPoint, but they're also much more than that. Themes were introduced in Microsoft Office 2007 to help you easily create the right look for your presentations and to coordinate all of your Microsoft Office documents almost instantly.A theme is a coordinated set of fonts, colors, and graphic effects that you can apply to your entire document with just a click. The same themes are available for your Microsoft PowerPoint presentations, Microsoft Word documents, Microsoft Excel workbooks, and even your Microsoft Outlook email messages (and, in Office 2010, your Microsoft Access database forms and reports), so it's easy to create your own personal or business branding throughout all of your documents.
In PowerPoint, the theme also includes the slide master, slide layouts (and slide background options).
 Five
versions of the same slide: It took just one click to apply a theme
that changed the fonts, colors, graphic effects, and design for each
slide shown here. Clockwise from the top are the Office (default),
Adjacency, Couture, Newsprint, and Slipstream themes.
Five
versions of the same slide: It took just one click to apply a theme
that changed the fonts, colors, graphic effects, and design for each
slide shown here. Clockwise from the top are the Office (default),
Adjacency, Couture, Newsprint, and Slipstream themes.- In the PowerPoint Ribbon (at the top of your screen), find many built-in themes on the Design tab. To preview a theme, in the Themes gallery, simply hover your pointer over it. In Office 2010, you also see a selection of themes in this gallery that are automatically updated periodically from Office.com.
- Using the galleries on the Design tab, you can also mix and match a slide design with different theme colors, fonts, and effects to quickly create your own look.
You can even easily create a completely custom theme. PowerPoint includes a large selection of themes.
Learn how to customize and save a theme. (Note that the link provided is for Office 2010 but also applies to Office 2007.) Create a design template in PowerPoint 2003.
2. Use video and audio to convey your message more effectively.
Dynamic content, such as a brief video that illustrates an important point, is a great way to engage your audience. Using audio that helps convey your message, like recorded narration (you can add this to slides when sending your presentation to others to view), can also help keep your slides clean and approachable.In PowerPoint 2010, video you insert from your files is now embedded by default, so you don't have to include multiple files when sharing your presentation electronically. You can also customize your embedded videos with easy-to-use tools, such as video trim, fades, and effects. And with PowerPoint 2010, you can insert a video that you've uploaded to a website to play directly in your presentation.
- Learn about working with video:
- Learn about recording narrations and slide timings:
- Learn more about working with audio:
3. Use graphics to emphasize key points
A well-chosen chart or diagram can often convey much more to your audience than can boring bulleted text. Fortunately, creating charts and graphics has never been easier. In Office 2010 and Office 2007, Office graphics coordinate automatically with the active theme in your presentation.- If Excel is installed on your computer, you
automatically get the power of Excel charts when you create a chart in
PowerPoint. Just click the Chart icon on any content placeholder in the PowerPoint presentation to create a chart.
 When
your chart is created, an Excel worksheet opens, and you can add and
edit your data. And when you select the chart in your document, you see
the Chart Tools Design, Layout, and Format tabs that make it easy to format and edit your chart. Find chart styles on the Design tab that automatically coordinate with your active document theme. Learn more about working with charts:
When
your chart is created, an Excel worksheet opens, and you can add and
edit your data. And when you select the chart in your document, you see
the Chart Tools Design, Layout, and Format tabs that make it easy to format and edit your chart. Find chart styles on the Design tab that automatically coordinate with your active document theme. Learn more about working with charts:
SmartArt graphics, introduced in Office 2007, enable you to create a professional-quality diagram as easily as you can type a bulleted list. Just type in the SmartArt text pane, and the diagram is automatically built. SmartArt layouts are available for many types of diagrams, ranging from simple lists to process diagrams, organization charts, timelines, and much more.
Click the SmartArt icon on any content placeholder to add a SmartArt graphic.
 When you select a SmartArt diagram, the SmartArt Tools tabs become available on the Ribbon. On the SmartArt Tools Design tab, you can use galleries to select a style that coordinates with the effects of your theme and you can choose from several color options that also coordinate with your theme. You can even select a different SmartArt layout to apply to your active diagram. The layout is updated, but your content and formatting remain. And you can point to options in any of those galleries to see a preview of your selection on your active graphic—before you apply it.
 When
you type in the text pane, SmartArt adds your text to the graphic.
Press Enter to add a new shape or content at the same level, and then
press the Tab key to create a subshape or subcontent, as shown here.
When
you type in the text pane, SmartArt adds your text to the graphic.
Press Enter to add a new shape or content at the same level, and then
press the Tab key to create a subshape or subcontent, as shown here.
Notes:
- To convert a bulleted list to a SmartArt graphic, right-click in the list, point to Convert to SmartArt, and then point to a layout to see a preview of the diagram on your active slide or click to apply the layout of your choice.
- In Office 2010, dozens of additional SmartArt graphics are available, including more organization chart and picture layouts, along with improved tools for working with picture diagrams.
4. Use animations and transitions wisely.
Having text and graphics appear on screen just when you need them can be a nice touch. However, overdoing animation can detract from your presentation's content.- To emphasize your points without
overwhelming your audience, limit animation to key points and use
consistent animation choices throughout the presentation.
Customize, preview, and apply animations directly from the Animations tab in PowerPoint 2010. In PowerPoint 2007, go to the Animations tab and find the Custom Animation pane.
Note: Animation effects in PowerPoint 2010 are improved to provide more realistic movement. You can also trigger animation of an object when you reach a specific point in audio or video playback. Watch a video on how to trigger animations in PowerPoint 2010 and one on how to organize a slide deck into sections. - Consistent or complementary choices in slide transitions can also provide a professional touch and help prevent distractions.
Customize, preview, and apply transitions from the Transitions tab in PowerPoint 2010 or the Animations tab in PowerPoint 2007.
 PowerPoint
2010 adds several new three-dimensional slide transitions with stunning
visual effects, such as the gallery transition (shown here).
PowerPoint
2010 adds several new three-dimensional slide transitions with stunning
visual effects, such as the gallery transition (shown here).Clearly communicate your information
Presentation can make a world of difference, and PowerPoint provides a host of tools for keeping your slides consistent, precise, professional, and clear. You might be surprised how using the slide master and layout formatting, for instance, can take you from basic to brilliant. Two
versions of the same content: The version on the right uses the slide
master and layout formatting in the presentation theme for a more
organized, readable slide.
Two
versions of the same content: The version on the right uses the slide
master and layout formatting in the presentation theme for a more
organized, readable slide.5. Start by outlining your presentation.
Take the time to outline your presentation before you create your slides. Doing so can save time and help you give a more clear and effective presentation.You can create your outline by typing a slide title and bullet points for your main topics on each slide. But you can also use the Outline pane to type your entire presentation outline in one window and add slides to your presentation as you go. To do this:
- In Normal view, on the left of your PowerPoint screen, in the Slides pane, click the Outline tab. (If you don't see the Slides pane, on the View tab, click Normal.)
- Notice that a slide number and icon appear for your first slide. Type a title to the right of the icon, and then press Enter to create your next slide.
- Press the Tab key to demote the text level and add points to the current slide in your outline. Or press Shift+Tab to promote the text level and add an additional slide.
 The Outline pane is available in both PowerPoint 2010 (shown here) and PowerPoint 2007.
6. Use masters and layouts to save time and help get better results.
The slide master is one of the most important PowerPoint tools for creating easy-to-use, great-looking presentations. The master gives you a central place to add content and formatting that you want to appear on all (or most) of your slides. Formatting and layout changes on the slide master automatically update throughout the slide layouts in your presentation, saving you a tremendous amount of time and effort and helping to keep your slides consistent. For example, place your logo on the slide master, and it will appear on all slides in the presentation.- A
slide master includes a set of slide layouts for different types of
content. Nine slide layouts are available by default in the Home
tab, and they are formatted based on the slide master. You can
customize any of these layouts individually and even create your own
custom slide layouts.
 The
Layout gallery displays the name of the active theme at the top and
provides thumbnails of each available slide layout. When you add custom
layouts to your presentation, they also appear in this gallery.
The
Layout gallery displays the name of the active theme at the top and
provides thumbnails of each available slide layout. When you add custom
layouts to your presentation, they also appear in this gallery. - If you just need a single slide that doesn't fit an existing slide layout and won't need to be reused, you can use the Title Only or Blank slide layout and create your own unique slide. But if you will reuse a layout for multiple slides in the same (or another) presentation, create or customize a slide layout to avoid doing the same work multiple times and to keep your slides looking professional and consistent.
Learn to create or customize the slide master:
Notes:
- To hide graphics that you place on the master for just one slide, on the Design tab, in the Background group, click Hide Background Graphics.
- Masters are also available for formatting notes pages and handouts. Find these options on the View tab.
7. Consider differences between print and on-screen presentations.
Presentations designed to be viewed on screen don't always work well when you print them. Dark backgrounds that look good on slides, for example, rarely print well. Similarly, footer content that you need in print is likely to be distracting on screen. Fortunately, PowerPoint makes it easy to switch between print and screen presentation options. Here are two features that can help:- When you format your presentation using a theme, slide master, and layouts, as described earlier in this article, you can change from a light background to a dark background in just a click, and text on your slides automatically changes color to be visible on the new background. Find the slide background gallery on the Design tab, in the Background group.
- To quickly show or hide footer, page number, and date content on all slides at once, on the Insert tab, click Header & Footer. In the Header & Footer dialog box, choose to display them or hide them, and then click Apply to All. ((Note
that if you remove the footer, page number, or date placeholder on any
slide, the slide will not display this content—even if you turn it on in
this dialog box.))

8. Use notes pages and handouts to help deliver the story.
Use the Notes pane that appears below the slide in Normal view to write notes to yourself for your presentation or to create notes that you can print for your viewers instead of crowding your slides with text. You can also format and print handouts that contain up to nine slides per page.Create and print notes pages:
Create and print handouts:
Stay in control of your presentations
Custom colors, layouts, and graphics can do a lot for your presentation. But a misaligned flowchart or a presentation that crashes on your client's computer isn't likely to make the impression you want. For example, look at these two timeline graphic images: Two
versions of the same content: Nudging and fussing to create the graphic
on the left took about an hour, and it's far from perfect. Using
PowerPoint tools, it took just a few minutes to create the flawless
diagram on the right.
Two
versions of the same content: Nudging and fussing to create the graphic
on the left took about an hour, and it's far from perfect. Using
PowerPoint tools, it took just a few minutes to create the flawless
diagram on the right.9. Keep file size manageable.
A common cause of stress when you work in PowerPoint is that the file becomes too large to edit or for the presentation to run smoothly. Fortunately, this problem is easy to avoid by compressing the media in your files and using native PowerPoint features whenever possible (such as tables, charts, SmartArt graphics, and shapes) instead of importing and embedding objects from other programs.Learn about compressing pictures in your presentations:
Note: PowerPoint 2010 also gives you the ability to compress the embedded video and audio files in your presentation. Learn about compressing media.
10. Use the tools available to get it right the first time.
You've already seen in this article that you can use features like slide layouts to quickly create consistent slides or use tools such as SmartArt graphics to create a professional-quality graphic in no time. But when you need to do your own thing—and that thing doesn't belong on a slide layout or fit an available graphic style—PowerPoint still provides tools to save you time and improve your results.- Learn about working with alignment tools in PowerPoint 2007.
- PowerPoint 2010 makes layout and alignment even easier with new Smart Guides. Learn about alignment tools in PowerPoint 2010, directly from the PowerPoint team.
11. Turn off (or manage) AutoCorrect layout options.
PowerPoint provides several automatic formatting options to help your slides conform to the provided layouts. They can be big time-savers, but they can also be frustrating if you're not using them intentionally and if they cause formatting (such as the font size in slide titles) to become inconsistent from one slide to the next. If you don't want your text to shrink automatically to fit content, you can easily disable those features in the AutoCorrect Options dialog box.- In PowerPoint 2010, click the File tab to open Backstage view, and then click Options. In PowerPoint 2007, click the Microsoft Office button and then click PowerPoint Options.
- On the Proofing tab, click AutoCorrect Options.
- On the AutoFormat As You Type tab, clear the AutoFit title text to placeholder and AutoFit body text to placeholder check boxes.
12. Know exactly what your viewers will see.
When you want to be sure that what you send is what viewers will see, you can save the presentation in the PowerPoint slide show format so that the show starts for the recipients as soon as they open the file. But some variables, such as whether media will play correctly on the recipient's computer, may still affect what viewers see.PowerPoint 2010 introduces a new feature that makes it easy to share your presentation perfectly with almost anyone, anywhere. You can now create a high-quality video of your presentation, complete with your saved narration and timings, in just a few clicks. PowerPoint creates the video in the background while you keep working. Read how to create a video of your presentation, or watch a video about it.
 Stephanie Krieger is a Microsoft Office MVP as well as author of the books Advanced Microsoft Office Documents 2007 Edition Inside Out and Microsoft Office Document Designer.
As a professional document consultant, she has helped many global
companies develop enterprise solutions for Microsoft Office on both
platforms and taught numerous professionals to build great documents by
understanding how the Office programs “think.” Stephanie writes and
creates content for several pages across the Microsoft web site. Visit
her blog, Arouet Dot Net, for Microsoft Office tips as well as information about new and upcoming publications and webcasts.
Stephanie Krieger is a Microsoft Office MVP as well as author of the books Advanced Microsoft Office Documents 2007 Edition Inside Out and Microsoft Office Document Designer.
As a professional document consultant, she has helped many global
companies develop enterprise solutions for Microsoft Office on both
platforms and taught numerous professionals to build great documents by
understanding how the Office programs “think.” Stephanie writes and
creates content for several pages across the Microsoft web site. Visit
her blog, Arouet Dot Net, for Microsoft Office tips as well as information about new and upcoming publications and webcasts.


 Firefox
No comments:
Post a Comment