- Make Bootable USB [OSx86, Snow Leopard]
- Download, Install Chameleon RC4 Bootloader
- Understanding MAC OSx86 for Dummies
Source [Totally copied]
Supported Hardware: The distribution is created out of Snow Leopard 10A421 works only with Intel. Following processors are supported: Xeon 5100, 5300, 3000 Series, Core 2 Duo, Core 2 Extreme, Core 2 Quad, Core i7, Core i5, Pentium Dual Core (NOT “Pentium D”), Celeron 4xx Sequence Conroe-L, Celeron Dual Core, E1200, Celeron M 500 series, Intel Atom (netbooks)
Disclaimer: Apple prohibits installing Mac on PC. But a genuine Snow Leopard before even attempting to damage the legal issues. We are not responsible for any kind of issues you might get into, this guide is for information purposes only.
Our Previous Hackintosh Guides:
Download: The Distro is very easy to Find on Torrentz or Piratebay. Google is no evil 
Step 1. Burn the ISO Image to DVD.
Step 2. You’ve got to make some small adjustments to your BIOS.
- Boot Priority: Enable USB Boot, and set USB thumb drive the highest priority for Boot.
- AHCI Mode: SATA RAID/AHCI Mode should be set to AHCI
- ACPI Power mode: Set it to S3(STR).
Boot from your DVD, darwin bootloader will start. Press F8 and enter “-v” to enter verbose mode.
Tip: If you get any errors in this step, its highly possible that your DVD ROM/drive is not working properly. Try burning another disc and Rewritable is not recommended.
Step 3. You should be able to boot into the GUI installer with no trouble. Choose your language, and then Accept the Instructions/TOS appear on the screen. (you can ignore them)
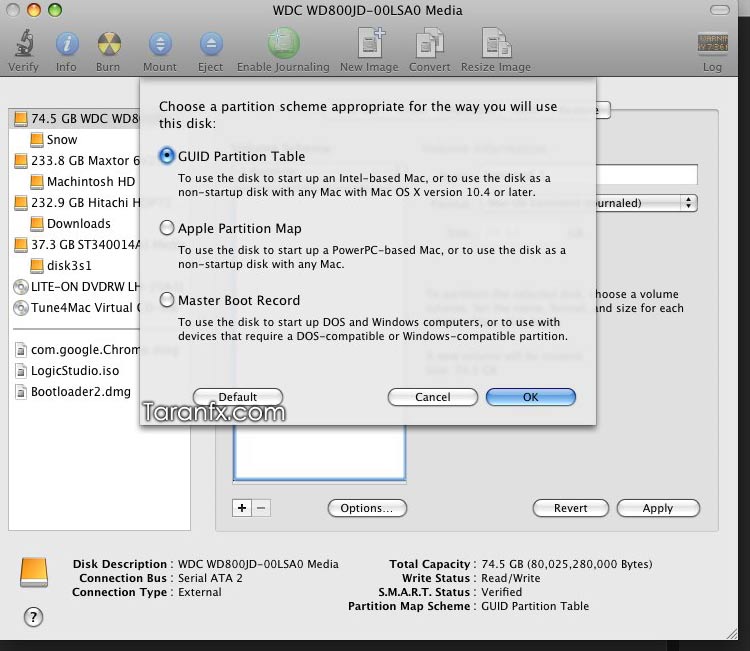
Step 4. At this stage, it expects a partition to install Mac on. Let’s quickly create new partition or Format existing one. Tools > Open disk utility and select the partition yo want to format. Click Erase tab and select “Mac OS Journaled” as the Filesystem, give it a name like “SnowFX” and click ”erase”.
If this hard disk is brand new, you can create new partitions as shown below:
Step 5. Close the Disk Utility and open the Terminal from tools. Enter the followng Command on the Terminal:
cd /
sh MakeDSDT SnowLeopardPartitionName
When it asks to press any key, do so. Then, when it asks for Darwin, Windows, etc. Write “0″ i.e. “zero” and press enter. This chooses Darwin.
Step 6. Now you are ready to start the installation to “SnowFX”. On the next screen, Click Customize and select all of the shown options. (by default two of them are unselected). One of the unselected box actually has a driver patch IOATAFamily. Hit OK and continue with the install.
Step 7. Next, it will start validating DVD source, you can skip that. The further automated installation takes around 15 – 20 mins, so sit back and relax.
Step 8. After the installation is complete, reboot with DVD ejected. Hit F8 on Darwin boot loader and enter “-v”. Probably, Snow Leopard will try to start and boom there is a Kernel Panic!!! Chill, Don’t Panic, it`s easy to fix, this was the bug that was supposed to be handled in the patch I mentioned earlier in Step 6. Their patch didn’t work, but we have a solution, another patch.
Step 9. Now to fix this kernel Panic, you need to get the driver (KEXT) patch in place. Download it here(2 zipped files, extract both of them). Either copy this patch to USB drive and copy to your drive or alternatively you can boot into Windows (using Windows Start-up repair from windows installation disc) and installing MacDrive 8 to read/write Mac drives on Windows.
Note: It is preferable that you do this via USB. Attempt the Windows method ONLY if USB doesn’t work for you. Boot into setup again and instead of installing, open terminal and write these commands
By USB:
cd /Volumes/PenDriveName/FolderWhereYouKextsArePresent
cp -R * /Volumes/SnowFX/System/Library/Extensions/
diskutil repairPermissions /Volumes/SnowFX/System/Library/Extensions
Tip: Replace the files if it already exists int eh destination folder.
Step 10. (only applicable if you chose Windows in step 9) You can copy and paste directly to the specified path if you are doing it via windows, there’s no need for permission repair. The .Patch file goes to IOATAFamily.kext\Contents\MacOS
If you perform the windows method, in step 9, it breaks your Snow Leopard booting. To fix it, Download and install EasyBCD. Open it and hit button that says “Add/Remove Entries”. Click on Mac tab and select “Generic x86 PC” and give any name you want e.g. “Snow Leopard”.
Step 11. Reboot. At Darwin bootloader, press F8, and type -v and Enter.
Step 12. Now the startup Welcome Video is shown and you must be dancing already. “Snow Leopard”
Step 13: To enable DualBoot with Windows, you can run Windows Startup repair from Windows installation disk and thereafter go back to Step 10 to use windows bootloader for Dual booting.
Step 14: (optional)
Fixing Video Graphics to Enable QE/CI:
Download and Install PC EFI v9 Chameleon to correct partition (its one click install) or Follow this guide on Installing Chameleon, and then edit /Library/Preferences/SystemConfiguration/Boot.plist
GraphicsEnableryes
and Reboot. In case you still have problems with graphics get in touch @taranfx.
Note: The first and the foremost thing is to try with chameleon and boot.plist, if that doesn’t work (95% success for Nvidia), proceed below:
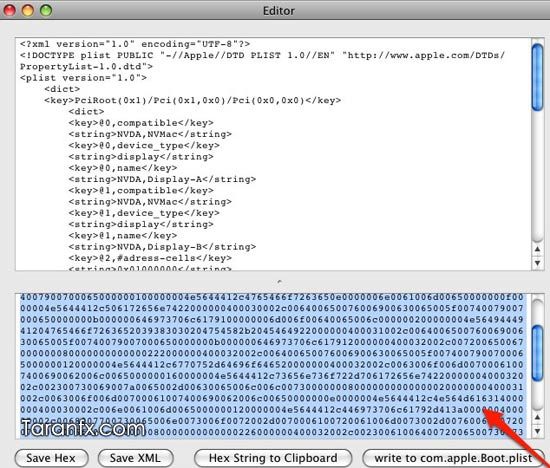
Now only thing you should have missing is the correct Display Resolution. You only need to set EFI strings for your graphic card and its fully functional.
Launch EFiStudio and look for your Display/Video Card through the drop down menu. Click add device and you will see some numbers, “write to com.apple.Boot.plist”.
If you happen to have Nvidia Graphics card, you can follow this insanelyMac flawless guide for NVInject.
For Fixing WiFi: Intel 3945 Wireless Driver for Snow Leopard
I`ll be updating the Guide for all the troubleshooting steps so make sure you check back after a while.
Tip: In case you need quick assistance, contact me on Twitter: @taranfx
Or if you have a doubt, feel free to comment below. I`ll be happy to help in my free time. Feel free to spread the word by giving us a RT.


 Firefox
No comments:
Post a Comment