Extracted from
Thanks for the tutorial!!
Table of Contents
- Introduction
- First Steps
- Extract the boot image from a Windows XP CD
- How to slipstream Windows Service Pack 3
- How To slipstream SATA Drivers Using nLite
- Burn a bootable CD or DVD Using Nero V 7.8
- Burn a bootable CD or DVD using nLite
- Conclusion
Before we can start the process of creating Windows install disc, we first need to gather some software. Below is a list of software that you will need to download and install, as well as CDs that you should have on hand in order to continue.
- An existing copy of Windows XP home, Professional, or Media Center. Unfortunately,
for this step you can not use an OEM CD provided by your computer manufacturer
(Dell, HP, etc).
- Nero Burning Rom or nLite
if you do not have NERO
- ISOBUSTER
- Network
installation copy of Windows XP Service pack 3
- A copy of your SATA drivers from your motherboard Web site if you have a
SATA HDD that requires special drivers.
- A blank writable CD or DVD and a CD/DVD burner.
Extracting the boot image
[...]
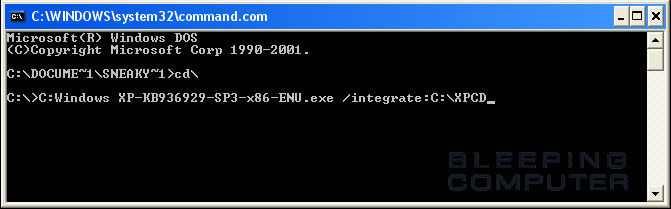
Using the Command Line to slipstream the service pack:
Click on the Start Menu and then select Run. Then type command into the Open: field. Finally, click on the OK button. You will now be at a command prompt where you should type the following bolded lines. After each line, press enter on your keyboard as shown in the figure below.
CD\
C:WindowsXP-KB936929-SP3-x86-ENU.exe /integrate:C:\XPCD
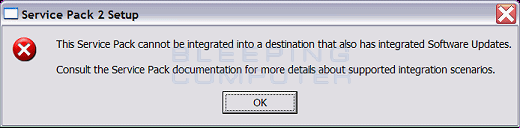
If you are using an OEM Windows XP CD you will receive the following error. This error means that you cannot use this type of CD to create a slipstreamed installation and will not be able to continue with this tutorial.
Now that you are done slipstreaming the service pack using the command line. You should now skip to the section detailing how to slipstream your SATA hard drive drivers. If you are not using a SATA drive you can skip ahead to learn how to burn the DVD.
[...]
How To slipstream SATA Drivers Using nLite
If you have not already installed nLite, you will need to download and install the program first. Next, you will need to download your SATA drivers from your motherboard or computer manufacture's web site. In our example, I will be using VIA raid drivers from Biostar. Once the SATA drivers have been downloaded, you should extract them to a folder on your hard drive. In our example, we have extracted the drivers into the C:\SATA Driver folder.
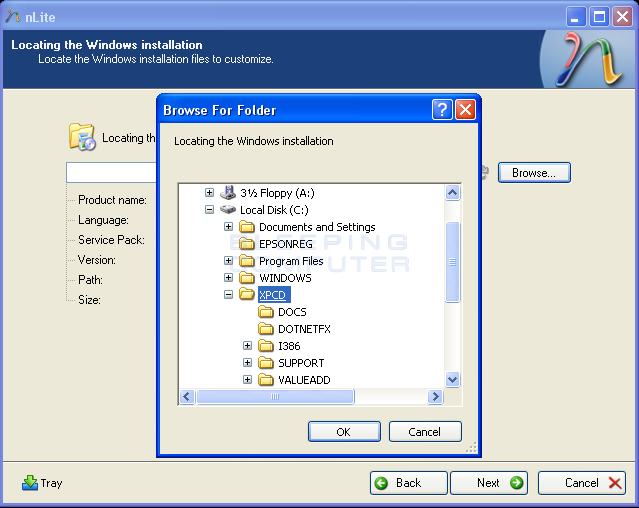
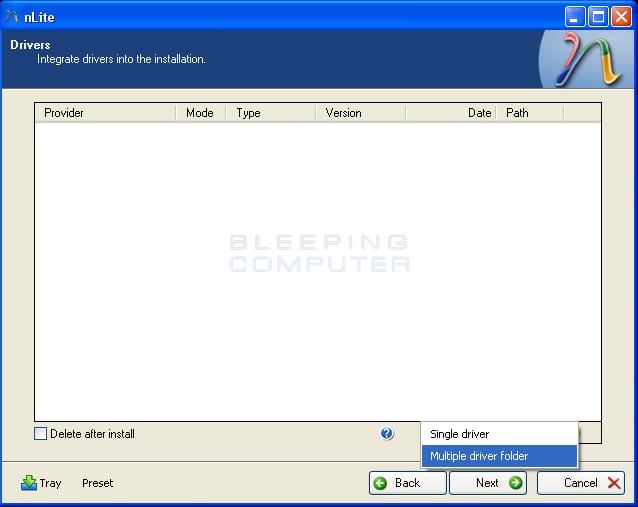
Now that everything is prepared you should start the nLite program. When the program starts, click on the Next button, and then at the next screen, select the Browse button to see a screen similar to the one below.
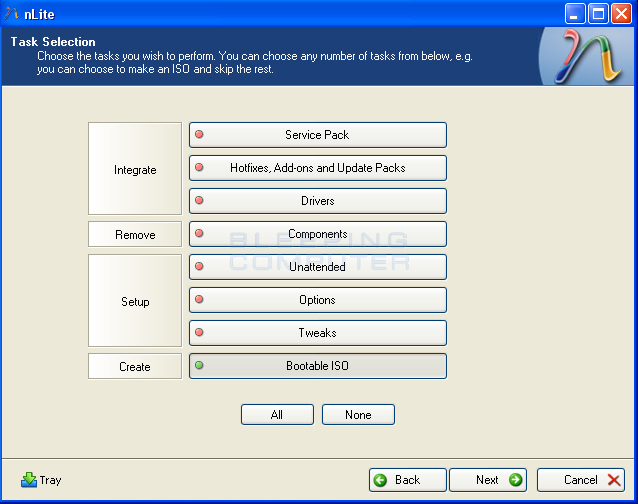
You will now be on the Task Selection screen. Simply click once on the Drivers button so that the circle becomes green as shown in the image below.
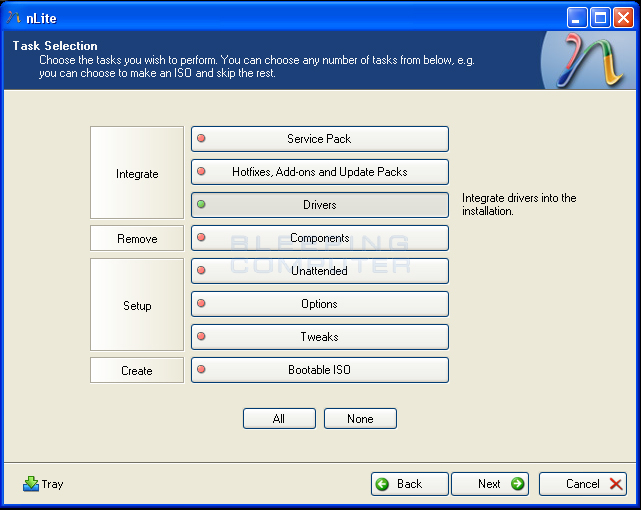
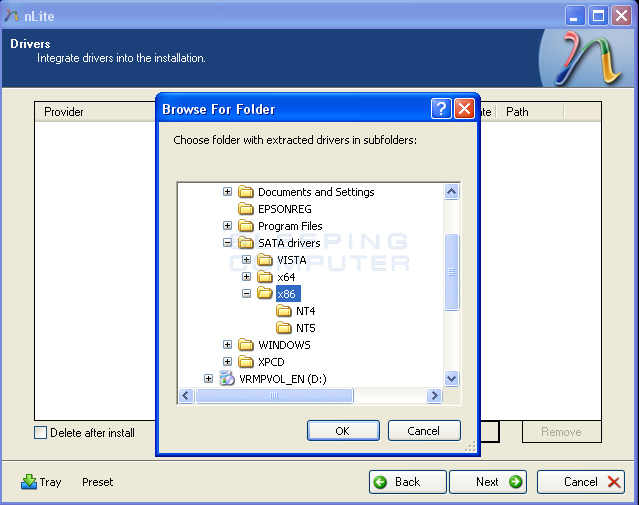
NOTE: If there are drivers for other versions of windows, for example Vista or 64 bit drivers, do not install them as it will cause file load errors. If you do select them, nLite will notify you of the problem.
When done selecting the correct drivers, click on the OK button.
A new screen will appear asking what driver mode you would like to select. At this screen, you should select the Textmode Driver as shown in the image below.
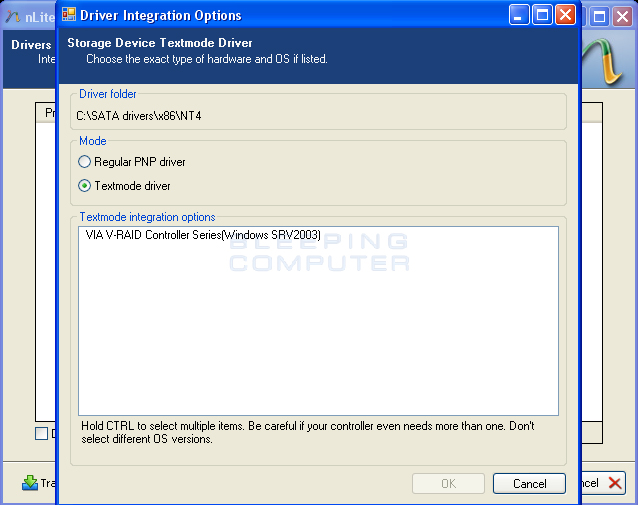
After selecting Textmode Driver you will be at a page listing all the drivers that will be installed. You should click on the Next button and then click on the OK button when it asks if you want to start the process. Your SATA drivers will now be integrated into your Windows files folder. When the process has finished, click on the Next button and then the Finish button.
You are now ready to burn the Windows files to your a bootable DVD. If you will be using Nero to create this DVD, then you can continue to the next section. Otherwise, you can skip ahead to instructions on how to use the free nLite utility to create your DVD.
Burn a bootable CD or DVD Using Nero
Please note that older versions of NERO may not use the same steps as what are outlined in this guide. These steps were created for use with Nero 7 and above.
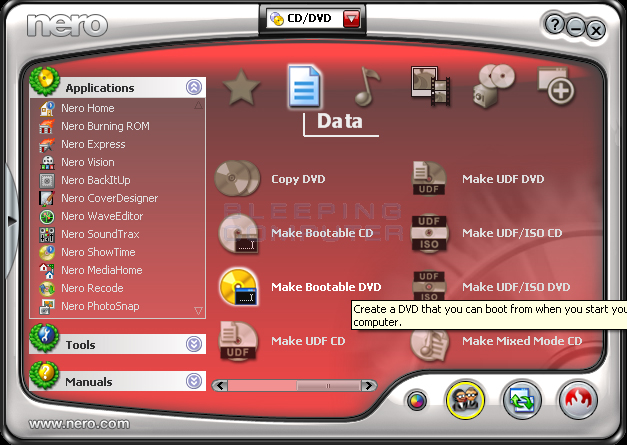
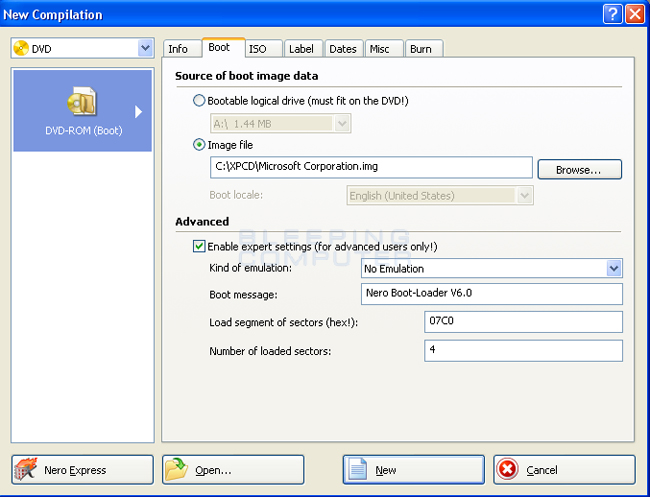
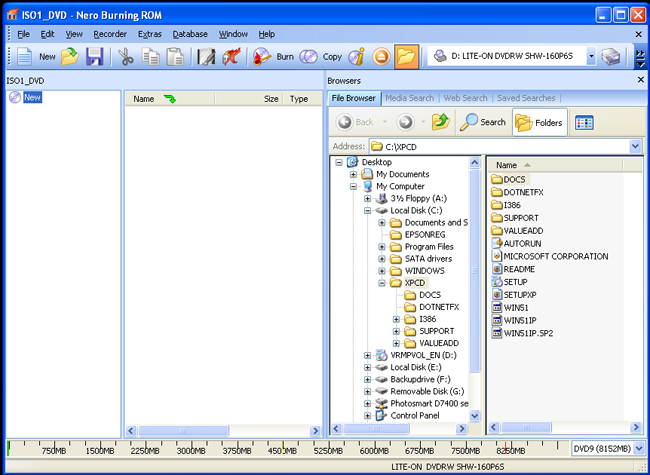
If you own Nero, then start the Nero Burning ROM program. Once started, if you do not see an option labeled Make Bootable DVD, as shown in the image below, you will need to enable the advanced user settings.
Burn a bootable CD or DVD using nLite
If you have not already installed nLite, you will need to download and install the program first and then start it.When the program starts, click on the Next button, and then at the next screen, select the Browse button to see a screen similar to the one below.
You will now be on the Task Selection screen.
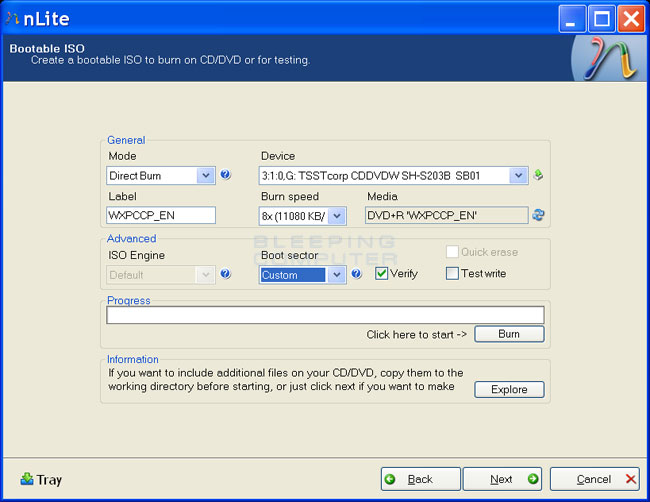
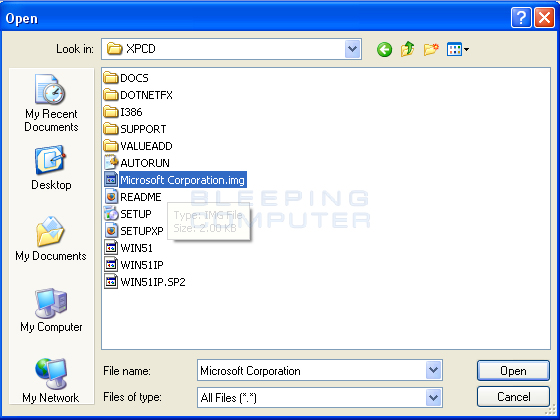
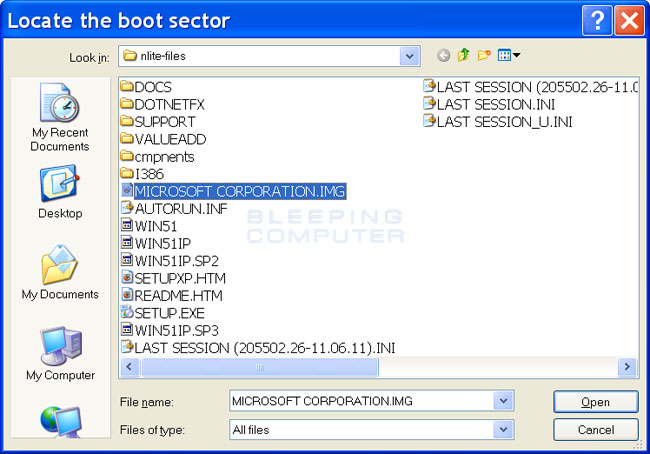
When you have finished configuring these settings, we need to specify our boot image. To do that, change Boot Sector to custom and a window will open asking you to locate your boot sector. You should browse to the folder where you saved the Microsoft Boot image that you extracted using Isobuster in previous steps and select it. Please note, that by default nLite will be looking for .bin or .dat files, so you will need to change Files of type to All Files. Once you do that you will be able to select the MICROSOFT CORPORATION.img boot image as shown in the image below.
Once you have changed all of your settings and selected your boot image, we are ready to create the Windows installation media. To start this process, click on the Burn button. A confirmation prompt will appear asking if you are sure you want to burn the content to the media. You should click on the Yes button to start the process. nLite will now start preparing the content that will be copied to your media. This may take some time, so please be patient. When it has finished preparing the files, nLite will start writing them to your media as shown in the image below.
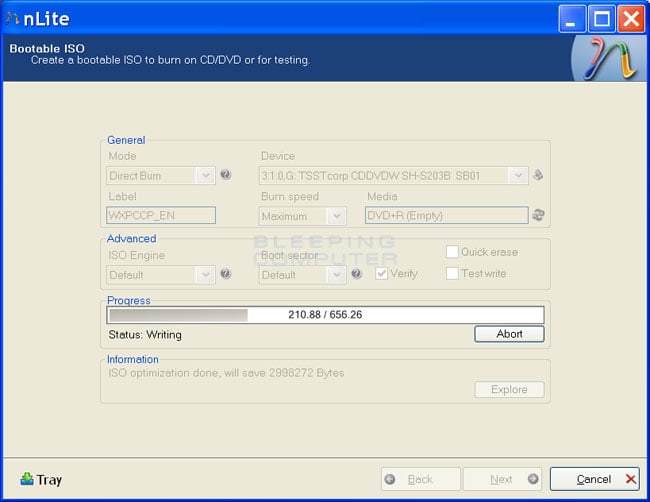
Please be patient while the files are written to your media. When it has finished, you will see a message stating the written files were verified successfully. You can then click on the Next button and then click on the Finish button to close nLite.
You now have a Slipstreamed SP3 CD or DVD!
============= ==============
How to slipstream SATA drivers into Windows XP setup CD, on your dual boot PC with Windows 7 or Vista


 Firefox
No comments:
Post a Comment