Bienvenido! - Willkommen! - Welcome!

Bitácora Técnica de Tux&Cía., Santa Cruz de la Sierra, BO
Bitácora Central: Tux&Cía.
Bitácora de Información Avanzada: Tux&Cía.-Información
May the source be with you!

Tuesday, November 29, 2011

Free and Open Source burner SW


burnaware
cdbxp burner
DeepBurner
ImgBurn
infraRecorder
nero burnlite is now Nero Kwik Burn 11 (free but crippleware)

RMVB en Ubuntu

con Real Player 11 Gold
Helix and RealPlayer Archive
RealPlayer es un reproductor de vídeo que permite visualizar ciertos formatos, especialmente permite streaming desde Internet. 
RealPlayer no es Software Libre pero sí gratuito.
Este reproductor permite visualizar los formatos mas populares, así como el RMVB ya muy popular en taringa y por supuesto en la pagina 
http://download-fanatico.blogspot.com en donde se encuentran buenas pelis.
Para instalarlo primero tendremos que descargarlo de:
https://player.helixcommunity.org/downloads/
Concretamente debemos bajar “RealPlayer 11 Gold -> Installer”.
Una vez descargado, abrimos una terminal en el directorio donde este guardado (o vamos a la carpeta donde esta guardado desde la terminal)y ejecutamos las 2 lineas:
chmod 755 RealPlayer11GOLD.bin
sudo ./RealPlayer11GOLD.bin

Presionamos enter, indicamos que queremos instalarlo en “/usr/local/Realplayer” y presionamos enter a las siguientes preguntas.
Ahora ya podemos ejecutar el programa mediante “Aplicaciones -> Sonido y vídeo -> Real Player 11”.
Dependiendo de nuestra tarjeta de sonido, lo más probable es que tengamos que matar el demonio eSound (ESD) para poder trabajar con Real Player. Abrimos una terminal y ejecutamos:
$ killall esd
Esto hará que no podamos escuchar los sonidos de Gnome ni los reproductores de audio/vídeo, pero podremos trabajar con Real Player.
A mi me ha funcionado correctamente hasta este momento y no tuve que matar el demonio para poder utilizarlo. Manual de instalación:

multimedia and stream online movies players

Source
RealMedia Variable Bitrate (RMVB) is a variable bitrate extension of the RealMedia multimedia container format developed by RealNetworks. Following are the our recommended media play software for RMVB format video. Stream Online Movies is one of the RMVB movide download website.
  • Real Alternative - play RealMedia files without having to install RealPlayer/RealOne Player
  • PowerDVD - Improve the audio and video playback of your DVD movies
  • VLC Media Player - Play audio and video files with this cross-platform media player and streaming server. RealNetworks RealPlayer - Play digital media of various formats 
  • BSPlayer - Windows player for playing back avi, asf, wmv, and mpeg video files or any other file for which you have a codec  
RMVB en Ubuntu con Real Player 11 Gold
k_lite_codec_pack

You are trying to play a High Quality Video

The worst shitty malware from  freaktorrents.info/unlock
THIS TORRENT IS FAKE, DO NOT DOWNLOAD IT, THE VIDEO DISPLAYS A MESSAGE TO TAKE YOU TO DOWNLOAD VLC MEDIA PLAYER FROM A FAKE SITE AND THE ANTIVIRUS DETECTED ADWARE FROM THE FILE THAT WAS TRYING TO AUTOINSTALL
I ALREADY HAVE VLC MEDIA PLAYER 1.1.11 INSTALLED ORIGINALLY FROM VIDEOLAN.ORG SO I DONT SEE THE POINT IN DOWNLOAD THE ALLEGGED MEDIA PLAYER AGAIN...
AND FOR THOSE WHO POST THIS IS REAL, CHECK YOUR COMPUTERS INFECTED WITH ADWARE, SPYWARE, TROJANS, ETC... !!
Fake VLC / Windows Media video file (sample)
To those who still believe that downloading a file from "common downloadZ websites", here is (another?) kindda sample of how dangerous it can be for your computer...

First, the video file displays the following message in the Windows Media Player (or in VLC, if it's your default mediaplayer):


But at the same time, it will launch your default web browser:


The text "you are going to play a High Quality Video" seems only to be there to tempt the user...
As you can see, the link at the bottom of the page points to: freaktorrents .info/unlock/downloadvlc.
In fact, it will drive the user to an old vlc player to download and install.. with an special program as extra and all is ueber-shit!
===============SHIT================
Your Download Will Be Available In A Moment
To continue to your file we need you to take just a moment to complete these steps.
1. Choose one of the four offers below. Offers are usually short surveys or signup forms.
2. Fill out the offer with valid information and a working email address. If your information is detected as fake you will not be given access, and could be permanently locked out.
3. Once you've completed the offer, the Download button will turn green and be enabled.Tonto o genio?
Haz un test simple para aveiguar si eres tonto o genio.
Tonto o Genio?
Averigualo con este simple test
Test de inteligencia - ganha un iPad!
Bienvenido al test oficial de inteligencia - ganha un iPad!
Cuánto deberías pesar?
Ingresa tus datos personales para descubrir tu peso ideal.

 ===============SHIT===============
The Blind Side 2009 BD-RiP [unrated] - DivX (download torrent)
taringa.net/ Peliculas-con-extension-MAX-son-una-ESTAFA
Cuidado con esas pelis que son una estafa, estas peliculas en realidad son una broma y la verdad no se si encubren algun malware, en mi caso descargue este archivo:
The.Rite.2011.DVDRip.XviD.MAX
de la web:
http://top-taringa.blogspot.com/2011...11-avi-hd.html
use el google buscando "el rito taringa" y la empece a descargar
demoro como hora y 40, y se guardo con extension MAX, luego cuando quise abrirla con el media player, mostraba la introduccion de las peliculas y un mensaje que decia Error de Codec y que se debia reproducir en windows media player
Inmediatamente despues se abrio una ventana del explorer con la pagina
http://freaktorrents.info/unlock/
que indica que debes pagar para descargar el codec
y cuando quise entrar a ver como bajarlo aparecio un gif animado de dos homosexuales en pleno acto.
No me quise quedar con la intriga y baje el programa MediaInfo de
mediainfo.sourceforge.net/es

MediaInfo provee información técnica y de la etiqueta sobre un archivo video o audio.
Éste es un software libre (gratuito y de libre acceso al código fuente: GPL o licencia LGPL)

Info
  • General: título, autor, director, álbum, número de pista, fecha, duración...
  • Video: códec, aspecto, fps, bitrate...
  • Audio: códec, frecuencia de muestreo, canales, lenguaje, bitrate...
  • Texto: idioma de subtítulo
  • Capítulos: número de capítulos, lista de capítulos
Formatos soportados
  • Video: MKV, OGM, AVI, DivX, WMV, QuickTime, Real, MPEG-1, MPEG-2, MPEG-4, DVD (VOB)...
    (Códecs: DivX, XviD, MSMPEG4, ASP, H.264, AVC...)
  • Audio: OGG, MP3, WAV, RA, AC3, DTS, AAC, M4A, AU, AIFF...
  • Subtítulos: SRT, SSA, ASS, SAMI...
Descargar
(version 0.7.51, Interfaz gráfica, con instalador, para Windows, x64, 3 MB)
Nota 1: puede supervisar o ver las notas de la versión en la página del proyecto en SourceForge
Nota 2: hay otras versiones (OS, interfaz...) disponibles (Microsoft Windows Mac OS Debian Ubuntu RedHat Entreprise Linux CentOS Fedora openSUSE Mandriva ArchLinux)
Resultado de MediaInfo:
General
Nombre completo : KeliculasThe.Rite.2011.DVDRip.XviD.MAX
Formato : Windows Media
Tamaño del archivo : 887MB
Duración : 19seg.
Modo de tasa de bits : Constante
Tasa de bits total : 381Mbps
Tasa de bits máxima : 1 516Kbps
Fecha de codificación : UTC 2009-06-15 05:30:33.359
Application : Windows Movie Maker 2.1.4026.0
FIJENSE EN LA DURACION DE 19 seg, justo lo que se ve como introduccion
Hasta ahora no se si ha dejado algun bicho extraño en la PC pero tengan mucho cuidado. Apenas termine este post formateo mi maquina ...

Monday, November 28, 2011

Event ID 1020 Source: TermServSessDir

The "Session Directory Computers" group is empty, you must add the computer accounts of Terminal Servers into this group for the Session Directory Service to work properly.
Source
To Do This: Do it on the Session Directory Machine:
1. Start - Execute
gpedit.msc
2. Browse to Local Computer Policy\Computer Configuration\Windows
Settings\Security Settings\Local Policies\User Rights Assignment
3. Open up "Access this computer from the network"
4. Add in the Terminal Servers that will be connecting to this Session
Directory Server
===============

Source
Populate the Session Directory Computers group
To resolve this issue, add the computer accounts for the terminal servers that will be members of the load-balanced terminal server farm to the Session Directory Computers local group on the TS Session Broker server.
To perform this procedure, you must have membership in the local Administrators group, or you must have been delegated the appropriate authority.
To add computer accounts for terminal servers to the Session Directory Computers local group:
  1. On the TS Session Broker server, open the Local Users and Groups snap-in. To open Local Users and Groups, click Start, click Run, type lusrmgr.msc, and then click OK.
  2. If the User Account Control dialog box appears, confirm that the action it displays is what you want, and then click Continue.
  3. In the left pane, click Groups.
  4. In the right pane, right-click the Session Directory Computers group, and then click Properties.
  5. Click Add.
  6. In the Select Users, Computers, or Groups dialog box, click Object Types.
  7. Select the Computers check box, and then click OK.
  8. Locate and then add the computer account for each terminal server that will use the TS Session Broker server.
  9. Click OK to close the Select Users, Computers, or Groups dialog box, and then click OK to close the Session Directory Computers Properties dialog box.
Verify
To verify that the Session Directory Computers local group on the TS Session Broker server is configured correctly, ensure both of the following:
  • The Session Directory Computers local group exists on the TS Session Broker server.
  • The computer accounts of the terminal servers that use the TS Session Broker server are members of the group.
To perform this procedure, you must have membership in the local Administrators group, or you must have been delegated the appropriate authority.
To check the configuration of the Session Directory Computers local group:
  1. On the TS Session Broker server, open the Local Users and Groups snap-in. To open Local Users and Groups, click Start, click Run, type lusrmgr.msc, and then click OK.
  2. If the User Account Control dialog box appears, confirm that the action it displays is what you want, and then click Continue.
  3. In the left pane, click Groups. Ensure that the Session Directory Computers group is listed.
  4. In the right pane, right-click the Session Directory Computers group, and then click Properties.
  5. Under Members, ensure that the computer accounts for all the terminal servers that use the TS Session Broker server are listed.
Related Management Information
TS Session Broker Security Group Configuration
Terminal Services
http://support.microsoft.com/kb/823659

epson pm B271a

http://driverscollection.com/_43025521935c23144396c31f375/Download-Driver-for-Epson-PictureMate-Easy-Photo-Print-v.2.23.01-for-Windows-Vista-XP-64-bit-Media-Center-2000-7-free

Epson PictureMate, Drivers & Downloads

Sunday, November 27, 2011

DistroWatch: debian fedora mint opensuse ubuntu

Source

Ubuntu Linux losing popularity fast. New Unity interface to blame?

Don’t panic Ubuntu fans but your favorite desktop Linux distribution has fallen to fourth place in DistroWatch’s latest ranking.
Ubuntu has been overtaken by Fedora, Mint, and openSUSE. Mint now holds the number one spot in all of DistroWatch’s rankings going back at least a year, which leads us to wonder why.
One reason behind this reversal of fortune for Ubuntu could be the change of default interface in version 11.04 or “Natty Narwhal”, released in April 2011. With the new Ubuntu came Unity, an interface previously seen in Ubuntu Netbook Edition, and Gnome was relegated to an option.
There has been quite a bit of controversy surrounding Unity. Now it seems like Canonical, the company behind Ubuntu, may be paying the price for the change. Let’s look at the numbers.

Mint’s rise to the top

We charted the top distributions since 2005, as ranked by DistroWatch. In doing so, we excluded a couple of distributions that only made a brief appearance in the top five: Mandriva dropped off after 2006, PCLinuxOS only made an appearance in 2007 and 2008, and Sabayon only showed up during 2007.
Here’s what it looks like from 2005 until now for the current top five Linux distributions:

Friday, November 25, 2011

Click-N-Type Portable

Source
Download CNTPortable.exe at the left, run it and follow the instructions: Now Windows 7 compatible.
  • Select the Portable Drive Letter (eg. X:\) of the device you're going to put the "Click-N-Type" folder on.
  • If you are using the PortableApps Launcher, install to its folder (eg. X:\PortableApps), rather that the drive root.
  • Then click the "Unzip" button at the upper right.
  • You may now use your Application Launcher to start Portable Click-N-Type.

Click-N-TypePortable will create a "\Click-N-Type" folder in the device or folder you chose. This version of Click-N-Type is portable and stealth. You may use this with any Application Launcher.

Some we've tried are:

PStart from http://www.pegtop.net/start/
Portable Start Menu
from http://www.aignes.com/psmenu.htm
PortableApps
from http://portableapps.com/

If you don't see Click-N-Type on your Launcher's menu, you may have to refresh its known Apps, restart the Launcher or manually tell it that the "...\Click-N-Type\Click-N-Type.exe" program exists on your device. If you are using the PortableApps.com launcher, make sure you have installed Click-N-Type to "X:\PortableApps", where "X:" is your portable drive.

You may then carry your portable device to any relatively new Windows computer, and launch Click-N-Type from the portable drive. All your settings and preferences will be remembered no matter what Drive Letter gets assigned to your portable device. No files or registry entries are left behind, provided you close Click-N-Type, and remove the device, before physically pulling it from the computer.

Special considerations for Click-N-Type Portable:
  • When installing Add-ons such as Word Prediction, Spoken Keys, Language packs, etc., launch Click-N-Type and leave it running while installing the Add-on. This is so the Add-on installer knows where to find the Click-N-Type Drive and Folder.  Then stop and restart Click-N-Type.
  • You will note that some options are disabled, that are available with the normal Installed version, such as a Shortcut on the Desktop and running at system startup, because of the obvious removable device restrictions.
  • Standard Click-N-Type and Portable Click-N-Type can both be installed on a computer but only one can be running at any given time. You must not try to uninstall any version of Click-N-Type while another version is running. Always close Click-N-Type before uninstalling.
  • All other rules about improperly removing a removable device, causing possible problems, and leaving traces behind, still apply as normal.

On-screen Keyboards

Source 
On-Screen Keyboard Portable 1.2
On-Screen Keyboard Portable Screenshot On-Screen Keyboard Portable makes it easy to access Windows' built-in On-Screen Keyboard on any system you come across. It remembers your settings for sound, hover to select or click to select, always on top, keyboard layout and more as you move from PC to PC. And the icon sits right in your PortableApps.com Menu for easy access. For earlier operating systems that lack a built-in on-screen keyboard (Windows 95/98/Me) it even includes a simple virtual keyboard that, while lighter on accessibility features, is still useful.
Keylogger Note: While on-screen keyboards offer protection against hardware keyloggers, they do not offer protection against software keyloggers (which are far more common). They are primarily intended as an accessibility tool or for alternate means of text entry (pen-based computing, etc).
======================
Free Virtual Keyboard
A free, lightweight, multilingual and finger friendly virtual on-screen keyboard
Free Virtual Keyboard works on any Windows based UMPC with a passive touchscreen (Ultra-mobile PC, Tablet PC and Panel PC). If you spend a lot of time responding to e-mail or jotting down notes on your mobile computer and find your hardware keyboard awkward or too small, a screen software keyboard may be just the improvement you've been seeking. This handy keyboard has keys large enough to be typed with the fingertips.
Also Free Virtual Keyboard allows people with mobility impairments to type data by using a pointing device.
Change size, color and transparency of keyboard on the computer screen You can change size, color and transparency of keyboard with one click at any time. In full-screen mode virtual keyboard automatically resizes to fit the width of the screen when invoked. This means it works in both landscape and portrait orientation, something other keyboard does not do.
Auto-repeat function
The autorepeat function (any key held down to repeat same character continuously) is automatic. All relevant keys would auto-repeat when pressed continuously.
Run it from your portable USB flash drive
Free Virtual Keyboard is a totally portable application, meaning that you can put it on any USB stick and run it directly from there. In this way, your interactive keyboard will always be with you.
The settings are stored in the FreeVK.ini file located in the program installation folder. If it's impossible, settings are stored in the registry.
 ======================

Source
Microsoft Visual Keyboard 1.0 download
Download from MS
Visual Keyboard es un programa que permite escribir en más de un idioma en el mismo equipo mediante la presentación del teclado de otro idioma en la pantalla. Utilice Visual Keyboard cuando desee cambiar la distribución del teclado de un idioma a otro. Al cambiar la distribución del teclado, los caracteres que aparecen a medida que escribe pueden no corresponderse con los de su teclado. Visual Keyboard permite ver en la pantalla el teclado del idioma al que ha cambiado. De este modo, puede hacer clic en las teclas que aparecen en la pantalla o ver las teclas correctas que debe presionar para escribir el texto.
Por ejemplo, supongamos que está trabajando con una versión en español de Microsoft Word pero desea escribir texto en griego. Después de cambiar la distribución del teclado de inglés a griego, utilice Visual Keyboard para ver la distribución del teclado griego en la pantalla. Para escribir un carácter griego en el documento, haga clic en dicho carácter en el teclado que se muestra en pantalla o use Visual Keyboard como mapa para presionar las teclas de su teclado que se corresponden con las teclas de la pantalla.
Instrucciones de uso:
Antes de usar Visual Keyboard, debe instalar el teclado del idioma adicional que desea utilizar.
Para instalar idiomas adicionales, siga los pasos que se indican a continuación:
En el menú Inicio, seleccione Configuracióny, a continuación, haga clic en Panelde control. Después, determine si el icono Servicios de texto está presente. (El icono contiene la imagen de un lápiz, un teclado y un globo de texto.)
Si el icono Servicios de texto está presente, siga estos pasos:

  1. Haga doble clic en el icono Servicios de texto y, después, en la ficha Configuración .
  2. En Servicios instalados, haga clic en Agregar.
  3. En el cuadro Idioma de entrada escriba el nombre que desee y, a continuación, haga clic en Aceptar.
    El idioma del teclado seleccionado aparece en el cuadro Servicios instalados .
  4. Si desea pasar de una distribución de teclado a otra usando la barra Idioma, haga clic en Barra de idioma en Preferenciasy, a continuación, active la casilla de verificación Mostrar la barra de idioma en el escritorio .
Si el icono Servicios de textono está presente, siga estos pasos:
  1. Haga doble clic en el icono Teclado .
  2. Siga uno de estos procedimientos:
    • Si trabaja con Microsoft Windows® 98 o con Microsoft Windows Millennium Edition, haga clic en la ficha Idioma .
    • Si trabaja con Microsoft Windows NT® 4.0 o con Microsoft Windows 2000, haga clic en la ficha Configuración regional .
  3. Haga clic en Agregar y siga uno de estos procedimientos:
    • Si trabaja con Windows 98 o con Windows Millennium Edition, haga clic en el idioma que desee en la lista Idioma y, a continuación, haga clic en Aceptar.
    • Si trabaja con Windows NT 4.0 o con Windows 2000, haga clic en el idioma que desee en la lista Configuración regional y, a continuación, haga clic en Aceptar.
  4. Repita el paso 3 para cada idioma que desee agregar.
  5. Si desea pasar de una distribución de teclado a otra usando la barra de tareas de Windows, asegúrese de que esté activada la opción Habilitar el indicadoren la barra de tareas .
Una vez instalados los idiomas del teclado, usar Visual Keyboard es muy sencillo.
  • Para iniciar Visual Keyboard, haga clic en Microsoft Visual Keyboard en el menú Herramientas de Microsoft Office (menú Inicio, submenú Programas ).
    Aparecerá el teclado del idioma actual.
  • Para cambiar de idioma, busque el indicador de dos letras del idioma del teclado en la barra de tareas.
  • Para obtener una lista de los idiomas del teclado instalados, haga clic una vez en el indicador.
  • Para cambiar a otro idioma, seleccione el que desee en la lista.
 =====================================
Source

 Click for other popular layouts
Click for other popular layouts Supported on 95/98/ME/NT/2000/XP Vista compatible Windows 7 compatible
UpdatedVersion 3.03.411 is now available.  Click here
Click-N-Type is an on-screen virtual keyboard designed to provide computer accessibility to anyone with a disability that prevents him or her from typing on a physical computer keyboard.  As long as the physically challenged person can control a mouse, trackball, touch screen or other pointing device, this adaptive software keyboard allows you to send keystrokes to virtually any Windows application or DOS application that can run within a window. The Click-N-Type Virtual Keyboard requires Windows 95/98/ME/NT/2000/XP/Vista/Win-7 or later.  There are other onscreen virtual keyboards around but you'll find Click-N-Type the easiest to use for getting text into problematic applications.  Try them all.  You'll see they all work fine while typing into Notepad or WordPad, but when you attempt to do some real work, with all but the expensive ones, you'll get really annoyed really fast. The Click-N-Type Soft  Keyboard was designed with ease of use foremost in mind.  Oh yes, it's FREE.  If you need it, you can have it.  I've seen too many people trying to make money off disabled people.  Of course, if you'd like to drop Bridget a line at Click-N-Type@Lakefolks.com with any comments, I guess I couldn't stop you.  If you do, we can keep you informed of any fixes and/or future enhancements.
======================================
Source 
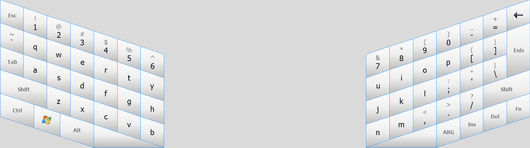
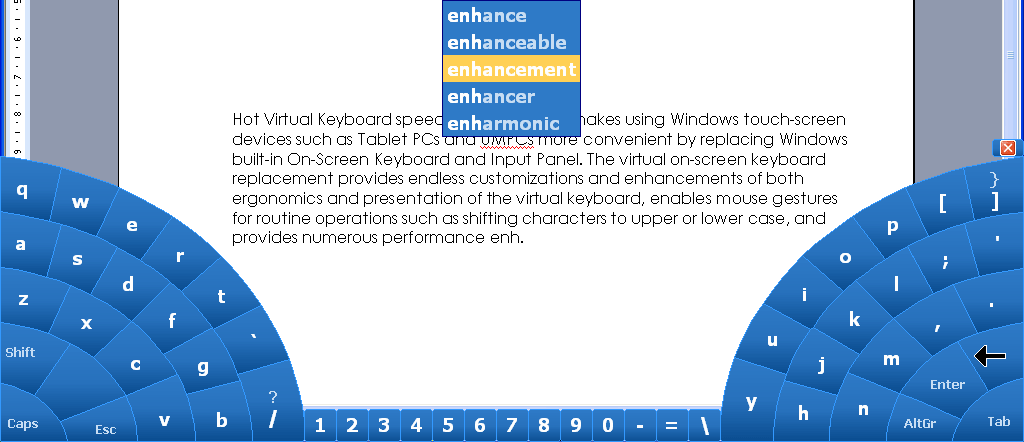
hot virtual keyboard 7.1 (vk_setup.exe) 
The Ultra-Mobile PC (often abbreviated UMPC) is a term for a small form factor PC and specification for tablet PCs. UMPC is a fully functional computer that runs the full version of Windows. The UMPC offers all the functionality of Windows with the additional Tablet and Touch Technology and delivers it in a form factor that is truly mobile. Users experience the same operating system with the same applications and features that are available on desktop and mobile PCs. UMPCs have enough processing power to support audio, video, and gaming, in addition to having rich support for browsing the internet as well as for other communication and networking applications.
UMPC Virtual Keyboard
UMPC Keyboard

The UMPC goes anywhere and can be used anytime, offering multiple input methods: touch screen, tablet pen, virtual keyboard (on-screen keyboard), speech, and optional Bluetooth or USB keyboard. In addition, several prototypes of "mounting solutions" have been previewed which permit the UMPC device to be mounted in the car, on the wall or attached to an adjustable arm.
As the units are so small, many UMPCs do not feature a physical keyboard (virtual keyboard only). With the electromagnetic digitizers common in most Tablet PCs today, you can see when the pen is close to the screen. But because the UMPC is a touch device, you cannot see when the tablet pen is close to the screen.
Users may be viewing in portrait or landscape mode. UMPCs generally have a widescreen aspect ratio.
UMPC Keyboard
Below you'll see a list of the compatible UMPC devices. You can view the latest UMPCs here and end-of-life UMPCs are also available.
========================
http://widgets.yahoo.com/widgets/universal-virtual-keyboard
  1. If you don't already have Yahoo! Widgets installed on your computer, please download the required supporting software.
  2. Download your new Widget:
============================
Virtual KB on Browser (javascript)
michel.staelens.pagesperso-orange.fr/unicode KB

Thursday, November 24, 2011

did not allow the name to be claimed by this machine

The name "   :1d" could not be registered on the Interface with IP address 5.49..... The machine with the IP address 5.49.... did not allow the name to be claimed by this machine.
Source
information about this event at T736044
----------------------
I uninstalled the Cisco VPN client and that corrected the issue for me.
----------------------
In my case, a W2k3 member server (2003 domain) suddenly started to generate this error, at different time intervals. I added the WINS server in the network configuration and the problem was solved.
-----------------------
In my case, I just disabled "lmhostlookup" in WINS (TCP/IP settings) and the problem was solved.
----------------------
In my case, the primary WINS address was wrong on both NICs on the server. I corrected them and restarted Computer Browser service.
----------------------
In my case, I just disabled "lmhostlookup" in WINS (TCP/IP settings) and the problem was solved.
---------------------
I got this error with an incorrect subnet mask on a Windows 2003 Server. I corrected the subnet mask, rebooted, and the error did not re-occur.
----------------------
In my case, the server had a /8 (255.0.0.0) netmask while the other machines had /16 (255.555.0.0). I changed the server's mask to /16 (255.555.0.0) and the problem was solved.
----------------------
This could be caused by loss of network connectivity". See MSW2KDB 
----------------------
This problem is directly related to DNS, and M291382 deals with it. You will also probably see Event ID 1054 messages in the application logs. In this case, a recent application install led to DNS being reconfigured, which resulted in the client losing Domain communication.
-----------------------
I received this message on an XP workstation with static IP and an incorrectly configured subnet mask. When I fixed the subnet mask, the system worked perfectly again. If you get this error, it pays to triple-check that all your basic network settings (e.g. IP address, subnet mask) are correct. 
----------------------
Turning the "Spanning Tree Protocol" feature off solved the problem.

----------------------
I had installed a NIC temporarily for troubleshooting an unrelated problem. I removed the NIC without un-installing the drivers. Event ID 4321 began after I brought the machine back up on the original NIC. There was still IP information in the registry bound to the NIC I had removed. I used Device Manager to remove the absent hardware, which removed the bindings. To get Device Manager to display devices not currently installed, either set the environmental variable or enter at a command prompt "set devmgr_show_nonpresent_devices=1".  If you use the command prompt, then on the next line type "devmgmt.msc" to open Device Manager. Go to "View" and select "Show Hidden Devices".  You can then uninstall the drivers for the removed NICs, which also removes the bindings (see M241257 for additional information).
------------------------
In my case, the problem was solved by stopping and disabling the Computer Browser service.


----------------------
´I received this event after installing a new router on a seven PC network running XP Pro with no server OS running. All seven machines had internet access and could ping one another, but attempting to access shares failed. Turning off all PCs, resetting the router, and starting the machines one by one solved the problem. 
-----------------------
NetBIOS code "0: - Upon performing a check of "nbtstat -an" at the server, it lists a status of "Conflict". In order to resolve this, I opened up WINS, right mouse clicked on Active Registrations, Display Records, clicked Find Now, found the     [OOh] record and deleted the entry. I then went back to a command prompt and ran "nbtstat -R", rebooted the server and the error went away and upon a recheck of nbtstat -an, the server name was registered.
===============
Source
look at
http://www.eventid.net/display.asp?e...=NetBT&phase=1

Configure and troubleshoot Automatic Updates

Source August 2007 by Snakefoot
Automatic Updates uses 100% CPU  

Automatic Updates (AU) can become corrupted, so svchost.exe starts using 100% CPU when contacting Microsoft to check for updates. This can be tested by running this command:

wuauclt /detectnow
To fix the high CPU usage apply the following updates to Automatic Updates. More Info MS KB932494:
Automatic Updates crashes when checking for updates
Automatic Updates can also enter a state where it crashes by just checking for updates:
Generic Host Process for Win32 Services encountered a problem and needed to close.
To repair the Automatic Updates service try the following steps:
  1. Press the Start-button and Run... this command to stop the service:
    net stop wuauserv
  2. Check the root for all drives (including network drives) and delete the folder called WuTemp:
    drive:\WuTemp
  3. Delete the following folder containing the Cryptographic Service database:
    %systemroot%\system32\catroot2
  4. Rename the following folder to SoftwareDistributionOLD:
    %systemroot%\SoftwareDistribution
  5. Rename the following system files used by Automatic Updates, so Windows File Protection is activated and restores them again:
    • Cdm.dll
    • Iuengine.dll
    • Wuapi.dll
    • Wuauclt.exe
    • Wuauclt1.exe
    • Wuaucpl.cpl
    • Wuaueng.dll
    • Wuaueng1.dll
    • Wuauserv.dll
    • Wucltui.dll
    • Wups.dll
    • Wups2.dll
    • Wuweb.dll
  6. Restart Windows
  7. Reinstall Windows Update Client by launching the install with the parameter /wuforce
More Info MS KB 916259
More Info MS KB 931852

Automatic Updates fails to start
 Automatic Updates might fail to start with the following error even if the service is not disabled:
Error 1058: The service cannot be started, either because it is disabled or because it has no enabled devices associated with it.
Event ID: 10005
DCOM got error "The service cannot be started, either because it is disabled or because it has no enabled devices associated with it. " attempting to start the service wuauserv with arguments "" in order to run the server: {E60687F7-01A1-40AA-86AC-DB1CBF673334}
This can be caused by the service being disabled with group policies or registry NoAutoUpdate. It can also be caused by DLL's required by Automatic Updates needs to be registered:
  • REGSVR32 %windir%\system32\wuapi.dll
  • REGSVR32 %windir%\system32\wuaueng1.dll
  • REGSVR32 %windir%\system32\wuaueng.dll
  • REGSVR32 %windir%\system32\wucltui.dll
  • REGSVR32 %windir%\system32\wups.dll
  • REGSVR32 %windir%\system32\Wuauserv.dll
Source
Perhaps Microsoft's response needs to be stated more clearly. You cannot disable Automatic Updates without logging regular error messages when Windows tries to use the service. You remove the error messages by enabling Windows Update.
As Gerry pointed out, Windows update does not have to (in most cases) install anything, just notify you.
There are a number of reasons Microsoft does not want you to disable this service, some more political than others. Some but not all are DRM, Genuine Windows, clueless owners of botnetted machines, updates that put Microsoft at legal risk if they are NOT installed, and critical updates that require a whole series of previous updates to be in place.
If previous news of Microsoft updates that were pushed on machines while not being publicized makes you uncomfortable for any reason, you will just have to weigh that versus the discomfort of having the error message appear in the system log and make your own 

event source: crypt 32 -- DCOM error

 Failed auto update retrieval of third-party root list sequence number from: http://www.download.windowsupdate.com/msdownload/update/v3/static/trustedr/en/authrootseq.txt with error: This operation returned because the timeout period expired.
For more information, see Help and Support Center at http://support.microsoft.com.
 ----------------------------
Source
To resolve this error, you must have an internet connection, or you must uninstall the Update Root Certificates component.
To turn off the Update Root Certificates component, follow these steps:
1. Go to Add/Remove Programs (start – run – “appwiz.cpl”)
2. Click the Add/Remove Windows Components button on the left.
3. Clear the Update Root Certificates check box, and then finish the Windows Components Wizard.
Read this 
 ================
Source
DCOM got error "The service cannot be started, either because it is disabled or because it has no enabled devices associated with it. " attempting to start the service wuauserv with arguments "" in order to run the server:
{E60687F7-01A1-40AA-86AC-DB1CBF673334}
"To resolve this problem, follow these steps to enable the Automatic Updates service:
1. Click Start, click Run, type services.msc, and then click OK.
2. In the right pane, double-click Automatic Updates.
3. Click the Log On tab.
4. In the You can enable or disable this service for the hardware profiles listed below box, click the current hardware profile, and then click Enable.
5. Click Apply, and then click the General tab.
6. Click Start, and then click OK."
......
If that's what you tried and it didn't work, try this:
Click Start, select Run and type: cmd , click OK or press Enter.
Then type the following (pressing Enter and then answering okay after each one):
net.exe stop wuauserv
regsvr32 wuapi.dll
regsvr32 wuaueng.dll
regsvr32 wuaueng1.dll
regsvr32 wucltui.dll
regsvr32 wups.dll
regsvr32 wups2.dll
regsvr32 wuweb.dll
regsvr32 MSXML3.dll
net.exe start wuauserv
Close the window to go back to Windows.
You probably don't have to reboot, but you could do that anyway to make sure the changes work.

Encrypting File System in Windows XP and Windows Server 2003

Abstract
Microsoft® Windows® XP and Windows Server 2003 provide many enhancements in the area of data protection— especially Encrypting File System (EFS). This article provides a technical walkthrough that illustrates how to use important data recovery and protection features in various Windows platforms. Also included are best practices and the steps needed to build an effective data recovery and protection strategy.
On This Page
Introduction
EFS Enhancements in Windows XP and Windows Server 2003
Data Recovery Overview
Data Recovery Using EFS
Data Recovery—Best Practices
Data Protection—Best Practices
Data Recovery Versus Key Recovery
Troubleshooting
Summary
Related Links
Knowledge Base Articles on EFS

AMD RaidXpert related

http://localhost:25902/amd/screen.jsp
After login with
admin
admin
you get this:
Welcome to Web based AMD Array Management Software (RAIDXpert)
RAIDXpert is an easy-to-use software designed to simplify RAID storage management. RAIDXpert is specifically designed for AMD HBA. RAIDXpert can configure, manage or monitor AMD RAID products remotely from a web browser from anywhere in the world. 


Allgemeine Eigenschaften
Erstellt, löscht, erweitert und konvertiert Festplattenarrays durch Fernbedienung.
Festplattenarray Synchronisierung und Ablauf-Wiederherstellung
Kontrolliert Laufwerk-, Array- und Gehäusestatus und unterstützt online Ereignisprokollieren
Email Benachrichtigung von Festplatten-, Array-, Controller- oder Gehäuseereignissen (z.B. Fehler- oder Ausfallbedingungen
=================
forums.amd.com/game/
Source
RAIDXPert is OEMed from Promise Technology and it's fairly poorly documenetd.
I have found an updated manual on the ASRock web site, if you actually want to USE the program. An nanohead pointed out, this program is poorly supported:
http://download.asrock.com/man...D790GX128M/English.pdf
Source
To repair your RAIDXpert shortcut, right click on it and open Properties.  It should open to the "Web Document" tab.  Make sure the URL is:  http://localhost:25902/amd/login.jsp.
For a new shortcut, it is easier to create it on the Desktop and move it to the Start Menu.  Right click the Desktop and select New\Shortcut.  Just enter http://localhost:25902/amd/login.jsp for the "location" and name it what you wish.  Then you can right click it, drag it to the Start Menu, and chose to copy or move it there.  Note, while you are holding the right mouse button down, with the shortcut "attached" hover over the Start Menu and then All Programs untill it opens.  Be patient, it might take a few seconds.
Another easy way to create an internet shortcut is to open your browser to the desired address, http://localhost:25902/amd/login.jsp.  Then click the icon in the Address Bar and drag it to the desktop or directly to the start menu.
 ========================
AMD site search for RaidXpert
How does AMD’s RAID solution work?
AMD distributes software which is based on Promise Technology, Inc.'s ROMB (RAID on Motherboard) implementation. This FAQ discusses how all the pieces fit together, and assumes the reader is familiar with RAID concepts or can easily find them on the internet. There are three software components in a fully outfitted RAID platform. 1) BIOS Option ROM 2) RAID storage driver 3) RAIDXpert software 1) The option ROM is made up of two separate binaries. One is the general functionality, runtime components, INT 13h extensions (i.e., BIOS’ storage support), etc. The other is the user interface (UI), which may be discarded if not used. Both these two pieces make up what is generally known as the option ROM. All RAID-enabled SBIOS implementations will include the option ROM and invoke it using the PC-compatible initialization method. If the option ROM finds the correct PCI Device ID in the system, it will display a message, allow the user to press Ctrl-F to enter the UI, etc. Alternatively, the SBIOS may elect to skip the initialization process if the Device ID is missing and it knows to associate the Device ID with the RAID option ROM. The interface inside the option ROM is easy to understand, albeit somewhat unforgiving (for example, a mistake made while creating a logical drive may require the user to start over). If necessary, an “Option ROM User Manual” is available. Once the user has configured the logical drives, the option ROM will store the configuration information in a proprietary format on the hard drives. A “RAID Option ROM Product Implementation Guide” is also available. Note that this describes how to integrate the option ROM into the SBIOS, and holds no useful information for the average AES customer. The target reader for the Implementation Guide is the engineer inside the BIOS company. The SBIOS will typically provide options for configuring the SATA controller, which will ultimately modify the Device ID of the controller. An option of “Type” might have selectable choices such as “Native IDE”, “RAID”, and “AHCI”. An option for “Forced RAID” will typically restrict the RAID controller to non-RAID5 operation. Also, “Combined Mode” will allow the remaining SATA ports (the first four are dedicated to RAID) to be used in native IDE mode. For more information about SATA PCI Device IDs, please see FAQ #387. 2) Most operating systems should require a driver to be associated with the Device ID; that is they will not simply rely on the INT 13h support in the BIOS. The installation method for the driver will be OS-specific. Because all the RAID software is a matching set, the driver knows how to decode the configuration information stored on the disks. An API is available for customers to directly manipulate the RAID from a custom application. 3) RAIDXpert is a utility that contains a superset of the features in the option ROM. It allows the user to modify the configuration information as well as set up management policies and permissions. This is an optional program and is not necessary for operation of the RAID system. It makes the management more convenient, however.
====================== 
[PDF] 
RAIDXPERT
How to use AMD RAIDXpert to enable NCQ function

AMD 770X Chipset
AMD 780V Chipset
AMD 790GX Chipset

dotnet framework 3.5 related

Quelle
.net Framework Mit Integriertem Sp1 Und Hotfix z.B. für Unattended Installation
To install the .NET Framework with no entries in the Add/Remove Programs list use the following command line:
msiexec /i netfx.msi /q ARPSYSTEMCOMPONENT=1 ARPNOREMOVE=1 
================   ================
Full Package
To download the full package, rather than the bootstrapper, click on the link below:
.NET Framework 3.5 Service Pack 1 (Full Package)
IMPORTANT:
After installing the .NET Framework 3.5 SP1 package (either the bootstrapper or the full package) you should immediately install the update KB959209 to address a set of known application compatibility issues.
In addition, on Windows Vista x64 and Windows Server 2008 x64, install the update KB967190 to address a file association issue for XPS documents.
Additional informationTo provide feedback on the Service Pack, please visit https://connect.microsoft.com/VisualStudio
The following information may be relevant for administrators performing deployments of the .NET Framework on to operating systems using non-English locales. This package does not contain localized resources for non-English locales. By default, it downloads and installs the language pack that matches the language of the customer’s operating system. This may not be desired behavior when managing deployments of the .NET Framework. To avoid the automatic download use the following command:dotnetfx35setup.exe /lang:enu
For more information see .NET Framework 3.5 Deployment Guide for Application Developers at http://msdn.microsoft.com/library/cc160716.aspx

KB959209:
For Windows XP and for Windows Server 2003
Download .NET Framework 3.5 Family Update for Windows XP x86 and Windows Server 2003 x86 package
Download .NET Framework 3.5 Family Update for Windows XP x64 and Windows Server 2003 x64 package
For Windows Vista and for Windows Server 2008

Download .NET Framework 3.5 Family Update for Windows Vista x86 and Windows Server 2008 x86 package
Download .NET Framework 3.5 Family Update for Windows Server 2008 IA-64 package
Download .NET Framework 3.5 Family Update for Windows Vista x64 and Windows Server 2008 x64 package
.NET Framework 3.0 Redistributable Package
For customers that already have the .NET Framework 2.0 installed, this .NET Framework 3.0 redistributable package installs only the new Windows Vista components. This ensures that any .NET Framework 2.0-based applications work seamlessly when the .NET Framework 3.0 is installed, with no application migration or updates of any kind required.
=================
How do I install .NET framework 1.1 for Windows 7

=================
To download the full redistributable package, rather than the bootstrapper, click the architecture you need below to start the download:

X86 Redist Package 
X64 Redist Package

Source
.NET Framework 3.5 Family Update for Windows XP x86 and Windows Server 2003 x86
After dotnet3 SP1 - what you must update:
NDP20SP2-KB958481-x86.exe 8.6 MB Download
NDP30SP2-KB958483-x86.exe 6.9 MB Download
NDP35SP1-KB958484-x86.exe 1.4 MB Download

Tuesday, November 22, 2011

Nero BurnLite 10 No se pudo iniciar la aplicación

Fuente
================
en.wikipedia.org/wiki/Nero_Burning_ROM
nero burnlite
Nero Kwik Burn 11

Autocad error

Error al iniciar la aplicacion; la configuracion en paralelo no es correcta. Consulte el registro de eventos de la aplicacion para mas detalles.

Error al generar el contexto de activación para "C:\Program Files\AutoCAD 2009\acad.exe". No se encontró el ensamblado dependiente Microsoft.VC80.MFC,processorArchitecture="x86",publicKeyToken="xxxxxxxx",type="win32",version="8.0.50727.762". Use sxstrace.exe para obtener un diagnóstico detallado.
Fuente
 SOLUCIÓN
Sin Visual C++ SP1  AutoCad 2009 no funciona.
Descargar Visual C++ 2008 Redistributable Package SP1
http://www.microsoft.com/downloads/details.aspx?familyid=A5C84275-3B97-4AB7-A40D-3802B2AF5FC2&displaylang=en

En equipos con windows x64 instalar el visual C++  para x86 y x64
---------------------------------------------
Iniciar el instalador de Autodesk Applications, gemeralmente se activa el autorun.inf del DVD
E instalar el Autodesk Design Review, el cual no se instala con acad.msi
-------------------------------------------
Posiblemente solucionado al instalar vcredist_x86.exe

Side by Side Configuration Incorrect


Source 
What Is SXSTRACE.EXE?

SXSTRACE.EXE plays a key role in the Windows operating system. SXSTRACE.EXE is a vital process which executes dll files and locates their libraries into windows system's memory. If SXSTRACE.EXE error occurs on your PC then the whole system would run unstably and be quite slow. 
Process SXSTRACE.EXE is located in the system directory
C:\windows\system32.
If the SXSTRACE.EXE process executes and runs from any other suspicious locations, it may be caused by Trojan virus, and then youd better fully scan your computer with an anti-virus program.
Repair SXSTRACE.EXE error
If it is a virus that destroys your SXSTRACE.EXE or, if for some other reason, your SXSTRACE.EXE is corrupt or gets accidentally removed; you need to take the following action to fix SXSTRACE.EXE error:

Locate a Copy of SXSTRACE.EXE on Your System

Check if you find a copy of SXSTRACE.EXE in the folder C:\windows\system32\dllcache or in C:\windows\ServicePackFiles\i386
.
If this is the case, go ahead and copy SXSTRACE.EXE to the system folder C:\windows\system32
If you don't find a copy on your system, you can try to find the file on your windows installation disks.
 

Most of the developers using assemblies in their application may have faced this issue. While starting an application, we may get an error “This application has failed to start because its side by side configuration is incorrect”.
Introduction
Side by side configuration is a trick for versioning files, in which multiple versions of a file are installed in a single machine. This is achieved through manifest files. E.g.: the C Runtime Library assembly contains three DLLs—msvcr80.dll, msvcm80.dll and msvcp80.dll — and is used by applications when they are built using functions from the CRT library. Side-by-side technology is also known as WinSxS or SxS.
What is Side by Side Configuration?
A side-by-side assembly contains a collection of resources—a group of DLLs, Windows classes, COM servers, type libraries, or interfaces—that are always provided to applications together. These are described in the assembly manifest.
Why is it Important?
In many cases, it is possible to update existing applications to use side-by-side assemblies without having to change the application code. Developers are encouraged to use side-by-side assemblies to create isolated applications, and to update existing applications into isolated applications for the following reasons:
  • Side-by-side assemblies reduce the possibility of DLL version conflicts.
  • Side-by-side assembly sharing enables multiple versions of COM or Windows assemblies to run at the same time.
  • Applications and administrators can update assembly configuration on either a global or per-application configuration basis after deployment. For example, an application can be updated to use a side-by-side assembly that includes an update without having to reinstall the application.
How is it Working?
In the preceding example shown in above picture, both Comctl32.DLL version 6.0 and Comctl32.DLL version 5.0 are in the side-by-side assembly cache and available to applications. When an application calls to load the DLL, the side-by-side manager determines whether the application has a version dependence described in a manifest. If there is no relevant manifest, the system loads the default version of the assembly. For Windows XP, version 5.0 of Comctl32.DLL is the system default. If the side-by-side manager finds a dependence on version 6.0 stated in a manifest, that version is loaded to run with the application.
Is it Related Project Settings?
We have to check if it is possible to resolve with project settings because EXE will run in debug build and fails to start in release build. Change your project settings to not use the runtime library, but this will make the output EXE bigger. (Project Properties -> C/C++ -> Code Generation -> Runtime Library -> use/MT or /MTd depends on your current configuration.) This may work, but it is not the solution for this issue.
Is it OS Related?
No, it is not an OS related issue. Since most of the experiences for this issue are in Vista, initially I thought it is only in Vista machine. Side by side error will come irrespective of OS, if reference assembly is missing from Sxs folder.
What is the Solution?
Now we need to think about the solution for this. Since the error message itself is saying “Please check windows event viewer for further information”. Go to event viewer and check for entry with sidebyside. Here we will take an example:
"Activation context generation failed for “DataViewer.dll". Dependent Assembly Microsoft.VC90.MFC, processorArchitecture="x86", publicKeyToken="1fc8b3b9a1e18e3b", type="win32", version="9.0.21022.8" could not be found. Please use sxstrace.exe for detailed diagnosis."
Here we are clear with what we are missing. We are missing 9.0.21022.8 version of Microsoft.VC90.MFC. You can go to C:\Windows\WinSxs folder and manually verify this dependent assembly is there or not. Since we are missing an assembly, the only solution is that reference assembly should be in the machine we are running our application on. Since we need to install dependent assembly to our client machine, we need to run Microsoft redistributable package for the required assembly to client machine. See section website for patches for downloading packages.
Are Sxstrace.exe Tools Useful?
This tool helps us for detailed diagnosis such as assembly probing steps. It also help us to identify what all are the previous versions available and loaded by the application and which folder it is currently searching for.
How Can I Use sxstrace.exe?
For running sxstrace.exe, go to Visual Studio command prompt and type sxstrace.exe. Usage is as follows:
  1. Before running your application, run sxstrace in trace mode sxstrace.exe Trace -logfile:C:\tmp\MySxSTrace.log
  2. Reproduce the error by starting your application
  3. Now stop the trace by using the below command sxstrace.exe Parse -logfile:C:\tmp\MySxSTrace.log -outfile:C:\tmp\MySxSTrace.txt
  4. Open output file from C:\tmp\MySxSTrace.txt
Website for Patches
Conclusion
Side by side configuration error comes because of the referenced assembly missing from winsxs folder. There is no code change for this issue, we can install the required patches to client machine and rebooting the PC will resolve this issue.

TrueImage and SideBySide failures

Quelle: Side by Side
event id: 33
Fehler beim Generieren des Aktivierungskontextes für
"C:\Program Files (x86)\Acronis\BootableComponents\WinPE\Files\TrueImage.exe"  
"C:\Program Files (x86)\Acronis\BootableComponents\WinPE\Files\TrueImageCmd.exe"
"C:\Program Files (x86)\Acronis\BootableComponents\WinPE\Files\mms.exe"
....
Die abhängige Assemblierung "Microsoft.VC80.CRT,processorArchitecture="x86",type="win32",version="8.0.50727.762"" konnte nicht gefunden werden. Verwenden Sie für eine detaillierte Diagnose das Programm "sxstrace.exe"
From Acronis Forum
This issue is currently under investigation by our Development Team. It is caused by PE plugin of Acronis Backup & Recovery 10 using different manifests than Acronis Backup & Recovery 10 itself.
For now there is a workaround: ZIP and delete the PE plugin folder:
- Go to C:\Program Files (x86)\Acronis\BootableComponents (or C:\Program Files\Acronis\BootableComponents), right-click on WinPE folder and choose Send to -> Compressed folder.
- Delete the original WinPE folder. This will not affect the software's functionality in terms of backup and recovery. Errors in the Event Log should not appear anymore.

ho visto che nessuno ti ha ancora risposto, pertanto ho deciso di passarti qualche info, che spero ti possa essere utile.
Sembrerebbe che Acronis esegua una routine è che questa generi una entry nel registro eventi senza comunque compromettere il funzionamento dell'applicazione.
Non sarebbe una cattiva idea dare un occhiata sul Forum di Acronis, tuttavia per rispondere direttamente alla tua domanda, ti dico che sxtrace è semplicemente uno strumento di tracing, o debugging, contenuto in Windows Vista che puoi trovare in %windir%\system32.
WinSxS è la sigla di riferimento per il sistema Side by Side Assemblies, che in Vista vuole essere un alternativa al vecchio modo di utilizzare le DLL.
Quando una applicazione cerca di utilizzare una DLL da WinSxS, Windows cerca prima nel file manifest. Se trovato, aggancia la DLL nella sua cartella e la utilizza.

Ritornando alla tua domanda, vorrei consigliarti di consultare la guida di Junfeng Zhang's - 
Diagnosing SideBySide failures per comprendere meglio come eventualmente utilizzare sxstrace.
------------------------------------
Ho spulciato il forum e mi pare di aver capito che, nonostante Acronis Backup & Recovery 10 sia compatibile con Win7, non lo è ancora un suo componente: WinPE. O meglio è compatibile con le versioni Home di Win7, non quelle enterprise. Vedi qui: http://forum.acronis.com/forum/3438  (l'ultima risposta di un utente del 27.01.2010 è abbastanza arrabbiata :-)
Non ho ben capito a cosa serva questo WinPE ma in effetti gli eseguibili a cui fanno riferimento i miei messaggi di errore nel visualizzatore eventi riguardano tutti la cartella di WinPE.
In definitiva mi pare di dover attendere eventuali aggiornamenti che risolvano questo problema, ma i backups dovrebbero funzionare regolarmente.
Ho aperto un topic nel forum di Acronis come il mio iniziale qui, riportando i dettagli del messaggio ricavato da visualizzatore eventi. Se avrò risposte tornerò ad aggiornarvi.
--------------------------------------
poche parole per soddisfare la tua curiosità in merito a WinPE...
L'acronimo sta per Windows Pre-installation Environment e individua il sistemo operativo contenuto nel kernel di Windows 7 avente il compito di fornire supporto per l'installazione, risolvere problemi di avvio, supportare la riparazione del sistema.
A Windows 7 corrisponde la version 3.0 di WinPE
Per maggiori informazioni da una occhiata a questo articolo di TechNet che descrive la versione 2.0
Inizialmente fu creato per consentire ai produttori  di hardware (OEM) di personalizzare Windows per le loro installazioni, sino al giorno d'oggi che, con Windows 7 che consente di installare WinRE (cuginetto di WinPE) per attuare operazioni di supporto al sistema.
Sembra che Acronis non rilascerà un aggiornamento che risolva il problema, bensì implementerà la compatibilità del suo Acronis B&R nelle versioni successive alla 10.
Rimane un grosso punto interrogativo per gli utilizzatori del software dato per compatibile con W7.

Issues after removing components


Event filter with query "SELECT * FROM __InstanceModificationEvent WITHIN 60 WHERE TargetInstance ISA "Win32_Processor" AND TargetInstance.LoadPercentage > 99" could not be reactivated in namespace "//./root/CIMV2" because of error 0x80041003. Events cannot be delivered through this filter until the problem is corrected.
------------------------ 
Cause
This problem occurs if the WMI filter is accessed without sufficient permissions.
Solution
To resolve this problem, run a script to stop the Event ID 10 messages. To run this script, follow these steps:
  1. In a text editor, such as Notepad, create a new text document named Test.vbs.
  2. Paste the following code into Test.vbs:
    strComputer = "."
    Set objWMIService = GetObject("winmgmts:" _
    & "{impersonationLevel=impersonate}!\\" _
    & strComputer & "\root\subscription")
    Set obj1 = objWMIService.Get("__EventFilter.Name='BVTFilter'")
    set obj2set = obj1.Associators_("__FilterToConsumerBinding")
    set obj3set = obj1.References_("__FilterToConsumerBinding")
    For each obj2 in obj2set
                    WScript.echo "Deleting the object"
                    WScript.echo obj2.GetObjectText_
                    obj2.Delete_
    next
    
    For each obj3 in obj3set
                    WScript.echo "Deleting the object"
                    WScript.echo obj3.GetObjectText_
                    obj3.Delete_
    next
    WScript.echo "Deleting the object"
    WScript.echo obj1.GetObjectText_
    obj1.Delete_
  3. After you run this script, the Event ID 10 messages stop appearing in the Application log. However, you have to manually clear any previous Event ID 10 messages.
    Note Make sure that you only delete the appropriate Event ID 10 messages. There may be other pertinent Event ID 10 messages that you do not want to delete.
For Windows 7 and Windows Server 2008 R2, we have a Fix It available for Event ID 10 logged, click the following article number to view the article in the Microsoft Knowledge Base:
2545227 Event ID 10 is logged in the Application log after you install Service Pack 1 for Windows 7 or Windows Server 2008 R2
Boot into safe mode.
First, open services and stop the Windows Management Instrumentation Service.
Take ownership of the folder or the contents of the folder "C:\Windows\System32\wbem\Repository." I've done this three times now on different installs and didn't have any issues after doing this, but I suggest you back up the folder to be certain. Delete the contents of the folder. Reboot. When you boot into Vista, you might notice a half dozen or so application errors...it's OK.
Reboot again, and Event ID 10 will be gone, along with the afore mentioned application errors.
After doing this, MS DTC Service may stop running; you will get this event, even after subsequent reboots:
Event 4691: The run-time environment was unable to initialize for transactions required to support transactional components. Make sure that MS-DTC is running. (DtcGetTransactionManagerEx(): hr = 0x8004d027)
and
Event 4427: Failed to initialize the needed name objects. Error Specifics: hr = 0x80004005, d:\rtm\com\complus\dtc\dtc\msdtcprx\src\dtcinit.cpp:571, CmdLine: C:\Windows\system32\dllhost.exe /Processid:{02D4B3F1-FD88-11D1-960D-00805FC79235}, Pid: 3060
This is the way you get rid of these:
At a command prompt, type the following command:
%WINDIR%\System32\msdtc.exe -uninstall
5. Start Registry Editor, and then remove the following registry keys if they exist: • HKEY_CLASSES_ROOT\CID
• HKEY_LOCAL_MACHINE\SYSTEM\CurrentControlSet\Services\MSDTC
• HKEY_LOCAL_MACHINE\SYSTEM\ControlSet001\Services\MSDTC
• HKEY_LOCAL_MACHINE\SYSTEM\ControlSet002\Services\MSDTC
• HKEY_LOCAL_MACHINE\Software\Microsoft\MSDTC
6. At a command prompt, type %WINDIR%\System32\msdtc.exe -install.
I guess it sounds complicated, but my event log is absolutely clean now - the only warning I'm getting now is the Kerberos thing. All audits are successful, and no application red or yellow blotches.
 No more events.